
Lawn
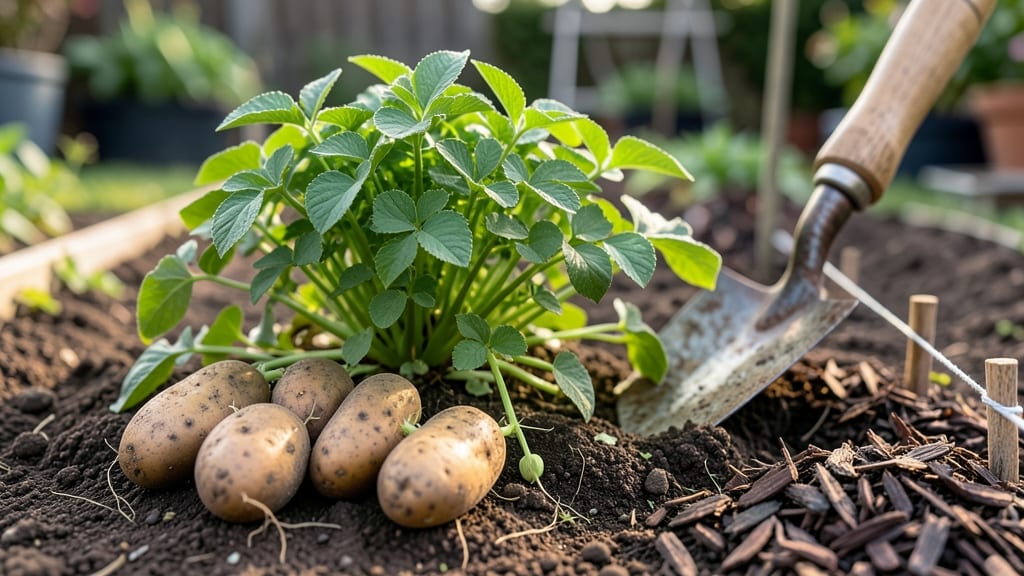
Chitting seed potatoes gives you a head start on the growing season—stronger sprouts mean bigger harvests with less effort. 🌱 I’ve chitted potatoes for years, and the difference in plant vigor is night-and-day compared to unchitted ones.
The process is simple: just place your seed potatoes in a cool, bright spot for 4-6 weeks before planting, and watch those little eyes emerge.
You’ll need just a few things: seed potatoes (certified disease-free), a shallow tray or egg carton, and a spot with 50-60°F temperatures—no fancy equipment required. The key is consistency: keep them in indirect light and avoid direct sun, which can dry them out.
Once sprouts reach 1-2 inches, they’re ready for the garden.
Planting chitted potatoes means faster emergence and better root development, so you’ll see greenery breaking through the soil within 7-10 days instead of weeks. The harvest? More tubers, fewer surprises, and plants that shrug off early-season cold snaps. Perfect for cool climates where the growing season feels short.
Troubleshooting is easy: if sprouts rot, reduce moisture and improve airflow. Slow growth? Boost light or warmth. And here’s the best part—this method works whether you’re planting in raised beds, containers, or traditional rows. Ready to try it?
📚 In This Guide
- What you need
- Instructions
- Tips and common mistakes
- Wrapping up and next steps
What you need
- ● Seed potatoes: 10–20 lbs (adjust based on space), certified disease-free, with eyes (sprouts) already forming (or chitted at home—see tips!).
- ● Growing containers or garden bed: For containers: 5-gallon buckets, fabric grow bags, or large pots (at least 12" deep) with drainage holes. Quantity: 1 container per 2–3 seed potatoes.
- ● For in-ground planting: Loose, well-draining soil with a pH of 5.0–6.5. Trench or hill method works best.
- ● Potting mix or compost: 1–2 bags of high-quality, sterilized potting soil or compost (avoid garden soil with pests/diseases).
- ● Fertilizer: Balanced, slow-release fertilizer (10-10-10 or organic options like composted manure) or potato-specific granules.
- ● Watering can or hose: With a gentle spray nozzle for even moisture.
- ○ Gloves (optional but recommended): To protect hands from dirt and potential cuts.
- ● Potato clip or pruning shears: For harvesting small potatoes without damaging plants.
- ● Row covers or mesh: To deter pests like Colorado potato beetles.
- ● Plant markers: To track varieties if growing multiple types.
- ● Moisture meter: For tech-savvy gardeners who love precision!
Step-by-Step instructions for chitting seed potatoes
Here's the foolproof method I use to get vigorous, disease-resistant potato starts every season.
🌱 Step 1: Select and Prepare Your Seed Potatoes
Choose certified disease-free seed potatoes—those labeled "seed" or "organic" work best. Look for potatoes with at least 2-3 eyes (the tiny dimples) per tuber. I avoid large potatoes because they produce more foliage than tubers, and I skip small ones with only one eye—they're too weak to grow well.
Place the potatoes in a cool, bright spot (45-55°F) for 4-6 weeks before chitting. This mimics winter conditions and triggers strong sprouting. I use a well-lit basement or garage shelf for this pre-chitting period. Rotate the potatoes weekly so all sides get even light exposure—this prevents lopsided growth later.
☀️ Step 2: Position for Optimal Sprouting
Once you see ½-inch long sprouts, it's time to move them to a warmer, brighter location. I place them on a windowsill facing east or west where they'll get 10-12 hours of indirect light daily. The key here is to position them with the sprouts facing upward—never force them to grow sideways.
If your sprouts grow unevenly, gently twist the potato until the longest sprout points upward. This ensures your strongest growth becomes the main stem. I like to lay them on their sides in egg cartons for stability—they stay organized and don't roll around.
💧 Step 3: Maintain Ideal Conditions
Water lightly every 3-4 days—just enough to keep the sprouts from drying out. You'll know it's right when the potato feels slightly damp but not soggy. Overwatering causes rot, while underwatering makes sprouts brittle and weak. I use a spray bottle for this because it gives me precise control.
Keep the temperature between 55-65°F during the day and no lower than 45°F at night. If your home gets too warm, move them to a cooler spot—sprouts grow too fast and become leggy when conditions are too hot. Watch for any sprouts that turn yellow or mushy—these need to be trimmed off immediately to prevent disease.
⏰ Step 4: Prepare for Planting
When your sprouts reach 1-2 inches long with small green tips, they're ready for planting. I plant mine about 2-3 weeks before the last frost date in my zone. The green tips should be facing upward in the soil—this becomes your main stem and produces the strongest plant.
Dig holes about 4-6 inches deep and space them 12-18 inches apart in rows that are 3 feet apart. The extra space between rows lets you easily cultivate without disturbing the plants. I always plant with the sprouts facing upward—this ensures your potato plant grows straight and strong from the start.
🌿 Step 5: Plant and Protect New Growth
Cover the potato with 2-3 inches of soil, leaving just the top inch of the sprout exposed. This protects the tuber while encouraging the stem to grow upward. As the plant grows, mound soil around the base to create a hill—this prevents greening of the tubers and encourages more tuber formation.
Water immediately after planting to settle the soil and encourage root growth. Keep the soil consistently moist but not waterlogged for the first 2 weeks. You'll know it's right when the soil feels like a damp sponge—water runs through but doesn't pool on the surface.
Tips & tricks for perfect chitted seed potatoes
Here's what nobody tells you about getting those sprouts just right—these little details make all the difference between healthy starts and wasted effort.
Light Exposure Secret: The 10-12 hours of indirect light in Step 2 is non-negotiable for strong sprouts. I use sheer white curtains to diffuse harsh sunlight—direct sun can scorch delicate sprouts while still providing enough light. Place your potatoes on the windowsill with the sprouts facing north if your window faces west to avoid afternoon heat. This balance prevents leggy growth while maintaining vigor.
Temperature Troubleshooting: Maintaining that 55-65°F range during the day is easier than it sounds. If your home runs hot, try placing potatoes on a tray of ice cubes wrapped in a towel—this creates a microclimate without freezing them. I've also had success using a small fan on low setting to circulate air around the potatoes, which helps prevent fungal growth while keeping temperatures stable. Watch for condensation on the container as a sign you've hit the right humidity level.
Pre-Planting Inspection: When your sprouts reach 1-2 inches in Step 4, do a final health check before planting. Trim any sprouts that look weak, yellow, or mushy with clean scissors—these are signs of disease or rot. Healthy sprouts should be firm, white to light green, and growing straight upward. I also gently brush off any dirt or debris from the potato skin with a soft brush to ensure good soil contact when planted.
Planting Depth Technique: That 2-3 inch soil coverage in Step 5 is a science. Use a ruler to measure the depth—any deeper and you risk stunting tuber formation, any shallower and you expose them to light (which turns potatoes green and toxic). I like to create small mounds of soil first, then place the potato on top and cover it. This method gives you better control over the exact depth and creates a natural air pocket around the tuber.
Pro Tips for Chitted Seed Potatoes
- Here's what nobody tells you about getting those sprouts just right—these little details make all the difference betw...
- Light Exposure Secret: The 10-12 hours of indirect light in Step 2 is non-negotiable for strong sprouts. I use sheer ...
- Temperature Troubleshooting: Maintaining that 55-65°F range during the day is easier than it sounds. If your home run...
Frequently asked questions
Got questions about chitting seed potatoes? You’re not alone!
Here are some of the most common queries—plus quick, practical answers to help you grow like a pro.
What exactly does “chitting” mean, and why should I bother?
Chitting is the process of encouraging seed potatoes to sprout before planting. It gives you a head start on the growing season, boosts early harvests, and ensures stronger plants. Think of it as giving your potatoes a confidence boost before they hit the soil!
How long does it take for seed potatoes to chit?
Most seed potatoes will start sprouting in 2–4 weeks when kept in a cool, bright spot (like a sunny windowsill). Keep an eye on them—once the sprouts are 1–2 inches long, they’re ready to plant. Patience pays off for a healthier harvest!
What’s the best temperature for chitting potatoes?
Aim for a cozy 45–55°F (7–13°C) during the day and slightly cooler at night. Avoid heat sources (like radiators) or direct sunlight, which can scorch the sprouts. A basement or garage with natural light works great!
Can I still plant seed potatoes if they don’t sprout?
While chitting speeds up growth, unsprouted potatoes will still grow—just a little slower. Give them extra time in the ground, and they’ll catch up. Pro tip: Cut larger potatoes into pieces (with at least one “eye” per chunk) to maximize your yield!
What do I do if my sprouts turn green or look weak?
Green sprouts mean too much light—move them to a shadier spot. Weak or leggy sprouts? Try rotating the potatoes weekly so all sides get even light. If mold appears, toss them (sadly) and start fresh with new seed potatoes. Prevention is key!
Can I chit potatoes in my fridge?
Not ideal! Fridges are too cold (below 40°F/4°C) and can stunt sprouting. Instead, use a cool, dark pantry for storage before chitting, then switch to a bright spot. Avoid humidity traps like plastic bags—airflow is your friend!
Wrapping up and next steps
Ready to unlock the secret to a thriving garden? Chitting seed potatoes is your stress-free shortcut to a bountiful harvest—no green thumb required! 🌱 With just a little prep time and the right conditions, you’ll be well on your way to hearty, disease-resistant plants that yield tons of delicious spuds.
Whether you’re a seasoned gardener or a curious beginner, this method makes growing potatoes easier (and more rewarding) than ever.
Now that you’re armed with the know-how, take the next step: grab those seed potatoes, set up your chitting station, and watch your garden dreams sprout into reality! 🌟 Happy planting—and here’s to your future potato feast!