
Lawn
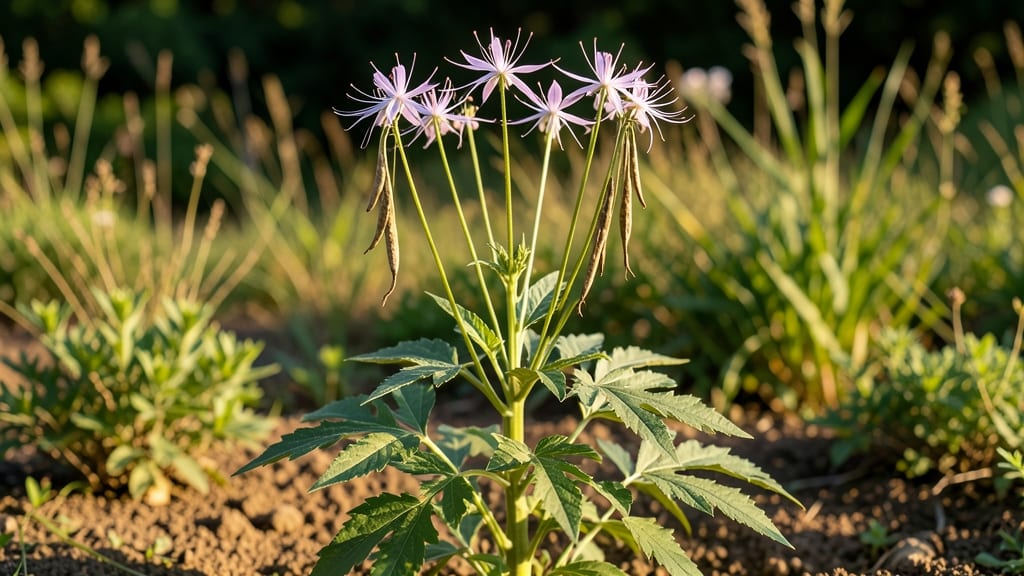
Those spidery cleome seed pods hold your next generation of plants—if you check them right. 🌱 The trick is catching them at the perfect stage before they split open and scatter seeds everywhere.
I’ve learned the hard way that dried pods don’t always mean viable seeds, so here’s how to test them before storing.
Start by harvesting pods when they turn brown but haven’t split yet—usually in late summer or early fall. Pop them open carefully (they’re fragile!) and look for plump, dark seeds inside. If they’re shriveled or empty, toss them—they won’t grow. This simple check saves hours of drying failed seeds later.
Once you’ve confirmed good seeds, dry them in a cool, dark place for 1-2 weeks on paper towels. Store them in an envelope or jar until spring, and you’ll have ready-to-plant cleomes without the guesswork.
The best part? These pods add whimsical texture to your garden long after the flowers fade.
Watch for premature splitting caused by rain or pests—cover plants with netting if needed. With this method, you’ll go from seed to spiky blooms in no time, and your garden will keep filling with cleome’s signature charm year after year.
📚 In This Guide
- What you need
- Instructions
- Tips and common mistakes
- Wrapping up and next steps
What you need
- ● Fresh cleome seed pods: 10–20 mature, fully developed pods (harvest when they’re slightly wrinkled but still green or brown).
- ● Sharp pruning shears or scissors: Clean, sterilized tools to avoid damaging pods or introducing pathogens.
- ● Paper towels or seed paper: 2–3 sheets (unbleached, acid-free for long-term storage).
- ● Small plastic bag or airtight container: Quart-sized with a zip-top seal (for short-term viability testing).
- ● Permanent marker or label: To mark dates or pod types.
- ○ Spray bottle with water (optional but helpful): For dampening paper towels if pods are very dry.
- ○ Notebook or spreadsheet: To track pod viability over time (optional but recommended!).
- ● Humidity dome or clear plastic wrap: Creates a mini greenhouse effect to speed up germination checks.
- ● Seed viability testing kit: Commercial kits (e.g., tetrazolium chloride) for advanced testing.
- ● Digital scale: To weigh pods pre- and post-drying (for data enthusiasts!).
- ● Desiccant packets: For long-term storage of dried pods.
How to test cleome seed pods for viability before drying
Here’s my foolproof method for checking which cleome seed pods are worth saving—no guesswork involved.
🌱 Step 1: Harvest Pods at Peak Ripeness
Pick cleome pods when they’re fully mature but before they twist open naturally. Look for pods that are dry to the touch and have turned a deep, papery brown—this means the seeds inside are ready for harvesting. If you wait too long, the pods will split open on their own, and you’ll lose seeds to wind or birds.
Gently twist the pod between your fingers to feel its texture. A viable pod will feel stiff and papery, not brittle or mushy. If it crumbles easily, it’s overripe and the seeds inside may not be viable. Harvest on a dry day to avoid moisture getting trapped inside the pods.
💧 Step 2: Perform the Float Test for Viability
Fill a bowl with room-temperature water and place the harvested pods in it. Let them soak for 10-15 minutes while you observe. Healthy, viable cleome seeds will sink to the bottom of the bowl—this means they’re full of water and contain strong, fertile embryos.
If a pod (or part of it) floats, it’s a sign the seeds inside are either empty or non-viable. Discard any pods that stay afloat or show signs of mold or soft spots. This test works best with pods that are fully dry—if they’re still damp from recent rain, wait 24 hours before testing.
✂️ Step 3: Split Open and Inspect Seeds
Use a small knife or your fingers to carefully split open the pods that sank in the float test. Look inside for plump, firm seeds that are a deep brown or black color. Viable seeds should feel heavy for their size and have a smooth, unblemished surface.
Discard any pods with shriveled, hollow, or discolored seeds—these won’t grow. If a pod contains a mix of good and bad seeds, separate them immediately. Store only the viable seeds in a dry, airtight container for future planting.
☀️ Step 4: Dry the Viable Pods Properly
Spread the viable pods out on a clean, dry surface in a well-ventilated area away from direct sunlight. A mesh screen or paper towel works well for airflow. Let them dry for 3-5 days, flipping them occasionally to ensure even drying. Over-drying can cause the pods to crack, while under-drying may lead to mold.
You’ll know they’re fully dry when the pods feel light and brittle to the touch. Store them in a sealed container with a silica gel packet to absorb any remaining moisture. Label the container with the date and variety—cleome seeds can stay viable for 2-3 years if stored correctly.
⏰ Step 5: Plant or Store for Next Season
If you’re planting immediately, sow the dried seeds directly into well-draining soil at a depth of ¼ inch. Cleome seeds germinate best in warm soil (70-80°F) and may take 10-21 days to sprout. Keep the soil consistently moist but not soggy during germination.
For long-term storage, place the dried pods in a cool, dark place. Check them every few months to ensure no moisture has seeped in. If stored properly, you’ll have fresh cleome seeds ready for next year’s garden—no need to buy new ones!
Tips & tricks for perfect cleome seed pod viability testing
Here's what nobody tells you about making sure your cleome seeds are ready for saving—these little tricks save hours of frustration later.
Harvest Timing Secret: Pay attention to the weather forecast before harvesting. If rain is predicted within 24 hours, wait to pick your pods—even a little trapped moisture can ruin the float test results. I learned this the hard way after testing pods that had rained on overnight.
Float Test Pro Tip: For the 10-15 minute float test, use a clear glass bowl so you can see the pods clearly. Add a drop of dish soap to the water to reduce surface tension—this helps pods sink faster and gives you a more accurate reading. Watch for any pods that float even partially, as partial floating often means some seeds inside are non-viable.
Seed Inspection Technique: When inspecting seeds in Step 3, hold them up to a bright light or window. Viable seeds will have a slight sheen and appear uniformly colored. Discard any seeds with white spots or fuzzy growth—these are signs of mold that can spread to your good seeds during storage.
Drying Strategy: Place a small fan near your drying pods to create gentle airflow without direct wind. This helps prevent mold while ensuring even drying. The 3-5 day drying time assumes moderate humidity—if your area is particularly damp, extend to 5-7 days and check daily for moisture signs.
Pro Tips for Cleome Seed Pods
- Here's what nobody tells you about making sure your cleome seeds are ready for saving—these little tricks save hours ...
- Harvest Timing Secret: Pay attention to the weather forecast before harvesting. If rain is predicted within 24 hours,...
- Float Test Pro Tip: For the 10-15 minute float test, use a clear glass bowl so you can see the pods clearly. Add a dr...
Frequently asked questions
Got questions about cleome seed pods?
You’re not alone! Here are some of the most common queries—plus quick, practical answers to keep your garden (and sanity) intact.
Are cleome seed pods safe to handle?
Yes! Cleome seed pods are non-toxic and harmless to touch or handle. However, they can be prickly—wear gloves if you’re sensitive to textures or have dry skin. The pods themselves are decorative and often used in dried floral arrangements, so they’re safe for creative projects too!
How do I know when cleome seed pods are ready to harvest?
Harvest cleome seed pods when they turn brown and papery but haven’t split open yet. Gently twist or pinch the pods to release seeds—if they resist, wait 1–2 more days. Overripe pods may burst, scattering seeds prematurely. Pro tip: Harvest on a dry day to avoid mold.
What if my cleome seed pods won’t twist open?
If pods refuse to release seeds, they might be underripe or overly moist. Try these fixes:
- Let them dry further in a well-ventilated spot (1–2 weeks).
- Use a small knife to carefully slit the pod lengthwise (wear gloves!).
- Check for pests like aphids or mites—infestations can weaken pods.
Can I use cleome seed pods for anything besides seeds?
Beyond seeds, cleome pods are stunning in dried arrangements—their unique shapes add texture to wreaths, bouquets, or winter centerpieces. For a rustic touch, string them into garlands or press them in heavy books. Just ensure they’re completely dry first to prevent mold.
Are cleome seed pods invasive or hard to grow?
Cleome seeds (like Cleome hassleriana) are not invasive and thrive in warm climates. They self-seed easily, so you may see volunteers popping up—simply thin them or relocate extras. For cooler regions, start seeds indoors 6–8 weeks before the last frost. Fun fact: They’re drought-tolerant once established!
Wrapping up and next steps
Cleome seed pods may seem tricky at first, but with the right twist-free viability check and drying techniques, you can ensure healthy seeds for future blooms! 🌱 Whether you're a gardening pro or just starting, understanding moisture content, color, and firmness is key to success.
Ready to take your lawn or garden to the next level? Grab those pods, follow the steps, and start your seed-saving journey today! Share your progress or tips with fellow gardeners—every expert was once a beginner. 🌿