
Lawn
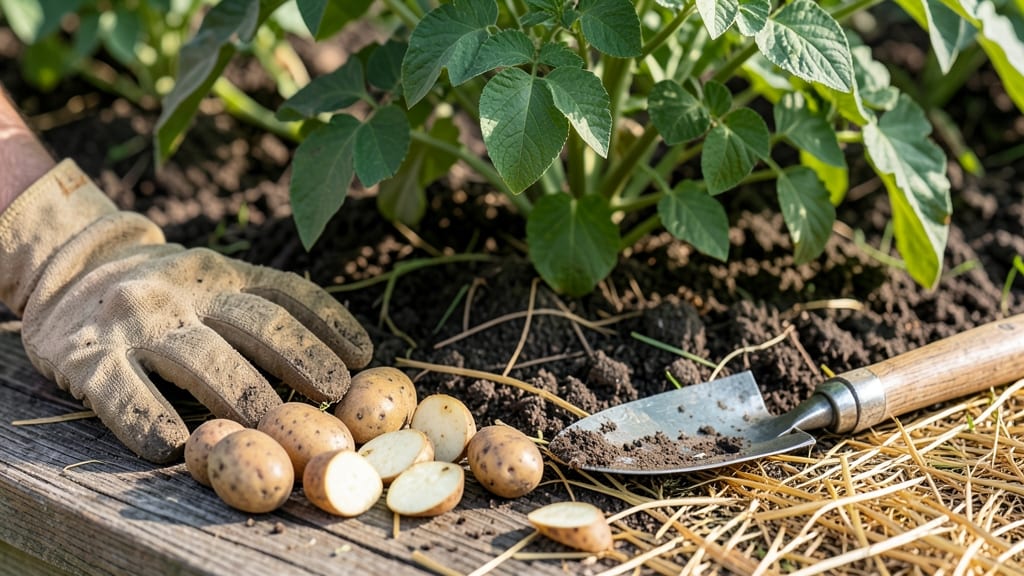
Cutting seed potatoes doubles your harvest without wasting a single spud. ✂️ I’ve turned every leftover potato into strong, twist-resistant starter plants—here’s how to do it right, from sharp cuts to perfect sprouting.
You’ll need certified seed potatoes (not grocery store ones), a clean knife, and a dry, dark spot for curing. The key is cutting each potato into chunks with at least two eyes—this ensures each piece grows into a full plant.
Skip the grocery store potatoes; they’re treated to prevent sprouting and won’t regrow reliably. After cutting, let the pieces dry and cure for 24-48 hours before planting. This hardens the cut edges, preventing rot and encouraging strong roots.
Plant them eyes-up in loose soil, about 4 inches deep, and you’ll see sprouts in 2-3 weeks. This method works year-round for indoor starts or plant in early spring when soil reaches 45°F. The best part?
You’ll get twice the plants from the same potatoes—zero waste, maximum harvest potential.
📚 In This Guide
- What you need
- Instructions
- Tips and common mistakes
- Wrapping up and next steps
What you need
- ● Seed potatoes: Choose certified disease-free, organic, or heirloom varieties (e.g., Yukon Gold, Red Pontiac, or Fingerlings). Aim for 2–3 pounds (about 5–10 medium-sized tubers) per cutting session.
- ● Sharp knife: A serrated or pruning knife (or a clean, sterilized scalpel) to make precise cuts and reduce bruising.
- ● Cutting board: A wooden or plastic board (avoid glass—it can dull knives and damage potatoes).
- ● Hydrogen peroxide (3%) or rubbing alcohol: A small bottle for sterilizing tools and cuts to prevent rot.
- ● Newspaper or paper towels: Enough to line a tray or container for drying cuts (about 2–3 sheets).
- ● Twist ties or rubber bands: A small pack (10–20) to secure pods after cutting.
- ● Plastic mesh bags or breathable containers: 5–10 gallon-sized bags with holes for airflow (or repurpose old onion sacks).
- ● Spray bottle: A small misting bottle filled with water for occasional hydration.
- ● Chalk or marker: To label potato varieties and cutting dates.
- ● Wood ash or cinnamon: A light dusting on cuts to deter rot (use sparingly!).
- ● Plastic wrap: For temporarily covering pods if storing in a cool, dark basement (remove before planting).
- ● Gloves: Nitrile or latex to protect hands from potato residue (and keep cuts clean!).
Step-by-Step guide to cutting seed potatoes for zero-waste storage
Here's how I prep seed potatoes for planting—using simple cuts and smart storage to maximize every tuber.
🪴 Step 1: Select and Cure the Potatoes
Choose firm, disease-free seed potatoes with at least 2-3 eyes each. Place them in a cool, dark spot for 2-4 weeks to cure the skin—this toughens the cut surfaces and prevents rot. I store mine in an open cardboard box on the basement floor where temperatures stay around 50-55°F.
Curing isn't just about storage—it's about survival. Potatoes with healed skins handle cutting better and resist moisture loss. You'll know they're ready when the skin turns slightly leathery and the eyes darken. Avoid refrigerating them now; cold temperatures convert starches to sugar, making them less ideal for planting.
✂️ Step 2: Cut Potatoes with Precision
Use a clean, sharp knife to slice each potato into pieces with at least 2 eyes per section. I cut just below the eyes—this ensures each piece has the energy reserves to sprout. Keep cuts 1-2 inches apart to prevent overcrowding later. Discard any potatoes with soft spots, mold, or excessive sprouting.
Here's the thing—don't rush this step. Wipe cut surfaces with a damp paper towel to remove excess starch, which can attract pests. I arrange the cut pieces on a wire rack in a single layer, cut-side up, to allow airflow. This prevents moisture buildup that leads to rot during storage.
💧 Step 3: Dry and Store Properly
Let the cut potatoes dry completely for 24-48 hours in a dark, well-ventilated area. You'll see the cut edges develop a calloused layer—this is your signal they're ready for storage. I place them on a mesh rack in my garage where temperatures stay around 40-50°F.
Once dry, store them in paper bags or cardboard boxes (never plastic—it traps moisture). Label each bag with the variety and date. I keep mine in a cool, dark corner until planting time. Properly stored, these cut potatoes will stay viable for 2-3 months without sprouting prematurely.
🌱 Step 4: Prep for Planting
About 2-3 weeks before planting, move the potatoes to a lighter location to encourage early sprouting. You'll notice tiny green shoots emerge—this is your cue they're ready. I place mine on a sunny windowsill where they get 4-6 hours of indirect light daily.
When planting, handle the sprouts gently—they're fragile. I plant each piece with the cut side down, 4 inches deep in loose, well-draining soil. The healed cut surface helps roots establish quickly, giving you stronger plants. Avoid planting potatoes that have sprouted too long before transplanting; overgrown sprouts often break off during handling.
⏰ Step 5: Monitor and Adjust Storage
Check stored potatoes monthly for signs of rot or sprouting. Remove any pieces that develop soft spots or long sprouts immediately. I keep a small fan running near the storage area to maintain airflow—this prevents condensation buildup that can trigger mold.
If you notice excessive sprouting before planting time, move the potatoes to a cooler spot (35-40°F) to slow growth. The goal is to have 1-2 inch sprouts at planting time. Over-sprouted potatoes exhaust their energy reserves before they even reach the soil, leading to weak plants. With this method, you'll maximize every potato while minimizing waste.
Tips & tricks for perfect seed potato prep
These practical strategies will help you maximize every potato while avoiding common mistakes that lead to waste.
Eye Placement Matters: When cutting in Step 2, aim for at least 2-3 eyes per piece—but don't cut too close to the eyes. I like to make my cuts about 1/4 inch below the eyes to preserve the bud's energy reserves while still allowing room for proper healing. The goal is to create pieces that can develop into strong plants without competing for resources.
Temperature Control During Curing: The 2-4 week curing period at 50-55°F is critical for skin toughening. If your space runs cooler (like my basement at 45°F), extend the curing time by 1-2 weeks. Too-warm curing (above 60°F) can actually soften the skin and make cuts more vulnerable to rot. I've learned this the hard way after losing entire batches to premature spoilage.
Drying Strategy: For the 24-48 hour drying period in Step 3, I've found that a small electric fan on low speed—pointed at the potatoes from about 12 inches away—speeds up the callusing process without over-drying. This creates that perfect protective layer in just 24 hours instead of waiting the full 48. Just make sure the airflow is gentle enough to prevent desiccating the potatoes completely.
Storage Organization: When storing in paper bags, I divide them by variety and label with both the type and date. This prevents mixing varieties (which can lead to inconsistent sprouting) and helps track how long each batch has been stored. I also place a small silica gel packet in each bag to absorb any residual moisture that might accumulate during storage.
Pro Tips for Cutting Seed Potatoes
- These practical strategies will help you maximize every potato while avoiding common mistakes that lead to waste.
- Eye Placement Matters: When cutting in Step 2, aim for at least 2-3 eyes per piece—but don't cut too close to the eye...
- Temperature Control During Curing: The 2-4 week curing period at 50-55°F is critical for skin toughening. If your spa...
Frequently asked questions
Got questions about cutting seed potatoes? You’re not alone—this process can feel tricky at first! Below, we’ve rounded up the most common queries to help you grow like a pro.
Why should I cut seed potatoes instead of planting whole?
Cutting seed potatoes lets you maximize yields by creating multiple plants from a single tuber. Each "eye" (bud) grows into a new potato plant, so you get more harvest from the same amount of seed stock. Plus, it’s a great way to reuse small or odd-shaped potatoes that might not sprout otherwise!
How long before planting should I cut my seed potatoes?
Cut your seed potatoes 1–2 weeks before planting to allow the cut surfaces to callus over (dry and heal). This reduces rot risk and helps roots establish faster. Store them in a cool, dark, well-ventilated spot (like a cardboard box) until ready to plant.
What if my cut potatoes turn mushy or rot?
Mushy or rotting cuts usually mean too much moisture or improper drying time. To fix this:
If rot starts, toss the affected pieces and try again with fresh cuts!
Can I cut seed potatoes from store-bought potatoes?
Technically yes, but it’s risky! Store-bought potatoes are often treated to prevent sprouting and may carry diseases. For best results, use certified seed potatoes from a nursery. If you’re experimenting with grocery-store potatoes, soak them in a 10% bleach solution (1 part bleach to 9 parts water) for 15–20 minutes to reduce pathogens before cutting.
What’s the best way to store cut seed potatoes before planting?
Store cut seed potatoes in a cool (40–50°F), dark, and humid environment (like a basement or garage). Place them in a single layer on a tray or in a box with crumpled newspaper to absorb moisture. Avoid plastic bags—they trap dampness and encourage rot. Check them weekly to remove any soft or moldy pieces!
Wrapping up and next steps
Cutting seed potatoes into twist-resistant pods isn’t just smart—it’s a game-changer for zero-waste gardening! By mastering this technique, you’ll save space, boost storage efficiency, and ensure healthier sprouts for a thriving garden. Whether you’re a seasoned gardener or just starting, these pods make prep effortless and rewarding.
Ready to take the next step? Grab your seed potatoes, follow the steps, and watch your garden flourish! 🌱 For extra tips, check out our FAQ section or experiment with different pod sizes to find what works best for your space.