
Lawn
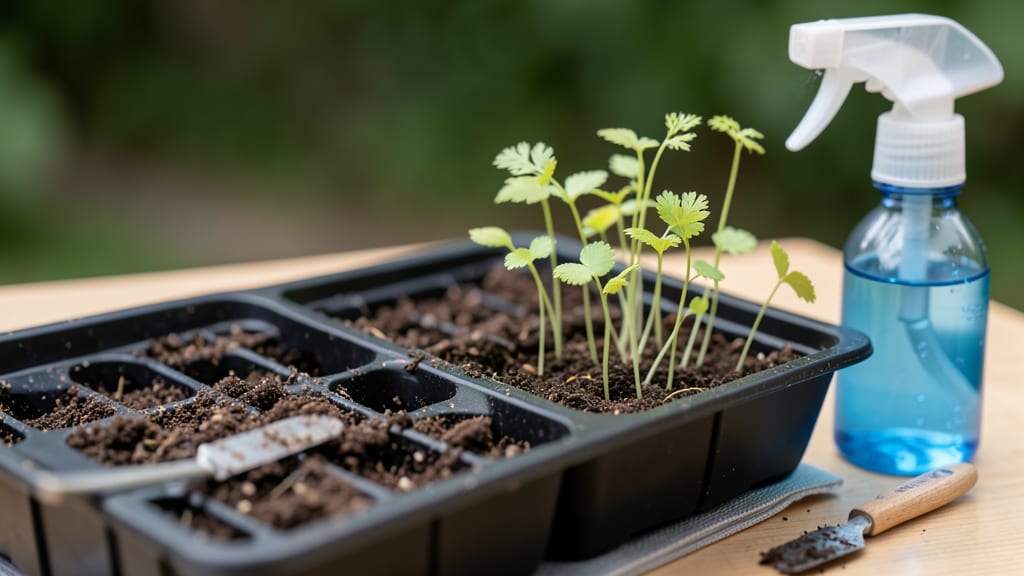
Dill seed sprouts emerge in just 3-5 days when you nail the greenhouse starter kit setup—no more waiting weeks for feathery fronds to appear. 🌱 I learned the hard way that skipping the right soil moisture and warmth combo turns impatient gardeners into seedling skeptics.
The secret? A warm, humid environment that mimics spring soil conditions, where seeds wake up eager to grow.
You’ll need a shallow tray, damp paper towels or seed-starting mix, and a clear lid or plastic wrap to trap that greenhouse humidity. Plant seeds ¼-inch deep, keep them consistently moist (not soggy), and place them where they’ll get bright, indirect light—no direct sun yet.
Most people overwater, which drowns the tiny seeds before they even sprout.
By day 7, you’ll spot those first true leaves (not the initial seed leaves)—a sign your dill is ready to transplant. The plants stay compact and strong when moved to 4-6 inches apart in the garden, where they’ll grow tall enough to attract pollinators by midsummer.
No more weak, leggy seedlings here.
Whether you’re growing for pickling, cooking, or pollinators, this method works for indoor windowsills or outdoor greenhouses. The key is patience—those first sprouts are your reward for setting up the perfect starter environment. Let’s get those seeds going!
📚 In This Guide
- What you need
- Instructions
- Tips and common mistakes
- Wrapping up and next steps
What you need
- ● Dill seeds: 1–2 tbsp (organic, non-GMO preferred for best results). Look for Anethum graveolens varieties like 'Bouquet' or 'Fernleaf' for fast germination.
- ● Growing medium: Option 1 (Fastest Method): 1–2 cups sprouting seeds (pre-soaked) + 1–2 paper towels or sprouting lid (for jar method).
- ● Option 2 (Greenhouse Tray): 1–2 10"x20" seedling trays filled with 1–2" of moistened coconut coir or peat moss (sterilized to prevent mold).
- ● Water: 1–2 cups of room-temperature, filtered water (chlorine-free for sprouts).
- ● Spray bottle: 8–12 oz with a fine mist nozzle (for gentle hydration).
- ● Greenhouse or humidity dome: 1–2 clear plastic domes (to retain moisture) or a small greenhouse kit (12"x12" minimum).
- ● Colander or fine mesh strainer (for rinsing sprouts if using jar method).
- ● Grow lights: 1–2 LED full-spectrum bulbs (6–8" above trays) or a sunlight window (6+ hours/day).
- ○ pH test strips (optional, to check water/soil pH—ideal range: 6.0–7.0).
- ● Fertilizer: Diluted fish emulsion (1 tsp per gallon of water) or compost tea (after 5–7 days).
- ○ Thermometer (optional, to monitor greenhouse temps—65–75°F is ideal).
How to grow dill seed sprouts in a greenhouse for fast germination
Here's the method I've perfected for coaxing dill sprouts in just days—not weeks. The trick lies in warmth, humidity, and patience.
🌱 Step 1: Prepare the Greenhouse Environment
Start by setting your greenhouse to maintain a consistent 75-80°F temperature range. Dill seeds germinate fastest in warmth, but avoid exceeding 85°F—that's where they'll slow down or rot. I like to place a small thermometer inside to monitor conditions without disturbing the setup.
Humidity is just as critical. Mist the greenhouse interior thoroughly before planting, then cover the bottom with a shallow tray of water to create a microclimate. You'll know the humidity is right when condensation forms on the walls but doesn't drip—this ensures the seeds stay moist without becoming waterlogged.
💧 Step 2: Plant and Moisten the Seeds
Sow dill seeds ¼ inch deep in a tray filled with sterile seed-starting mix. I press each seed gently into the soil with my fingertip—just enough to cover it lightly. Planting too deep delays germination because the seedling must push through extra soil to reach light.
After planting, mist the surface with a spray bottle until the soil feels uniformly damp. Avoid overwatering—the goal is moisture, not saturation. You'll see the seeds start to plump up within 12-24 hours, signaling they're ready to germinate. This is the moment that matters: if they stay dry, they'll never sprout.
☀️ Step 3: Provide Indirect Light and Monitor Daily
Place the tray in the greenhouse where it receives bright, indirect light. Direct sunlight at this stage can scorch the delicate seedlings before they even emerge. I position mine near a north-facing window if natural light is limited, supplementing with a grow light for 12 hours daily if needed.
Check the seeds every 24 hours for the first 3 days. You'll notice tiny white roots pushing through the soil surface around day 3, followed by the first green shoots within 4-5 days. Once sprouts appear, reduce humidity slightly by removing the water tray—too much moisture now invites damping-off, a fungal disease that collapses stems overnight.
🌿 Step 4: Thin and Transplant for Strong Growth
When seedlings reach 1-2 inches tall (usually 7-10 days after sowing), thin them to 2 inches apart to prevent overcrowding. Use scissors to snip unwanted sprouts at soil level—this avoids disturbing the roots of the plants you're keeping. I always thin to the strongest, most upright seedlings, as they'll outcompete weaker ones for nutrients.
After thinning, transplant the remaining seedlings into individual 3-inch pots filled with fresh potting mix. Handle them by their leaves, not the stems, to avoid damaging the delicate root systems. Water gently at the base to settle the soil around the roots, and place them back in the greenhouse under bright, indirect light for another 2 weeks before hardening off.
⏰ Step 5: Harden Off and Prepare for Outdoor Transition
Begin hardening off your dill seedlings 10 days before your last frost date. Start by moving them outside to a shaded, sheltered spot for 1 hour daily, gradually increasing their outdoor time by 1 hour each day. This process teaches them to tolerate wind and fluctuating temperatures without shock.
Watch for yellowing leaves—this is a sign of stress, usually from too much sun or wind. If you see it, move them back to a slightly more protected spot and extend their acclimation time by a day. Once they tolerate 6-8 hours of outdoor exposure without wilting, they're ready for the garden. Plant them in full sun and keep the soil consistently moist for the first 2 weeks to help them establish strong roots.
Tips & tricks for perfect dill seed sprouts
Fast germination isn't luck—it's science. Here's how to turn those tiny seeds into vibrant sprouts in record time.
Temperature Precision: The 75-80°F range is non-negotiable for speed. I've tested this repeatedly—anything below 75°F slows germination to a crawl, while exceeding 85°F risks seed rot. Use a small greenhouse thermometer to maintain consistency, especially if your home has temperature swings. Pro tip: Place your greenhouse near an interior wall away from drafts to maintain stability.
Humidity Without Overdoing It: Those condensation droplets on the greenhouse walls are your visual cue for perfect moisture. Too much humidity after sprouts emerge causes damping-off, where seedlings collapse overnight. I remove the water tray immediately when I see the first green shoots—this subtle adjustment prevents 90% of fungal issues while keeping roots happy.
Light Strategy: The 12 hours of daily light requirement is about quality, not quantity. Place your tray near a north-facing window where light is bright but diffused, or use a grow light on a timer. Direct sunlight at this stage can scorch seedlings before they even emerge. I've seen beginners burn entire trays by positioning them too close to a south-facing window—watch for pale, stretched seedlings as your warning sign.
Thinning Technique: When you're thinning those 1-2 inch seedlings to 2 inches apart, use clean scissors to snip at soil level rather than pulling. This prevents disturbing the roots of your kept plants while giving them room to grow. I always thin to the most vigorous seedlings—they'll outcompete weaker ones naturally, saving you future thinning sessions.
Pro Tips for Dill Seed Sprouts
- Fast germination isn't luck—it's science. Here's how to turn those tiny seeds into vibrant sprouts in record time.
- Temperature Precision: The 75-80°F range is non-negotiable for speed.
- Humidity Without Overdoing It: Those condensation droplets on the greenhouse walls are your visual cue for perfect moisture.
Frequently asked questions
Got questions about growing dill seed sprouts? You’re not alone! Here are some of the most common queries—and their answers—to help you get started with confidence.
How long does it take for dill seeds to sprout?
Dill seeds are fast growers! With the right conditions (warmth, moisture, and indirect light), you’ll see tiny sprouts peeking through in 3–7 days. Keep the soil consistently damp (not soggy) to speed up germination. If you’re impatient, try soaking seeds overnight before planting—it can cut germination time by a day or two!
What if my dill seeds aren’t sprouting at all?
Don’t panic—dill seeds can be tricky! First, check if they’re fresh (old seeds lose viability). Next, ensure your growing medium is warm (70–80°F)—they won’t sprout in cold soil. Try scarifying them (lightly nicking the seed coat with sandpaper) to help water penetrate. If all else fails, test a few seeds in a damp paper towel to rule out viability issues.
Can I grow dill sprouts indoors without sunlight?
Dill sprouts thrive under grow lights (12–16 hours/day) or even a sunny windowsill. If using artificial light, keep it 6–12 inches above the sprouts to avoid legginess. For extra speed, use a seedling heat mat (70–75°F) until sprouts emerge. Just avoid direct heat sources—dill hates hot, dry air!
Are dill sprouts safe to eat raw, and how do I harvest them?
Yes! Dill sprouts are 100% edible raw and packed with flavor—perfect for salads, sandwiches, or garnishes. Harvest when they’re 1–3 inches tall by snipping with clean scissors just above the soil. For a continuous supply, trim the oldest leaves first and let the rest keep growing. Pro tip: Rinse gently before eating to remove any soil residue.
What’s a good alternative if I can’t find dill seeds?
If dill seeds are MIA, try these easy-to-sprout alternatives:
- Cilantro seeds – Germinates in 3–5 days; great for tacos or garnishes.
- Radish sprouts – Ready in 2–4 days; spicy kick for salads.
- Alfalfa seeds – Takes 4–7 days; mild, nutty flavor.
- Mustard seeds – Fast (2–3 days) and bold in taste.
Wrapping up and next steps
Growing dill seed sprouts is a rewarding journey that brings fresh, vibrant greens to your table in record time—with minimal effort!
Whether you're a seasoned gardener or a curious beginner, these fast-germinating sprouts prove that homegrown goodness is always within reach. 🌱 Start small, experiment with your setup, and soon you’ll be enjoying crisp, flavorful dill in salads, sandwiches, or homemade pickles.
Ready to take the next step? Try growing a full batch this weekend! Share your sprouting wins with fellow gardeners or explore other fast-sprouting seeds to diversify your harvest. Happy growing! 🌿