
Lawn
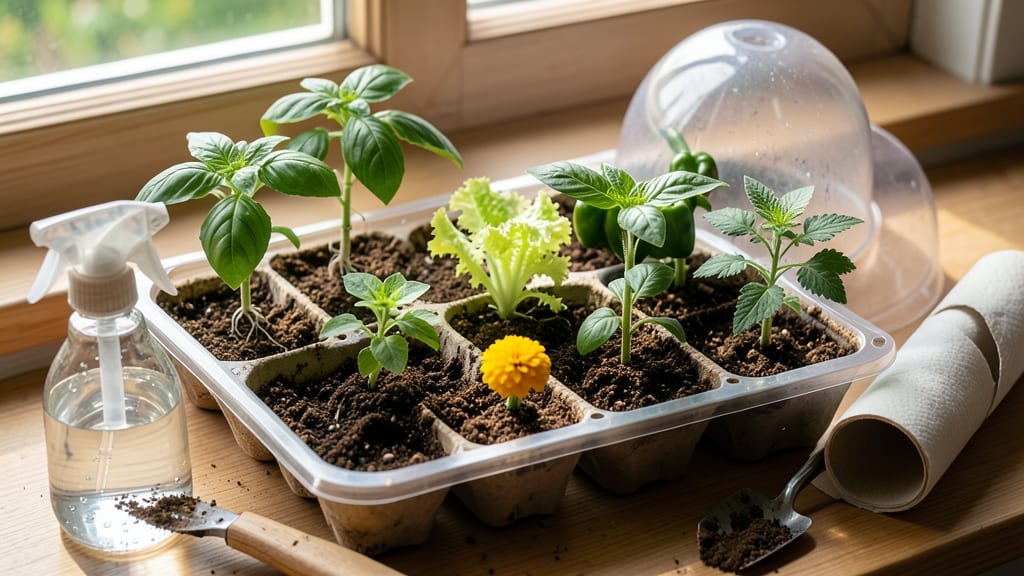
A DIY seed starter tray can cut your germination time in half—no fancy equipment needed. 🌱 I built mine from recycled cardboard and a few dollars' worth of supplies, and my seedlings now sprout in 5-7 days instead of two weeks.
The secret is lightweight loam that holds moisture without suffocating roots. You’ll need basic materials: egg cartons, cardboard boxes, potting soil, and a spray bottle. Sterilize everything with boiling water to prevent damping-off disease. For drainage, poke holes in the bottom of any container—even plastic takeout boxes work.
The goal is to mimic the airy, crumbly texture of forest floor soil where seeds naturally sprout. Once your tray is ready, fill it with moistened seed-starting mix and plant your seeds just below the soil surface. Keep it warm (70-75°F) and under grow lights or a sunny windowsill.
Within 10 days, you’ll see tiny leaves unfurling, ready for transplanting. This method saves money, reduces waste, and gives seedlings a strong start. Perfect for beginners or anyone tired of slow germination. Let’s get growing!
📚 In This Guide
- What you need
- Instructions
- Tips and common mistakes
- Wrapping up and next steps
What you need
- ● Seed starter tray base: 1 rectangular plastic container (12" x 6" x 2" deep) – clean and food-safe
- ● OR a reusable plastic takeout container (like a 6-pack egg carton holder)
- ● Loam mix: 2 cups peat moss or coco coir (for moisture retention)
- ● 2 cups perlite or vermiculite (for aeration)
- ● 2 cups potting soil (lightweight, seedling-friendly blend)
- ● Dividers: 6–12 plastic cups (4–6 oz size) OR
- ● 12–24 biodegradable egg cartons (cut into individual cells)
- ● Seeds: Your chosen variety (check seed packet for spacing needs)
- ● Essential tools: Scissors or box cutter (for cutting dividers)
- ● Ruler or measuring tape
- ● Spray bottle (for gentle watering)
- ○ Optional (but helpful!): Hairpin or chopstick (for poking drainage holes)
- ● Clear plastic wrap (to create a mini greenhouse effect)
- ● Plant labels & marker (to track seed types)
- ● Tray or saucer (to catch excess water)
Step-by-Step instructions for building DIY seed starter trays
Here’s how to create sturdy, lightweight trays that speed up germination and root development.
🪴 Step 1: Gather Materials for a Sturdy Base
Start with a wooden frame—I use 1x4 pine boards cut to 12x12 inches for each tray section. The key is lightweight yet durable; pine resists warping better than softwoods like cedar. Pre-drill ¼-inch holes at each corner to secure the frame without splitting. For bottoms, I use hardware cloth (½-inch mesh) instead of solid material—it allows excess water to drain while preventing soil from washing out.
Assemble the frame with deck screws (not nails) to ensure it stays square. A slight overhang on the sides (½ inch) keeps soil contained when watering. Sand any rough edges—seedlings are delicate, and splinters will damage tender roots. Test the frame by placing it on a flat surface; if it wobbles, reinforce the corners with wood glue before screwing.
🌱 Step 2: Layer Loam for Optimal Drainage and Aeration
Fill the tray with a three-layer mix for fast germination. Bottom layer: ½ inch of perlite or coarse sand—this prevents compaction and ensures roots get oxygen. Next, add 2 inches of coconut coir or peat moss, which holds moisture without suffocating seeds. Top with 1 inch of fine horticultural vermiculite to retain humidity while allowing airflow.
Mix the layers gently with a small trowel, breaking up any clumps. The goal is a fluffy, crumbly texture—like damp potting soil but lighter. Press down lightly to settle, then water until the top inch feels slightly damp but not soggy. Overwatering now will delay germination; under-watering will dry out the seed bed. I use a spray bottle for even moisture distribution.
💧 Step 3: Sow Seeds at the Right Depth and Spacing
Follow the seed packet’s depth guidelines—most tiny seeds (like lettuce or basil) go ¼ inch deep, while larger ones (tomato, pepper) need ½ inch. I use a toothpick to poke individual holes, then drop seeds in one at a time. Crowding leads to weak, leggy seedlings, so space them 1-2 inches apart unless the packet specifies closer planting.
Cover seeds with a thin layer of vermiculite (no more than ⅛ inch) to protect them from drying out. Mist the surface lightly with water—just enough to moisten the top layer. Place the tray in a humidity dome or cover with plastic wrap to trap heat. Check daily for condensation; if water droplets form, remove the cover for 30 minutes to prevent fungal growth.
☀️ Step 4: Provide Warmth and Light for Fast Germination
Germination speeds up in warmth (70-80°F)—place the tray on a seedling heat mat or near a sunny window. Most seeds sprout in 5-10 days, but some (like parsley) take 2-3 weeks. Watch for first true leaves (not the initial seed leaves) to appear; this signals strong root development.
Once sprouts emerge, remove the cover immediately to prevent damping-off. Move the tray under grow lights (12-16 hours daily) or to a south-facing window. Leggy seedlings mean insufficient light—adjust the tray so tops brush the light source. Rotate the tray quarter-turn daily to encourage even growth. You’ll see sturdy stems and dark green leaves in 2-3 weeks if conditions are right.
✂️ Step 5: Harden Off and Transplant Seedlings
Two weeks before your last frost, start hardening off seedlings by placing them outside in partial shade for 1 hour daily, gradually increasing time. Transplant when seedlings have 3-4 true leaves and the soil is warm (55°F+). Water the tray thoroughly 24 hours before transplanting to reduce shock.
Use a small trowel to lift seedlings by the leaves (never the stems), then place them in their final home. Bury up to the first set of true leaves to encourage root growth. Water deeply at the base—avoid overhead watering to prevent fungal diseases. Your DIY trays will break down naturally in the soil, eliminating transplant stress entirely.
Tips & tricks for perfect DIY seed starter trays
Here's what I've learned after perfecting this method for faster, stronger seedling growth.
Frame Stability Secret: When assembling your 12x12-inch wooden frame, use a clamp to hold corners perfectly square while screwing. I've found that even slight wobble can cause uneven soil distribution in Step 1, which leads to inconsistent germination. The ½-inch overhang on sides is perfect for containing soil—just make sure it's consistent on all four edges. For extra durability, I pre-drill the ¼-inch holes with a countersink bit to prevent wood splitting when inserting deck screws.
Layering Technique: In Step 2, the key to that perfect fluffy, crumbly texture is mixing the layers right in the tray—not in a separate container. Use a small hand trowel to gently fold the ½-inch perlite into the 2-inch coconut coir layer first, then sprinkle the 1-inch vermiculite on top. This creates tiny air pockets that seedlings love. After pressing down lightly, run your finger through the mix—it should feel like damp sponge cake, not compacted dirt.
Germination Timing: The 5-10 day germination window in Step 4 can feel like forever, but there's a trick: place your tray on a seedling heat mat set to 80°F during the day and let it drop to 70°F at night. This temperature swing mimics natural conditions and speeds up sprouting. For seeds like parsley that take 2-3 weeks, I've found adding a pinch of compost tea to the watering spray bottle helps break dormancy without overstimulating growth.
Transplanting Hack: In Step 5, when your seedlings have 3-4 true leaves, water the tray thoroughly 24 hours before transplanting—this makes removal easier and reduces shock. I use a damp paper towel to gently wrap around each seedling's base before lifting with the trowel. This keeps the delicate root ball intact while you transplant, giving your seedlings a much better chance of thriving in their new home.
Pro Tips for Diy Seed Starter Tray
- Here's what I've learned after perfecting this method for faster, stronger seedling growth.
- Frame Stability Secret: When assembling your 12x12-inch wooden frame, use a clamp to hold corners perfectly square wh...
- Layering Technique: In Step 2, the key to that perfect fluffy, crumbly texture is mixing the layers right in the tray...
Frequently asked questions
Got questions about DIY seed starter trays? You’re not alone! Here are some of the most common concerns—and their simple solutions—to help you grow confidently.
What’s the best material for a DIY seed starter tray?
A lightweight loam mix (like 50% peat moss, 30% perlite, and 20% vermiculite) works wonders for fast germination. For trays, repurpose plastic containers, egg cartons, or even recycled cardboard boxes lined with newspaper. Just ensure they have drainage holes to prevent soggy roots!
How long does it take for seeds to germinate in a starter tray?
Germination time varies by seed type—fast growers like radishes or lettuce sprout in 3–7 days, while slower ones (tomatoes, peppers) take 1–3 weeks. Keep trays in a warm, sunny spot (or under grow lights) and maintain consistent moisture. Patience pays off!
Can I reuse a DIY seed starter tray?
Clean and sanitize trays between uses by soaking them in a 10% bleach solution (1 part bleach to 9 parts water) or baking them at 200°F (93°C) for 30 minutes. This kills pests and pathogens, giving your next batch a fresh start.
Why aren’t my seeds sprouting in the starter tray?
Check these common culprits: too much water (roots rot), not enough light (seeds stay dormant), or old seeds (viability drops after 1–2 years). Try pressing seeds lightly into moist soil and covering them with a thin layer of loam for better contact.
What’s a budget-friendly alternative to store-bought starter trays?
Get creative! Use toilet paper rolls (cut in half), muffin tins, or even old yogurt cups with drainage holes punched in the bottom. Line them with coffee filters or paper towels to wick excess moisture away—eco-friendly and cost-effective!
Wrapping up and next steps
Creating your own DIY seed starter tray with lightweight loam is a game-changer for faster germination and healthier roots! 🌱 With just a few simple materials and a little creativity, you’ve unlocked a cost-effective, eco-friendly way to kickstart your gardening journey.
Whether you’re a beginner or a seasoned green thumb, this project proves that great results start small—literally, right in your tray!
Ready to take the next step? Grab your supplies, follow your instincts, and watch those seeds sprout with confidence! 🌿 Next, experiment with different seed varieties or even expand your setup for a full garden bed. Happy growing!