
Lawn
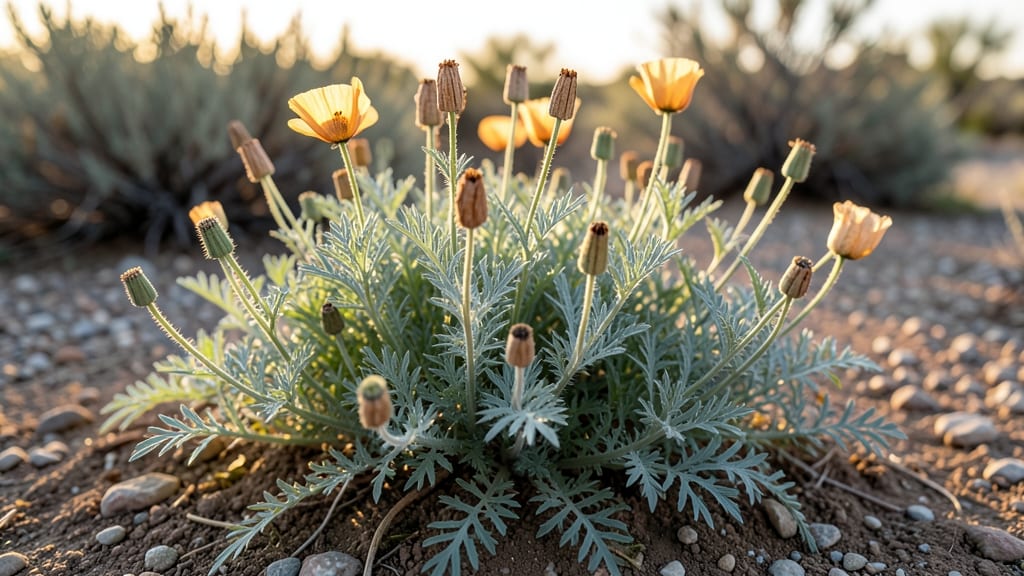
Those delicate dry poppy seed pods are nature’s tiny treasure chests—packed with seeds for next year’s vibrant blooms if you harvest them right. 🌸 I’ve learned the hard way that waiting too long means empty pods or mold, while harvesting too early ruins viability.
The secret is timing: pick pods when they’ve turned completely brown and papery but before they split open on their own.
You’ll need just a few simple supplies: clean paper bags (for air-drying), a pair of scissors or pruners, and a dry, dark spot to store your seeds. California poppies and Oriental poppies respond best to gentle handling—never shake pods over paper, or you’ll lose seeds to the breeze.
Instead, snip them off the stem and let them dry whole in a breathable bag for 1-2 weeks.
Once fully dry, the pods will crumble easily when squeezed, revealing tiny black seeds ready for storage. Store them in an airtight container in the fridge, and they’ll stay viable for 3-5 years.
The payoff? A garden bursting with poppies again next spring, their delicate petals swaying in the breeze just like this year’s.
Pro tip: If you’re short on time, oven-drying at 150°F for 1-2 hours speeds up the process—but watch closely to avoid overheating. And if you spot mold?
Toss those pods and start fresh. The key is patience, and the reward is seeds that’ll grow into poppies as stunning as the ones you’re harvesting now.
📚 In This Guide
- What you need
- Instructions
- Tips and common mistakes
- Wrapping up and next steps
What you need
- ● Dry poppy seed pods: Fully mature, brown, and slightly papery pods (harvest when they’re just starting to split open). Aim for 10–20 pods per plant, depending on size.
- ● Garden shears or pruning scissors: Sharp, clean pair to snip stems without crushing pods.
- ● Paper grocery bags or brown lunch bags: 2–3 bags (one per plant or per harvest session) to collect pods and seeds.
- ● Newspaper or cardboard: A large sheet (24”x36” or bigger) to lay out seeds for drying.
- ○ Fine-mesh sieve or colander: A 1/8” mesh or smaller to sift seeds from chaff (optional but helpful!).
- ● Small paintbrush or soft-bristle brush: For gently coaxing stubborn seeds out of pods.
- ○ Air-tight storage container: A glass jar or resealable plastic bag with a silica packet (optional) to keep seeds dry.
- ● Gloves: Protect your hands from prickly stems or seed residue.
- ● Labeling tags: To mark seed varieties if harvesting multiple types.
- ● Fan or hairdryer (low heat): Speed up drying time for stubbornly damp seeds.
- ● Magnifying glass: For spotting tiny seeds hidden in pod crevices.
- ● Seed viability test kit: If you’re really committed to next year’s garden!
How to harvest poppy seed pods for next year’s blooms
Here’s how I collect poppy seeds without losing a single pod to wind or rain.
🌱 Step 1: Wait for Pods to Fully Dry and Open
Poppy pods need full maturity before harvesting—wait until they turn a deep brown and crack open slightly on their own. You’ll see the inside fluff and seeds exposed, but not yet scattered. This usually happens 4-6 weeks after flowering, depending on your climate. If you harvest too early, seeds won’t be viable.
Check pods daily in the morning. The best time to collect is on a dry, calm day—wind or rain will scatter seeds before you can gather them. I like to harvest in the late morning when dew has dried but temperatures are still mild. Avoid hot afternoons, which can cause pods to split too quickly.
🪴 Step 2: Gently Collect Pods Without Damaging Them
Use clean, dry hands or a small paper bag to pick pods directly off the stem. Avoid twisting or pulling—they’re delicate and can break open prematurely. If pods are still attached to the plant, snip the stem ½ inch below the pod with pruning shears. Place them in a brown paper bag (not plastic) to allow airflow.
Don’t shake the plant—this sends seeds flying and wastes your harvest. Instead, work systematically from the outermost pods inward, moving toward the center of the plant. Label each bag with the poppy variety if you’re growing multiple types. This prevents mix-ups later when storing seeds.
💧 Step 3: Dry Pods Completely Before Handling
Spread the pods in a single layer on a clean, dry surface (like a baking sheet or cardboard) in a warm, dry place out of direct sunlight. A well-ventilated area (like a garage or shed) works best—humidity will ruin seeds. Let them dry for 3-5 days, stirring occasionally to ensure even drying.
Pods are fully dry when they feel lightweight and crunchy when squeezed gently. If they still feel damp or bendable, leave them longer. Overlooking this step leads to moldy seeds or poor germination. I test dryness by tapping two pods together—they should make a hollow sound, not a dull thud.
✂️ Step 4: Extract Seeds and Store Properly
Once completely dry, place pods in a clean cloth or paper towel and gently rub them between your palms to release seeds. Avoid using your hands directly—poppy seeds can stain. Sift the mixture through a fine mesh sieve to separate seeds from chaff. Store seeds in a paper envelope or airtight container with a silica gel packet to absorb moisture.
Label the container with the variety and harvest date. Poppy seeds stay viable for 2-3 years if stored in a cool, dark place (like a fridge or seed vault). Check seeds annually—discard any that smell musty or look discolored. This ensures next year’s poppies grow strong and true to type.
🌿 Step 5: Clean Up and Prepare for Next Season
After harvesting, trim the dead stems 2-3 inches above the ground to encourage new growth from the base. Poppies often self-seed, but deadheading spent blooms early in the season can redirect energy to stronger stems. Add compost or aged manure to the soil to replenish nutrients for next year’s plants.
If you’re growing poppies as annuals, remove all dead foliage to prevent disease. For perennials, leave some stems standing over winter—they add winter interest and protect the crown. Mark the spot with a stake or garden flag so you remember where to plant new seeds in spring.
Tips & tricks for perfect poppy seed pod harvesting
These simple tricks will help you collect and store poppy seeds like a pro—without losing a single one to wind or moisture.
Timing is Everything: The 4-6 week window after flowering is critical. I've learned this the hard way—harvesting too early means immature seeds, while waiting too long risks losing them to wind. Check pods daily in the morning when dew has dried but temperatures are still mild. This timing prevents premature splitting while ensuring full maturity.
Harvesting Technique: When collecting pods in Step 2, I always work from the outermost pods inward. This prevents accidentally knocking off seeds from inner pods as you move toward the center. Use a small paper bag to catch any stray seeds that might fall—it's a game-changer for maximizing your harvest. The ½-inch snip below the pod is perfect for maintaining stem integrity while allowing easy removal.
Drying Strategy: The 3-5 day drying period in Step 3 is your best defense against mold. I spread pods on a baking sheet in my garage where it's warm but not sunny. Stirring them every 12 hours ensures even drying. The hollow sound test is foolproof—if it doesn't sound right, give them another day. Proper drying is what separates viable seeds from useless chaff.
Storage Wisdom: For long-term seed viability, I use a combination of paper envelopes for short-term storage and airtight containers with silica gel for the fridge. The key is keeping seeds in a cool, dark place. I always check my seeds annually—discarding any that smell musty prevents wasted effort on non-viable seeds. Labeling with the harvest date helps track freshness.
Pro Tips for Dry Poppy Seed Pods
- These simple tricks will help you collect and store poppy seeds like a pro—without losing a single one to wind or moi...
- Timing is Everything: The 4-6 week window after flowering is critical. I've learned this the hard way—harvesting too ...
- Harvesting Technique: When collecting pods in Step 2, I always work from the outermost pods inward. This prevents acc...
Frequently asked questions
Got questions about harvesting and storing dry poppy seed pods? You’re not alone! Here are answers to the most common queries to help you master the process with ease.
When are poppy seed pods ready for harvesting?
Poppy seed pods are ready when they turn brown and papery, usually 4–6 weeks after flowering. If they split open or release seeds prematurely, harvest them immediately—seeds lose viability quickly! Aim for a dry, sunny day to avoid moisture issues.
How do I know if the seeds inside are still viable?
Healthy poppy seeds should be plump and dark gray or black. If they’re shriveled, discolored, or moldy, they’ve likely lost viability. For a quick test, crush a few seeds—fresh seeds release a slightly sweet, nutty aroma. Store them in a cool, dry place for up to 2 years.
What’s the best way to store harvested poppy seed pods?
After harvesting, let pods dry completely (1–2 weeks in a well-ventilated spot). Store them in paper bags or breathable containers (not airtight!) in a cool, dark place. Avoid plastic—it traps moisture and causes mold. Label them with the harvest year!
Why are my poppy seed pods splitting open before I can harvest them?
Pods split when they’re overripe or due to humidity. Harvest pods as soon as they turn brown to prevent seed loss. If splits happen often, try harvesting earlier or in drier conditions. Some varieties are naturally prone to early splitting—check seed packets for tips!
Can I use poppy seed pods for anything other than seeds?
Dry pods add rustic charm to floral arrangements, wreaths, or even homemade potpourri. Just ensure they’re completely dry to avoid mold. For culinary use, the seeds (not pods) are edible—sprinkle them on baked goods or salads for a nutty flavor!
Wrapping up and next steps
Harvesting dry poppy seed pods doesn’t have to be a stressful task—with the right tools and timing, you can ensure a bountiful yield of viable seeds for next year’s garden. 🌱 Whether you’re pruning for aesthetics or collecting seeds, patience and gentle handling are key to preserving those delicate pods.
Now that you’re armed with answers to common questions and a clear plan, it’s time to roll up your sleeves and enjoy the process!
Ready to take the next step? Mark your calendar for late summer or early fall, grab your pruners, and start harvesting those pods before they burst open naturally. Your future garden—and those cheerful poppies—will thank you! 🌸