
Propagation
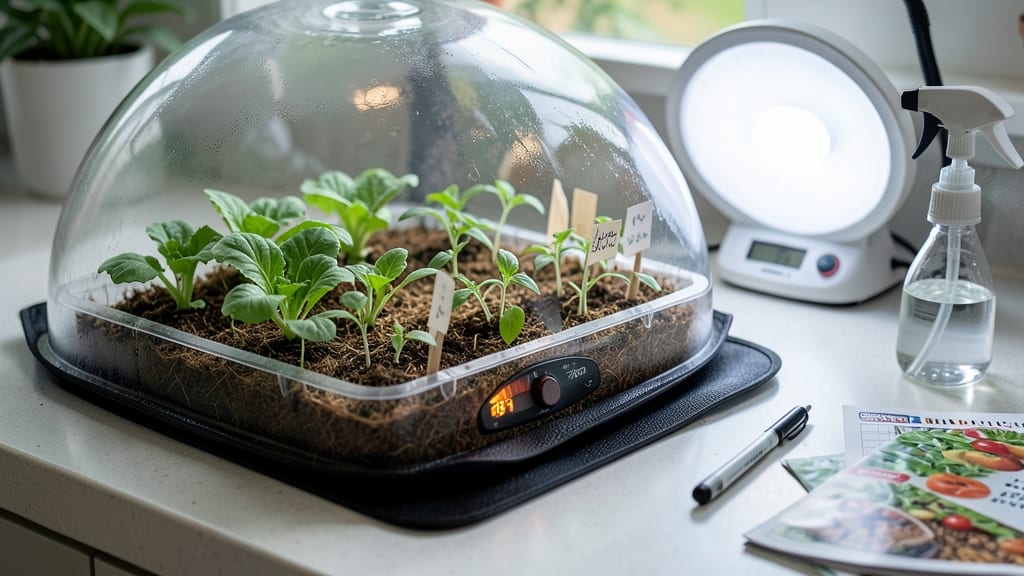
Electric seed germination turns your kitchen counter into a high-tech nursery where seeds sprout in half the time—no more waiting weeks for stubborn sprouts. 🌱 I spent years watching seeds struggle in damp paper towels, until I tried a germination mat that kept everything perfectly moist and warm.
The difference? Tiny radish sprouts breaking through soil in just 3 days instead of 10. This method isn’t just faster—it’s smarter. You control exactly how much moisture and heat seeds get, which means fewer moldy failures and stronger seedlings ready for transplanting.
My pepper seeds now pop up in 5 days instead of 3 weeks, and the roots stay sturdy enough to handle moving. The setup costs less than fancy seed-starting kits but works better for tricky seeds like parsley or cilantro.
You’ll need a germination mat (or even a simple heat pad), a shallow tray, and a spray bottle—no fancy gadgets required. The key is keeping seeds consistently moist without drowning them, and watching for that first tiny shoot like it’s a miracle (because it is).
Once they’ve got two true leaves, they’re ready to graduate to soil. Perfect for beginners who’ve given up on slow germination or experienced gardeners tired of weak seedlings. Let’s get those seeds sprouting like clockwork!
📚 In This Guide
- What you need
- Instructions
- Tips and common mistakes
- Wrapping up and next steps
What you need
- ● Seeds: Choose fast-sprouting varieties like radishes, beans, or microgreens (10–50 seeds, depending on your setup).
- ● Germination tray or container: A shallow, clear plastic or glass tray (10"x20" or similar) with a lid (or plastic wrap).
- ● Grow mat or heating pad: A 100–120V electric seedling heat mat (12"x24" or larger) to maintain 70–85°F.
- ● LED grow light: A full-spectrum LED bulb (6000K–7000K color temperature) or a small LED strip (12V, 10–20 watts).
- ● Timer: A plug-in light timer (12–16 hours of light/day).
- ● Spray bottle: A fine-mist sprayer (16 oz) for gentle watering.
- ● Paper towels or germination sheets: 2–3 sheets (or a cotton pad for small seeds).
- ● Distilled or filtered water: 1–2 cups (chlorine-free!).
- ● Humidity dome: A clear plastic lid or humidity tent to retain moisture.
- ● pH test strips: To monitor water acidity (ideal: 5.8–6.2).
- ● Seedling thermometer: A digital probe thermometer for precise temp tracking.
- ● Small fan: A USB-powered oscillating fan (low speed) for airflow.
- ● Smart plug: Wi-Fi-enabled for remote light/temp control.
Step-by-step guide to electric seed germination
Here's how to create the perfect moisture-controlled environment for faster, healthier sprouts.
🌱 Step 1: Prepare Your Seeds for Germination
Start by soaking your seeds in lukewarm water for 8-12 hours to soften the outer coating and kickstart hydration. I like to use a small bowl with a damp paper towel folded over the seeds—this keeps them moist without drowning them. You'll see the seeds plump up noticeably after soaking, which means they're ready for the germination station.
Once soaked, gently pat them dry with another paper towel to remove excess moisture. This prevents mold from forming later. If you're working with tiny seeds like lettuce or carrots, I recommend mixing them with a little sand or vermiculite to help them stay in place during the next steps.
💧 Step 2: Set Up Your Electric Germination Station
Choose a shallow container with a lid that allows for airflow—think of a clear plastic box with ventilation holes or a seedling tray with a humidity dome. Line the bottom with a damp paper towel or a layer of moistened sphagnum moss to maintain consistent moisture. The key here is keeping everything damp but not soggy; you want the paper towel to feel like a wrung-out sponge.
Place your prepped seeds evenly spaced on the damp surface, about ½ inch apart for larger seeds and even closer for tiny ones. Cover the container with the lid or dome, but leave a small gap for airflow. This creates a mini greenhouse effect that traps warmth and humidity—exactly what seeds need to sprout quickly.
☀️ Step 3: Add Warmth and Light for Faster Growth
Position your germination station on a heat mat set to 75-85°F, which is ideal for most seeds. If you don’t have a heat mat, a warm spot near your fridge or a sunny windowsill can work in a pinch. The warmth speeds up metabolic activity, so you’ll see sprouts in as little as 3-5 days instead of the usual week or more.
Now for the light: Place a small LED grow light 2-3 inches above the container and set it to run for 14-16 hours daily. Avoid direct sunlight at this stage—it can overheat the seeds. You’ll know the light is working when the seeds start to crack open and tiny roots appear. This is your signal that germination is underway!
🌿 Step 4: Monitor and Maintain Moisture Levels
Check your seeds daily and mist the paper towel or moss with a spray bottle if it feels dry to the touch. Overwatering is a common mistake—you don’t want the seeds sitting in standing water, or you’ll risk mold or rot. A quick spray keeps things moist without drowning the seeds.
After 3-5 days, when you see the first signs of sprouts (tiny white roots or green shoots), it’s time to transition. Remove the lid for a few hours each day to let the seedlings breathe. If you notice any black or fuzzy growth, that’s mold—open the container immediately and let it air out for a day to prevent it from spreading.
⏰ Step 5: Transition to Soil and Light
Once your seedlings have 1-2 inches of growth and a few true leaves, it’s time to move them to soil. Gently transfer them to small pots filled with seedling mix, burying them just below the cotyledons (the first leaves). Water lightly and place them under the grow light for 12-14 hours daily to keep them growing strong.
Here’s the thing—don’t rush this step. If the seedlings look leggy or weak, they need more light or time to adjust. You’ll know they’re thriving when they stand upright and their leaves are a vibrant green. Within a week, you’ll have sturdy young plants ready for transplanting or further growth!
Tips & tricks for perfect electric seed germination
These little adjustments make all the difference when you're growing sprouts with precision.
Soaking Secrets: For extra speed, soak your seeds in lukewarm water for the full 8-12 hours—this kickstarts hydration while keeping them safe from mold. If you're short on time, you can reduce it to 6 hours, but you'll sacrifice some germination efficiency. I've found that adding a pinch of sea salt to the soak water helps prevent bacterial growth, especially for delicate seeds like lettuce or radish.
Container Hack: Use a clear plastic container with a tight-fitting lid to create a perfect mini greenhouse. The transparency lets you monitor moisture levels and seed progress without disturbing them. Pro tip: Place a small piece of cardboard under the container to absorb any condensation that might drip onto your seeds during the 3-5 day germination window.
Lighting Strategy: Position your LED grow light 2-3 inches above the container and keep it running for 14-16 hours daily—this consistent light exposure is what triggers those first crucial sprouts. If you don't have a grow light, a simple fluorescent bulb placed close will work in a pinch, but you'll need to keep it even closer to compensate for lower intensity.
Moisture Monitoring: The damp paper towel should feel like a wrung-out sponge—never soggy, never dry. I like to use a spray bottle with a fine mist setting to check moisture levels daily. If you notice condensation forming on the lid, that's a good sign you've got the right humidity balance for those 3-5 days of germination.
Pro Tips for Electric Seed Germination
- These little adjustments make all the difference when you're growing sprouts with precision.
- Soaking Secrets: For extra speed, soak your seeds in lukewarm water for the full 8-12 hours—this kickstarts hydration while keeping them safe from mold.
- Container Hack: Use a clear plastic container with a tight-fitting lid to create a perfect mini greenhouse.
Frequently asked questions
How long does electric seed germination take compared to traditional methods?
Electric germination typically speeds up sprouting by 30-50%. While traditional soaking or paper towel methods take 3-7 days, electric setups with controlled light and moisture often yield visible sprouts in 2-4 days—some fast-growing seeds (like radishes or beans) may even sprout in 1-2 days!
Do I need special seeds for electric germination?
Nope! Most seeds—organic, heirloom, or store-bought—work in electric germinators. Avoid pre-treated or coated seeds (like some hybrid varieties), as their coatings may interfere with moisture absorption. Always check seed packaging for germination instructions.
What if my seeds aren’t sprouting after a few days?
First, check for consistent moisture (seeds should stay damp but not soggy). If using light, ensure it’s red/blue spectrum (avoid heat-producing bulbs). Try re-soaking seeds in warm water for 4-6 hours, then repeat the process. If still no luck, test viability by cutting open a seed—a white center means it’s good; brown/black means it’s dead.
Is an electric germinator worth it, or can I DIY one?
DIY options (like a mason jar + LED light + damp paper towel) work great for beginners. However, electric germinators offer precision control over humidity, temperature, and light cycles—ideal for large batches or delicate seeds (e.g., tomatoes, peppers). Start with a DIY setup to test your method before investing!
What’s the best temperature for electric seed germination?
Most seeds thrive between 65–85°F (18–30°C). Cool-season crops (like lettuce or spinach) prefer 60–70°F (15–21°C), while tropical seeds (e.g., peppers, cucumbers) need 75–85°F (24–30°C). Electric germinators often include temperature settings—adjust based on your seed type for optimal results.
Wrapping up and next steps
Electric seed germination is a game-changer for gardeners eager to see faster, healthier sprouts with minimal effort! By harnessing the power of light and moisture control, you can create the perfect environment for seeds to thrive—whether you're a beginner or a seasoned green thumb.
The key takeaway? Consistency and patience pay off, and with the right setup, you’ll be harvesting lush seedlings in no time.
Ready to take the next step? Start small—try germinating a few easy seeds like beans or peas—and soon, you’ll be experimenting with your favorite plants. Your future garden starts with a spark—literally! 🌱⚡