
Size
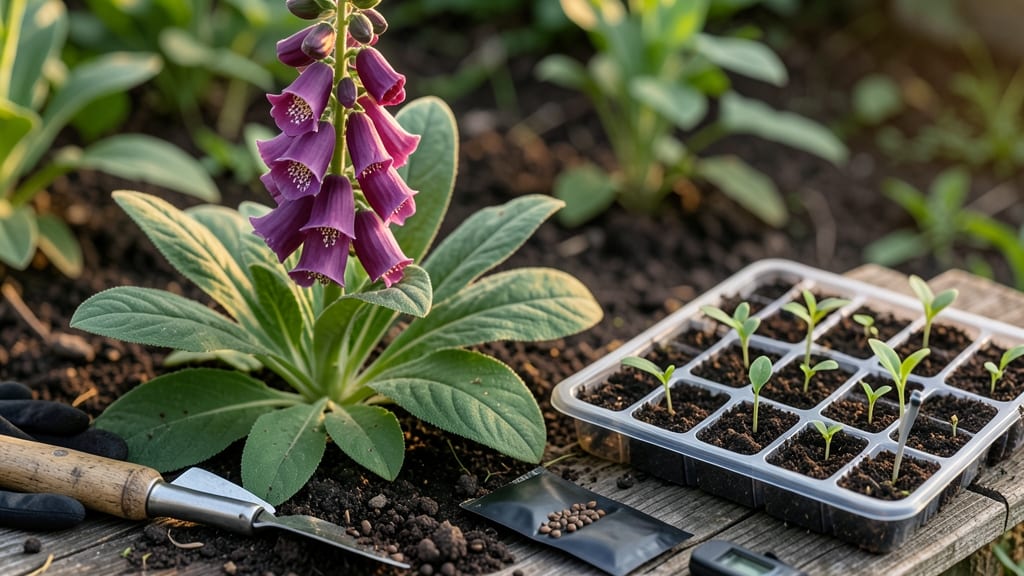
Growing a garden from foxglove seed means turning last year's spent blooms into next season's towering spires—no waste, just magic. 🌿 The key is harvesting those seed pods before they explode, then storing them properly until planting time.
I've grown foxglove from seed for five years, and the secret isn't complicated: patience and knowing exactly when to plant.
You'll need well-drained soil, a sunny spot with afternoon shade, and a little extra care during germination. Foxglove seeds need stratification (a cold period) to break dormancy, which mimics their natural cycle.
Start with fresh seeds from mature plants, or collect pods when they turn brown but haven't split open—this gives you the best chance at strong, healthy seedlings.
By late winter, you'll have tiny green shoots ready for transplanting. The first blooms arrive the following summer, but the real reward is watching those 5-foot-tall spires emerge from what started as a single seed.
They thrive in cottage gardens, woodland edges, or even containers, and their bell-shaped flowers attract hummingbirds all season.
Here's the best part: foxglove self-seeds prolifically, so with just a few plants, you'll have a permanent garden feature that multiplies year after year. The only challenge is resisting the urge to harvest every bloom—save a few seed heads, and you'll always have fresh starts.
📚 In This Guide
- What you need
- Instructions
- Tips and common mistakes
- Wrapping up and next steps
What you need
- ● Foxglove seeds: 1–2 packets (each typically contains ~500 seeds). Pro tip: 💡 Collect seeds from mature pods (when they turn brown and split open) for a zero-waste harvest!
- ● Seed-starting mix: 1–2 bags (1–2 cubic feet) of sterile, well-draining potting soil (e.g., Miracle-Gro Seed Starting Potting Mix or coco coir blend).
- ○ Seed trays or small pots: 10–20 (3–4 inch diameter) with drainage holes. Optional: Biodegradable peat pots for transplanting.
- ● Grow lights or sunny windowsill: 1–2 LED grow bulbs (or a south-facing window with 6+ hours of sunlight daily).
- ● Misting bottle or spray nozzle: For gentle watering (avoid soaking seeds).
- ● Plastic wrap or humidity dome: To retain moisture until germination (~14–30 days).
- ○ Fertilizer (optional but helpful): 1–2 tbsp of balanced liquid fertilizer (e.g., 10-10-10) diluted to half-strength after seedlings sprout.
- ● Fine-tip tweezers: For carefully placing tiny seeds.
- ● Plant labels & markers: To track varieties (foxglove seeds are slow to mature!).
- ● Garden gloves: Foxglove leaves can irritate skin—protect your hands!
- ● Patience (and a calendar): Foxglove seeds take 6–12 months to flower from seed! Mark planting dates.
- ● Outdoor space (for mature plants): Full sun to partial shade (6+ hours of light). Soil should be well-draining.
Step-by-Step instructions for growing foxglove from seed
Here's how to transform those iconic seed pods into a thriving garden—no waste, just beauty.
🌱 Step 1: Collect and Prepare Foxglove Seed Pods
Harvest mature seed pods in late summer or early fall when they turn brown and split open naturally. I like to pick them just before they fully open to prevent seed loss. Wear gloves—foxglove contains cardiac glycosides that can irritate skin. Once home, lay pods on newspaper in a dry, shaded spot for 2-3 weeks to fully dry and release seeds.
Shake pods gently over a white paper plate to collect seeds. Foxglove seeds are tiny and dark brown—you'll see them scattered like specks of pepper. Store unused seeds in an envelope until spring planting. The key here is patience: fresh seeds need cold stratification to germinate, so don't rush this step.
💧 Step 2: Stratify Seeds for Better Germination
Place seeds in a sealed plastic bag with a damp paper towel. I add a few drops of water to keep everything moist but not soggy. Store the bag in your refrigerator's crisper drawer for 4-6 weeks. This mimics winter's cold period and breaks seed dormancy. Check weekly—if the towel dries out, mist it lightly with water.
After stratification, remove seeds and sow them immediately. Don't let them dry out again or they'll lose viability. I find this step makes all the difference—without it, germination rates drop dramatically. You'll know stratification worked when you see tiny sprouts after 3-4 weeks of warm soil conditions.
☀️ Step 3: Sow Seeds in Well-Draining Soil
Fill seed trays with a mix of 50% potting soil and 50% perlite for excellent drainage. Foxglove roots hate soggy conditions, so good airflow is critical. Sprinkle seeds on the surface—don't bury them. They need light to germinate, so only press them gently into the soil with your fingertip.
Cover the tray with plastic wrap to maintain humidity, then place in a warm spot with indirect light (like a north-facing windowsill). Keep the soil consistently moist but never waterlogged. You'll see first true leaves appear in 4-6 weeks—these will be small and round, unlike the initial seed leaves.
🌿 Step 4: Transplant Seedlings to Garden Beds
Wait until seedlings have 4-6 true leaves and are at least 3 inches tall before transplanting. Harden them off by moving them outdoors for 1-2 hours daily over 10 days. Choose a garden spot with partial shade and well-draining soil—foxglove thrives where it gets morning sun and afternoon shade.
Dig holes twice as wide as the root ball but no deeper. Space plants 18-24 inches apart to allow for their mature height. Water deeply after planting to settle the soil. Mulch around the base with 2 inches of compost to retain moisture and suppress weeds. This is where your patience pays off—foxglove grows slowly but rewards you with dramatic height and striking flowers.
⏰ Step 5: Maintain and Enjoy Your Foxglove Garden
Water established plants once weekly during dry spells, focusing on the soil around the base rather than overhead. Foxglove is drought-tolerant once established, but young plants need consistent moisture. Deadhead spent flower spikes in early summer to encourage a second flush of blooms later in the season.
In late fall, cut back dead foliage but leave the seed pods if you want to propagate more plants next year. Foxglove is biennial, so first-year plants focus on root growth while second-year plants produce those iconic flower spikes. With proper care, your garden will become a magnet for hummingbirds and bees—just be mindful of the toxic nature of all parts of the plant.
Tips & tricks for perfect foxglove seed germination
These little-known tricks will help you turn those delicate foxglove seeds into thriving plants with minimal fuss.
Pod Harvesting Timing: The 2-3 week drying period in Step 1 is crucial—don't rush it! Place pods in a single layer on newspaper to prevent mold. I've found that pods dried in a well-ventilated area (like a covered porch) actually release seeds faster than indoor drying. This step prevents premature seed loss while the pods are still on the plant.
Stratification Success: During the 4-6 week cold treatment in Step 2, I recommend labeling your bag with the date. This helps track progress, especially since foxglove seeds are slow to sprout. After removing from the fridge, I like to let seeds sit at room temperature for 24 hours before planting—the temperature shift seems to trigger germination more reliably.
Soil Mix Secret: The 50% potting soil to 50% perlite ratio in Step 3 works wonders, but I've had even better results adding a handful of coarse sand to the mix. This extra grit improves drainage further, which is critical since foxglove roots are particularly sensitive to soggy conditions. The goal is to mimic the rocky, well-drained soils where foxglove naturally thrives.
Transplanting Confidence: When checking for those 4-6 true leaves in Step 4, focus on the leaf shape rather than just counting. Foxglove's true leaves are oval with slight serration, while initial seed leaves are smooth and round. This visual cue helps you determine exactly when seedlings are ready for their garden home. The 10-day hardening process is non-negotiable—rushing this step often leads to transplant shock.
Pro Tips for Foxglove Seed Grow A Garden
- These little-known tricks will help you turn those delicate foxglove seeds into thriving plants with minimal fuss.
- Pod Harvesting Timing: The 2-3 week drying period in Step 1 is crucial—don't rush it!
- Stratification Success: During the 4-6 week cold treatment in Step 2, I recommend labeling your bag with the date.
Frequently asked questions
Got questions about growing foxglove from seeds? We’ve got answers!
Whether you’re a first-timer or a seasoned gardener, here’s what you need to know to turn those tiny seeds into stunning blooms.
How long does it take for foxglove seeds to germinate?
Foxglove seeds can take anywhere from 2 weeks to 6 months to sprout—patience is key! Cold stratification (chilling seeds in the fridge for 4-6 weeks) often speeds up germination. Keep soil consistently moist and warm (around 60-70°F) for best results.
When is the best time to plant foxglove seeds?
For fastest germination, sow seeds indoors 6-8 weeks before your last frost (typically late winter/early spring). Alternatively, scatter them directly in the garden in early fall—this mimics natural conditions and boosts success. Just cover lightly with soil (¼ inch max) and water gently.
Can foxglove grow in containers or do they need a garden bed?
Yes! Foxglove thrives in containers as long as the pot is at least 12 inches deep and has drainage holes. Use well-draining soil and place in partial shade. Just be mindful: they’re biennials, so container-grown plants may live only 1-2 years before needing replacement.
Why aren’t my foxglove seeds sprouting? Troubleshooting tips
If your seeds aren’t germinating, check these common issues:
- Dry soil: Foxglove seeds need consistent moisture—don’t let the soil dry out.
- Poor light: They prefer bright, indirect light (not direct sun).
- Lack of stratification: Try chilling seeds in a damp paper towel in the fridge for 4-6 weeks before planting.
- Old seeds: Foxglove seeds lose viability quickly—use fresh seeds for best results.
What can I plant alongside foxglove for a zero-waste garden?
Pair foxglove with self-seeding companions like columbine, lupines, or honesty (Lunaria) to create a low-maintenance, pollinator-friendly garden. Avoid planting near vegetables—foxglove contains toxic compounds that can harm edibles if ingested.
Wrapping up and next steps
Growing foxglove from seeds is a rewarding journey that turns your garden into a whimsical, zero-waste haven—all while embracing sustainability! 🌱 By harvesting mature seed pods and nurturing new plants, you’re not just cultivating beauty; you’re creating a self-sustaining cycle of growth.
Whether you’re a seasoned gardener or just starting, your patience and care will soon be rewarded with striking spikes of purple, pink, or white blooms.
Ready to take the next step? Start small—plant a few seeds in a pot or a dedicated garden bed—and watch your foxglove thrive. Then, share your progress or even swap seeds with fellow gardeners to spread the magic! Happy growing! 🌸