
Lawn
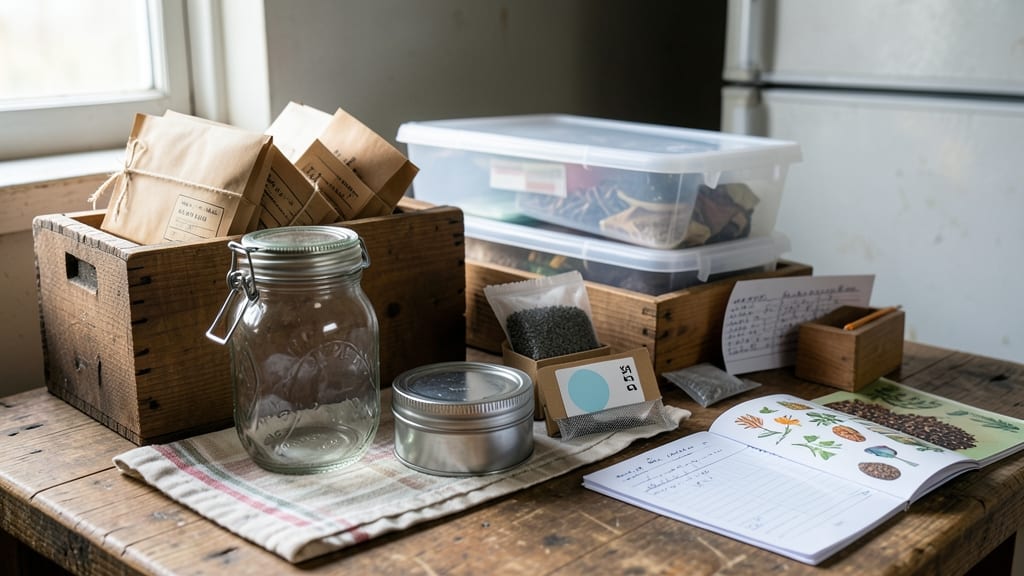
Storing garden seeds properly means saving money and ensuring next year's garden starts with the best possible foundation. 🌱 I’ve learned the hard way that damp, warm storage turns seeds into dust—so I now keep mine in airtight containers with moisture absorbers, where they last for years instead of months.
The key is controlling humidity and temperature, two factors most gardeners overlook until their seeds fail to sprout.
You’ll need hermetic containers (like glass jars with oxygen absorbers), a cool, dark place (around 35-40°F), and desiccant packets to keep moisture at bay. Label everything with the seed type and year—trust me, you’ll forget otherwise!
Even heirloom seeds can last 5-10 years with this setup, cutting your seed budget dramatically.
Before storing, let seeds dry completely—any moisture left behind will speed up decay. Test viability every 2-3 years by planting a few seeds in damp paper towels; if they sprout within 7-10 days, the rest are good to go.
This simple check saves you from planting blindly and wasting money on fresh seeds.
Common mistakes? Storing seeds in the fridge without containers (condensation ruins them) or keeping them in the garage where temps swing wildly. The goal is consistent coolness and dryness—think of it like a seed vault, not a pantry. With this method, your garden’s future is already planted and preserved.
📚 In This Guide
- What you need
- Instructions
- Tips and common mistakes
- Wrapping up and next steps
What you need
- ● Air-tight storage containers: 5–10 containers (e.g., Mylar bags, glass jars, or plastic bins with tight seals). Choose containers that are humidity-resistant and light-blocking (e.g., opaque or lined with aluminum foil).
- ● Desiccant packets: 1–2 packets per container (e.g., silica gel or calcium chloride) to absorb excess moisture. Do not reuse desiccants—they lose effectiveness over time.
- ● Seed envelopes or small paper bags: Enough to hold seeds before transferring to containers (e.g., kraft paper or breathable seed packets for short-term storage).
- ● Permanent markers or labels: For marking seed types, varieties, and storage dates. Use archival-quality ink to prevent smudging.
- ○ Humidity indicator cards: 1–2 per container (optional but helpful for monitoring moisture levels).
- ○ Vacuum sealer (optional but recommended): For long-term storage, removes air and extends seed viability.
- ● Seed catalog or digital tracker: To log seed varieties, germination rates, and storage conditions.
- ● Freezer or refrigerator: For ultra-long-term storage (seeds can last decades in 0°F to 32°F conditions).
- ● Food-grade oxygen absorbers: 1–2 per container (if storing for 5+ years to prevent oxidation).
- ● Plastic zip-top bags with one-way valves: For short-term storage (e.g., 1–2 years) in a cool, dry place.
Step-by-Step guide to humidity-controlled seed storage
Preserving seeds properly means they'll stay viable for years—here's the science-backed method I trust.
🪴 Step 1: Gather Proper Storage Materials
You'll need airtight containers (glass jars with rubber seals or Mylar bags with oxygen absorbers) and a dehumidifier or silica gel packets to control moisture. I like using one-pint canning jars for small batches—they seal tightly and let me see the contents without opening. Label each jar with the seed variety and harvest date using a permanent marker—fading labels mean lost heirlooms.
Store containers in a cool, dark place—your refrigerator's crisper drawer works perfectly. The ideal temperature range is 32-41°F, which slows seed deterioration. If you don't have a fridge, a basement corner with consistent humidity works, but avoid attics or garages where temperatures fluctuate wildly.
💧 Step 2: Dry Seeds Thoroughly Before Sealing
Spread seeds in a single layer on paper towels or a seed drying screen and let them dry for 7-14 days in a warm, dry place (like a sunny windowsill). Seeds are properly dry when they crunch between your fingers—this prevents mold growth inside containers. I test by gently pressing two seeds together; if they make a crisp sound, they're ready.
Don't rush this step—moisture is the #1 enemy of long-term seed viability. If seeds feel damp or bend easily, give them more drying time. Once dry, transfer seeds to their storage containers immediately to prevent reabsorption of ambient moisture.
☀️ Step 3: Control Humidity with Absorbers
Place 2-3 silica gel packets (the orange color type) in each container to maintain 30-40% humidity—the sweet spot for seed longevity. For larger batches, I use oxygen absorbers in Mylar bags, which create an inert environment. Seal containers immediately after adding absorbers to trap the dry environment.
Check humidity levels annually by opening a container and using a digital hygrometer—if readings climb above 50%, add fresh silica gel or reseal with new absorbers. High humidity speeds up seed aging dramatically, cutting viability by years. I mark my calendar to check storage conditions every January.
⏰ Step 4: Test Viability Periodically
Every 2-3 years, conduct a germination test by planting 10 seeds in moist paper towels. Fold the towels around the seeds, place them in a ziplock bag, and store in a warm spot (around 70°F). Check for sprouts in 7-14 days—if 80% or more germinate, your seeds are still viable. If germination drops below 50%, consider replacing those varieties.
This test reveals which seeds need refreshing. I keep a spreadsheet tracking germination rates by year—it's shocking how quickly some varieties decline (like lettuce seeds, which often lose viability in just 1-2 years). The test also helps you decide whether to save seeds for another year or purchase fresh ones.
🌱 Step 5: Organize by Viability Timeline
Group seeds by their typical storage lifespan—short-term (1-2 years) varieties like leeks and onions go in one container, while long-term (5+ years) seeds like beans and peas get priority shelf space. I use color-coded labels (red for 1-year, blue for 3-year, green for 5-year+ seeds) to quickly identify which varieties need planting soonest.
Rotate your seed stock annually by planting the oldest seeds first. This prevents you from accidentally storing seeds past their prime. I also keep a separate "plant this year" bin in my gardening shed—it's tempting to save everything, but some seeds simply don't age well. Know your varieties' natural lifespans to avoid disappointment.
Tips & tricks for perfect garden seed preservation
Took me years of trial-and-error to perfect these seed-saving secrets—don't skip these critical details.
Container Selection: Glass jars with rubber seals work best because they're reusable and let you monitor seed condition without opening. For long-term storage beyond 5 years, Mylar bags with oxygen absorbers create an inert environment that extends viability dramatically. I've found that repurposed canning jars from the thrift store often have better seals than new plastic containers.
Drying Technique: The 7-14 day drying period in Step 2 is non-negotiable for seeds like lettuce and onions that have high moisture content. For faster drying, place your drying screen on a baking rack over a low heat lamp (not direct sunlight which can degrade seeds). Test dryness by pressing two seeds together—they should make a crisp sound like breaking dry pasta, not bend like fresh twigs.
Humidity Monitoring: That 30-40% humidity range in Step 3 is the sweet spot, but it's easy to exceed it. I recommend placing a small digital hygrometer inside one of your storage containers as a reference point. If your kitchen humidity naturally runs high (common in summer months), consider adding an extra silica gel packet or using a dehumidifier in your storage area for a few days before sealing.
Labeling System: Permanent markers fade over time—especially in cool, dark environments. I've switched to using archival-quality ink pens and adding a small piece of masking tape over the label. For seed varieties with similar names (like 'Black Krim' vs 'Cherokee Purple' tomatoes), include a tiny color swatch on the tape to instantly distinguish them. This simple system has saved me from planting the wrong variety three times!
Pro Tips for Garden Seed Storage
- Took me years of trial-and-error to perfect these seed-saving secrets—don't skip these critical details.
- Container Selection: Glass jars with rubber seals work best because they're reusable and let you monitor seed condition without opening.
- Drying Technique: The 7-14 day drying period in Step 2 is non-negotiable for seeds like lettuce and onions that have high moisture content.
Frequently asked questions
Got questions about keeping your garden seeds fresh and ready to grow?
Here are answers to the most common concerns—so you can store seeds like a pro!
How long can I store seeds in a humidity-controlled environment?
With proper humidity control (30-40% RH) and cool temps (32–41°F), most vegetable and flower seeds stay viable for 3–5 years. Heirloom or rare seeds may last even longer! Check seed packets for specific lifespans—just remember, older ≠ useless—test a few before planting.
Can I store seeds in my freezer instead of a humidity-controlled container?
Freezing (0°F or below) is one of the best ways to extend seed life—some seeds stay viable for decades. Use airtight containers or resealable bags with silica gel packets to prevent moisture buildup. Just label everything—frozen seeds can get lost in the chaos!
What do I do if my seeds smell musty or look moldy?
Musty or moldy seeds are a red flag—they’ve likely been exposed to too much humidity or warmth. Discard them immediately to avoid poor germination or fungal issues. For future storage, double-check containers for leaks, use dehumidifiers (like DampRid), and store seeds in cool, dark places.
Is there a best time of year to store seeds for next season?
The ideal window is right after harvest—clean, dry, and fully mature seeds store best. For most gardeners, late summer to early fall works perfectly. If you’re storing seeds from store-bought packets, do it before winter to avoid temperature fluctuations that can degrade quality.
What’s the easiest way to test if my stored seeds are still good?
Try the paper towel germination test! Moisten a paper towel, place 10 seeds between two, seal in a bag, and keep warm (70°F). Check in 3–7 days—if 80%+ sprout, they’re ready to plant. For large seeds (like beans or peas), a quick float test works too: sink = viable, float = toss!
Wrapping up and next steps
Proper garden seed storage is your secret weapon for a thriving garden year after year! By controlling humidity, temperature, and light, you’ll keep your seeds viable, vibrant, and ready to sprout—no matter the season. 🌱
Now that you’re armed with the best techniques, take the next step: organize your seed collection today! Label your containers, test a few stored seeds to check viability, and start planning your next planting season with confidence. Happy growing! 🌿