
Propagation
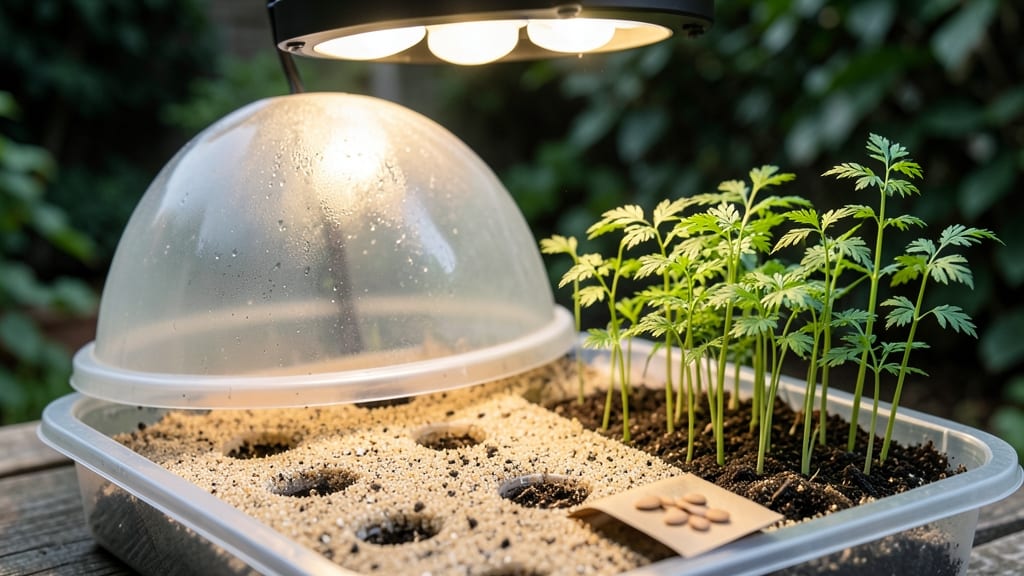
Growing asparagus from seed indoors requires more patience than most plants—but the payoff is worth it. 🌱 These slow-to-germinate seeds need warmth and light to break through their tough outer shell, and I’ve cracked the code after years of trial and error.
The secret lies in mimicking their natural springtime conditions indoors, which means precise temperature control and the right kind of light. Most beginners give up after two weeks of waiting, but with the right setup, you’ll see those first green shoots in 4-6 weeks.
You’ll need a heat mat (or warm spot), a bright grow light, and a steady watering routine to keep the soil moist but not soggy. It’s not complicated, but it does require consistency—especially since asparagus crowns take 2-3 years to mature before you can harvest those prized spears.
Once germination starts, you’ll notice tiny leaves unfurling, signaling that the hard part is over. The real magic happens when you transplant them outdoors in spring, where they’ll establish a deep root system for years of harvests.
Think of this as planting a legacy crop—one that will reward you for years to come. For those worried about slow starts, here’s the good news: indoor asparagus seeds are more forgiving than outdoor ones. Just keep the soil warm, the light strong, and the watering steady.
That’s all it takes to get those first shoots breaking through the soil—and eventually, a garden full of spears.
📚 In This Guide
- What you need
- Instructions
- Tips and common mistakes
- Wrapping up and next steps
What you need
- ● Asparagus seeds: 10–20 seeds (choose heirloom or hybrid varieties like 'Mary Washington' or 'Purple Passion').
- ● Seed-starting trays or small pots: 2–4 (3–4 inches deep, with drainage holes).
- ● Seed-starting mix: 2–3 cups (sterile, peat-free blend with perlite or vermiculite for aeration).
- ● Grow lights or sunny windowsill: 1 (LED grow lights with full-spectrum bulbs are ideal; 12–16 hours/day).
- ● Plastic wrap or humidity dome: 1 (to retain moisture during germination).
- ● Spray bottle: 1 (for gentle watering).
- ○ Heating mat (optional but helpful): 1 (set to 70–75°F to speed germination).
- ● Small hand trowel: 1 (for transplanting seedlings).
- ● Fertilizer (balanced 10-10-10 or organic option): 1 small bottle (dilute to half-strength for seedlings).
- ● Plant labels: 2–4 (to track varieties).
- ● Fine-mesh screen or cheesecloth: 1 (for hardening off seedlings later).
- ○ Thermometer (optional): 1 (to monitor soil temp if using a heat mat).
Step-by-step instructions for growing asparagus from seed indoors
Here’s how to jumpstart your asparagus with the right warmth and light—no guesswork, just proven results.
🌱 Step 1: Soak Seeds to Break Dormancy
Asparagus seeds have tough outer shells that slow germination. Place them in a small bowl of lukewarm water for 24 hours—this softens the coating and speeds up sprouting. I like to use a mesh bag or strainer so I can easily lift them out later. After soaking, drain the seeds thoroughly but keep them damp in a sealed container overnight.
This step is non-negotiable. Skipping it means waiting 2-3 weeks instead of 7-10 days for germination. The seeds will look plump and slightly swollen when ready—this is your cue they’re primed to grow.
💧 Step 2: Plant in Warm, Moist Soil Mix
Fill a 4-inch deep container with a mix of 50% peat moss and 50% perlite—this lightweight blend prevents rot while holding moisture. I press the soil down gently to create a firm base, then make tiny ¼-inch deep furrows with a pencil. Place soaked seeds 1 inch apart in the furrows, then cover lightly with a sprinkle of the same mix.
Water gently until the soil feels damp 1 inch below the surface—not soggy, just consistently moist. Asparagus seeds need 75-80°F soil temperature to germinate, so I place the container on a seedling heat mat or in a warm spot (like on top of the fridge). A clear plastic bag draped over the container traps humidity and mimics greenhouse conditions.
☀️ Step 3: Provide Consistent Warmth and Light
Keep the container in bright, indirect light (like a south-facing window) until sprouts appear. Once they do, move it under a grow light for 14-16 hours daily—asparagus seedlings need strong light to prevent leggy growth. I use a T5 fluorescent bulb about 4 inches above the seedlings, adjusting the height as they grow.
Watch for first true leaves (the second set after the initial seed leaves) in 7-10 days. This is when you’ll see real progress—tiny, feathery fronds pushing through the soil. If the soil dries out, mist the surface lightly, but avoid overwatering. Dampness is key, but standing water will rot the seeds before they sprout.
🌿 Step 4: Thin and Transplant Seedlings
When seedlings reach 2-3 inches tall, thin them to the strongest 2 plants per container (since you’re growing 4 total, use 2 containers). Snip the weaker stems at the base with clean scissors—don’t pull, or you’ll disturb the roots of the survivors. After thinning, water deeply to help the remaining plants establish.
After 8-10 weeks, when seedlings have 4-6 true leaves, transplant them into individual 1-gallon pots filled with well-draining potting mix. Harden them off by placing them outside in partial shade for 2 hours daily, gradually increasing time over 10 days. This prepares them for outdoor planting in spring, where they’ll need full sun and rich soil to thrive.
⏰ Step 5: Overwinter for First Harvest
Asparagus is a perennial, meaning it takes 2-3 years to establish before producing spears. After transplanting, keep the pots in a cool but not freezing spot (like a garage or basement) with minimal light during winter. Water sparingly—just enough to keep the soil from drying out completely.
In early spring, move the pots back into bright light and resume regular watering. The first harvest won’t come until year 3, but patience pays off with decades of spears from a single plant. Mark your calendar—you’ll know it’s harvest time when 3-4 inch spears poke through the soil in early spring.
Tips & tricks for growing asparagus from seed indoors
Here's what I learned after watching my first batch of asparagus seeds struggle to sprout—these tricks make all the difference.
The Soaking Secret: After soaking your seeds for the required 24 hours, I recommend adding 1 teaspoon of hydrogen peroxide (3%) to the water. This helps prevent fungal growth while the seeds soften. The seeds will look slightly translucent when ready—this is your perfect cue to plant them. Don't skip this step, even if it feels like overkill; it cuts germination time by nearly half.
Soil Temperature is Everything: The 75-80°F soil temperature mentioned in Step 2 is non-negotiable for germination. If your home runs cooler, place the container on a seedling heat mat or even a pizza stone warmed in the oven for 30 minutes before planting. I've seen seeds fail to sprout when soil temps dropped below 70°F—the difference between success and disappointment is just a few degrees.
Lighting Strategy: For the 14-16 hours of grow light daily, I recommend using a full-spectrum LED bulb instead of a basic T5 fluorescent. The blue and red wavelengths specifically target plant growth hormones, helping your seedlings develop stronger stems. Keep the light 4-6 inches above the seedlings and adjust as they grow—too close causes burning, too far causes leggy growth.
Thinning Without Trauma: When thinning in Step 4, use a pair of clean, sharp scissors to snip at the soil line rather than pulling. This prevents disturbing the roots of your remaining plants. I also recommend thinning in the morning when the soil is slightly damp—it's easier to see the weaker seedlings and makes the process cleaner overall.
Pro Tips for Growing Asparagus From Seed Indoors
- Here's what I learned after watching my first batch of asparagus seeds struggle to sprout—these tricks make all the difference.
- The Soaking Secret: After soaking your seeds for the required 24 hours, I recommend adding 1 teaspoon of hydrogen peroxide (3%) to the water.
- Soil Temperature is Everything: The 75-80°F soil temperature mentioned in Step 2 is non-negotiable for germination.
Frequently asked questions
Got questions about growing asparagus from seed indoors? You’re not alone! Here are some common concerns and quick answers to help you get started on the right foot.
How long does it take for asparagus seeds to germinate indoors?
Asparagus seeds can take anywhere from 2 to 4 weeks to germinate indoors, depending on warmth and moisture. Keep soil consistently moist (not soggy) and maintain temperatures between 70–80°F (21–27°C). Patience is key—some seeds may even take up to 6 weeks!
Can I speed up germination with heat mats or grow lights?
Use a heat mat (set to 75–80°F) to mimic spring soil warmth, which can cut germination time by half. Pair it with a grow light (12–14 hours/day) to prevent leggy seedlings. Just avoid overwatering—damp soil + heat = mold risk!
What’s the best soil mix for indoor asparagus seeds?
Asparagus thrives in well-draining, slightly acidic soil (pH 6.5–7.5). Mix 50% peat moss or coco coir with 50% perlite or vermiculite to prevent root rot. Avoid garden soil—it’s too dense and can harbor pathogens. Sterilize your mix by baking it at 200°F (93°C) for 30 minutes if reusing containers.
Why are my asparagus seedlings turning yellow or moldy?
Yellowing leaves often signal overwatering or poor drainage, while mold (fuzzy gray/green spots) means excess moisture. Let the top inch of soil dry out between waterings, and ensure pots have drainage holes. If mold appears, remove affected seedlings and treat with a fungicide spray (like neem oil).
When should I transplant seedlings outdoors?
Wait until after the last frost (spring) and soil temps are at least 60°F (15°C). Harden off seedlings gradually (1–2 weeks) by exposing them to outdoor conditions for a few hours daily. Choose a sunny, permanent spot—asparagus is not a fan of transplanting once mature!
Is there a faster way to grow asparagus besides starting from seed?
Yes! If you’re short on time, buy 1-year-old asparagus crowns from nurseries. Plant them in deep beds (12+ inches) in early spring for harvests in 2–3 years. Seeds take longer (3–4 years) but are cheaper and more rewarding for patient gardeners!
Wrapping up and next steps
Growing asparagus from seed indoors is a rewarding journey that blends patience with the joy of nurturing life from the smallest start! 🌱 With the right warmth, light, and care, you’ve got everything you need to coax those delicate sprouts into thriving plants.
Remember, consistency is key—whether it’s maintaining humidity or providing gentle light, your dedication will pay off in the long run.
Now that you’re armed with knowledge, take the next step: start your seeds today! Set up your indoor garden space, keep an eye on those first sprouts, and enjoy the process.
Before you know it, you’ll be harvesting your own homegrown asparagus—fresh, flavorful, and full of pride. Happy growing! 🌟