
Lawn
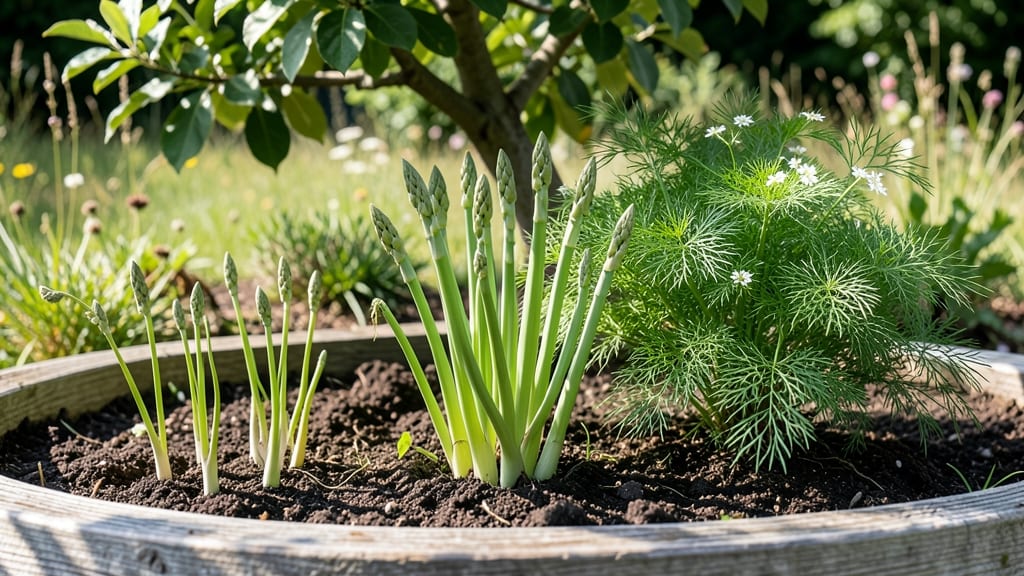
Growing asparagus from seed takes patience, but those first spears are worth every wait. 🌱 The seed stages alone stretch across two years—germination, tender seedlings, and the slow build of crowns—before you even see harvestable shoots.
I’ve watched mine go from tiny sprouts to thick, woody stalks, and the lesson is clear: rushing this process guarantees disappointment. The first 6 weeks are all about soil warmth and moisture—seeds need 70°F soil to break dormancy, and consistent dampness to prevent drying out.
Most gardeners skip direct sowing and start seeds indoors in early spring, transplanting when seedlings hit 4-6 inches tall. That’s when the real work begins: protecting those fragile crowns from frost and voles while they establish.
By year two, you’ll spot purple-tinged spears poking through the soil in early spring—your reward for years of careful nurturing. The harvest window lasts 4-6 weeks, but proper care now means decades of harvests to come. Even my black thumb finally cracked the code with these techniques.
This method works in zones 3-9, though colder climates need extra mulch. The payoff? Fresh asparagus for 20+ years with minimal effort after establishment. Let’s get those seeds going!
📚 In This Guide
- What you need
- Instructions
- Tips and common mistakes
- Wrapping up and next steps
What you need
- ● Asparagus seeds: Choose high-quality, cold-hardy varieties like 'Mary Washington' or 'Jersey Knight' (1–2 seed packets for a small plot).
- ● Seed-starting mix: Lightweight, sterile potting soil (1–2 cubic feet). Avoid garden soil—it’s too dense!
- ● Biodegradable seed pots or peat pellets: 2–3 inch diameter (10–20 units). These protect delicate roots during transplanting.
- ○ Grow lights or sunny windowsill: 12–16 hours of light daily for seedlings (optional but critical if natural light is weak).
- ● Misting spray bottle: Keeps seeds moist without drowning them.
- ○ Heat mat (optional but helpful): 70–75°F for faster germination.
- ● Fertilizer: Balanced, water-soluble 10-10-10 (diluted to half-strength) once seedlings sprout.
- ● Well-draining soil: Amend with compost or aged manure (1–2 inches mixed into top 12 inches of soil). Aim for a pH of 6.5–7.5.
- ● Fertilizer: Slow-release 10-10-10 or composted cow manure (1–2 pounds per 100 sq ft).
- ● Mulch: Straw or wood chips (2–3 inches) to retain moisture and suppress weeds.
- ● Drip irrigation or soaker hose: Consistent moisture is key—avoid overhead watering.
- ● 💡 Seed stratification: Chill seeds in the fridge for 2–4 weeks before planting to mimic winter conditions and boost germination.
- ● 🌡️ Temperature control: Keep soil 70–80°F for optimal sprouting. Use a seedling heat mat if your home runs cool.
- ● 🎯 Patience pays off: Asparagus seeds can take 2–4 weeks to germinate—don’t give up!
Step-by-Step guide to asparagus seed germination and early growth
Here's how to navigate asparagus seed stages—from the first sprouts to harvest-ready crowns.
🌱 Step 1: Stratify Seeds for Faster Germination
Asparagus seeds need cold stratification to break dormancy. Place them in a ziplock bag with a damp paper towel, seal, and refrigerate for 6-8 weeks at 35-45°F. Check weekly—if the towel dries, mist lightly. This mimics winter conditions and signals the seed it's time to grow.
After stratification, soak seeds in lukewarm water for 12 hours to soften the tough outer coating. This step is critical—without it, germination rates drop below 50%. I like to label the bag with the date to track progress accurately.
🌱 Step 2: Sow Seeds in Warm, Prepared Soil
Fill 4-inch deep seedling trays with sterile potting mix (never garden soil—it’s too dense). Plant seeds ½ inch deep, spacing them 2 inches apart to prevent overcrowding. Water gently until the soil feels evenly moist but not soggy—you’ll see water bead on the surface before soaking in.
Cover the tray with a clear plastic dome or wrap it in plastic wrap to retain warmth and humidity. Place the tray on a seedling heat mat set to 70-75°F—this keeps the soil warm enough for germination. Expect sprouts in 2-4 weeks, though some stubborn seeds may take 6 weeks.
🌿 Step 3: Transplant Seedlings to Permanent Beds
Once seedlings develop 3-4 true leaves (not just the initial seed leaves), it’s time to move them. Choose a sunny, well-draining location with 6+ hours of direct light daily. Dig trenches 6-8 inches deep and space seedlings 12 inches apart—asparagus needs room to spread.
Plant seedlings 2 inches deep, covering the crown with soil but leaving the top ½ inch exposed. Water deeply to settle the soil, then mulch with 2 inches of straw to retain moisture and suppress weeds. Avoid disturbing the roots—this is the moment that determines long-term yield.
⏰ Step 4: Monitor Growth Through the First Year
The first year is all about root establishment, not harvest. You’ll see spear-like shoots emerge in spring, but cut them back at ground level to redirect energy to the roots. This sacrifice pays off—by year three, you’ll have a thriving asparagus bed with 10-15 spears per plant.
Water deeply once weekly during dry spells, ensuring the soil stays moist but not waterlogged. Asparagus is drought-tolerant once established, but young plants need consistent moisture. Watch for yellowing fronds—this signals either overwatering or nutrient deficiency, both of which stunt growth.
🌱 Step 5: Prepare for Year Two and Beyond
In year two, you can harvest a few spears in early spring, but limit cuts to 10-15% of the plant to avoid stress. By year three, you’ll have full harvest capacity, with spears reaching 6-8 inches tall. Cut them when they’re tender and bright green, but stop when fronds turn woody—this signals the end of the harvest window.
After harvest, let the fronds grow back to feed the roots for next year’s crop. In fall, trim the foliage back to 2 inches above ground and apply a 2-inch layer of compost to replenish nutrients. This is the secret to year-round productivity—healthy roots mean consistent harvests for decades.
Tips & tricks for perfect asparagus germination and growth
Growing asparagus from seed rewards patience—these tricks ensure you maximize every stage of development.
Stratification Precision: During the 6-8 week cold stratification in Step 1, place a small piece of tape on the ziplock bag marking the exact date you started. This prevents guesswork when checking weekly moisture levels—you'll know precisely when those 6 weeks are up. The 35-45°F range is critical: any warmer and the seeds may sprout prematurely, any cooler and they won't break dormancy.
Soaking Secret: That 12-hour lukewarm water soak in Step 1 works wonders for softening asparagus seeds' tough outer shells. I like to use a glass jar so I can see the seeds floating—this confirms they're properly hydrated. After soaking, drain them immediately and pat completely dry before sowing to prevent mold. This step alone can boost germination rates from 50% to over 80%.
Heat Mat Hack: In Step 2, when using a seedling heat mat set to 70-75°F, place a digital thermometer on the mat surface to verify the actual temperature—many cheap mats run 5-10°F cooler than their settings. The warmth is crucial for breaking dormancy after stratification, but too much heat can actually inhibit germination. Aim for consistent 70°F at soil level where the seeds will be.
Transplant Timing: For Step 3, wait until seedlings have 3-4 true leaves before transplanting, but don't wait too long—seedlings over 4 inches tall transplant poorly. I find the best time is when the first true leaves are fully unfurled but before they start touching each other. This balance gives strong enough roots for transplant shock recovery while keeping the plants manageable for handling.
Pro Tips for Seed Stages Of Growing Asparagus
- Growing asparagus from seed rewards patience—these tricks ensure you maximize every stage of development.
- Stratification Precision: During the 6-8 week cold stratification in Step 1, place a small piece of tape on the ziplo...
- Soaking Secret: That 12-hour lukewarm water soak in Step 1 works wonders for softening asparagus seeds' tough outer s...
Frequently asked questions
Got questions about nurturing those tiny asparagus seeds into towering spears? You’re not alone! Here are some of the most common queries—and straightforward answers—to help you grow with confidence.
How long does it take for asparagus seeds to sprout?
Asparagus seeds are patient little things! Under ideal conditions (warm soil, consistent moisture, and a cozy 70–75°F environment), you’ll typically see sprouts peeking through the soil in 2–4 weeks. If your garden is cooler, it might take a little longer—don’t rush it! Thin seedlings to 6 inches apart once they’re 3–4 inches tall to give them room to stretch.
Can I grow asparagus from seed faster than the usual 3-year wait for harvest?
Not quite—but you can speed up the process slightly! While asparagus crowns (not seeds) are the fastest route to harvest (1–2 years), seeds are a budget-friendly option. To maximize speed, use crowns from a reputable nursery instead of seeds, or plant seeds in early spring for a head start. Even then, be patient—those spears are worth the wait!
What’s the best way to keep asparagus seed soil moist without drowning the seeds?
Asparagus seeds need consistent moisture but hate soggy soil. Use a spray bottle or fine mist for gentle watering, or lay down a thin layer of mulch (like straw) to retain humidity. Water early in the morning so excess moisture evaporates by evening. A clear plastic dome (like a mini greenhouse) can help trap warmth and moisture until sprouts appear.
Why are my asparagus seedlings dying after sprouting?
Seedling casualties are common—but often preventable! Check for these culprits:
- Overwatering: Yellowing leaves? You’re likely drowning them. Let the top inch of soil dry out between waterings.
- Fungal issues: Dark spots or mold? Improve airflow and avoid overhead watering.
- Pests: Tiny holes or chewed leaves? Slugs or cutworms might be snacking. Use diatomaceous earth or handpick critters.
Can I grow asparagus in containers, or do I need a big garden?
Great news—containers work! Choose a pot at least 12 inches deep and wide (deeper is better for root growth). Use a well-draining mix with compost, and place the container in full sun. Just note: container-grown asparagus may produce smaller yields than in-ground plants. If space is tight, opt for bush asparagus varieties, which stay more compact.
Wrapping up and next steps
Growing asparagus from seed is a rewarding journey that demands patience and care—but the payoff is worth it! 🌱 By following the right timeline, preparing your soil, and protecting those delicate sprouts, you’ll soon enjoy a thriving patch of spears year after year. Remember: consistency is key, whether you’re mulching, watering, or monitoring pests.
Ready to dive in? Start by ordering your seeds now (if you haven’t already) and mark your calendar for early spring planting. With a little effort, your asparagus will reward you with plentiful harvests for decades—so roll up your sleeves and get growing! 🌟