
Propagation
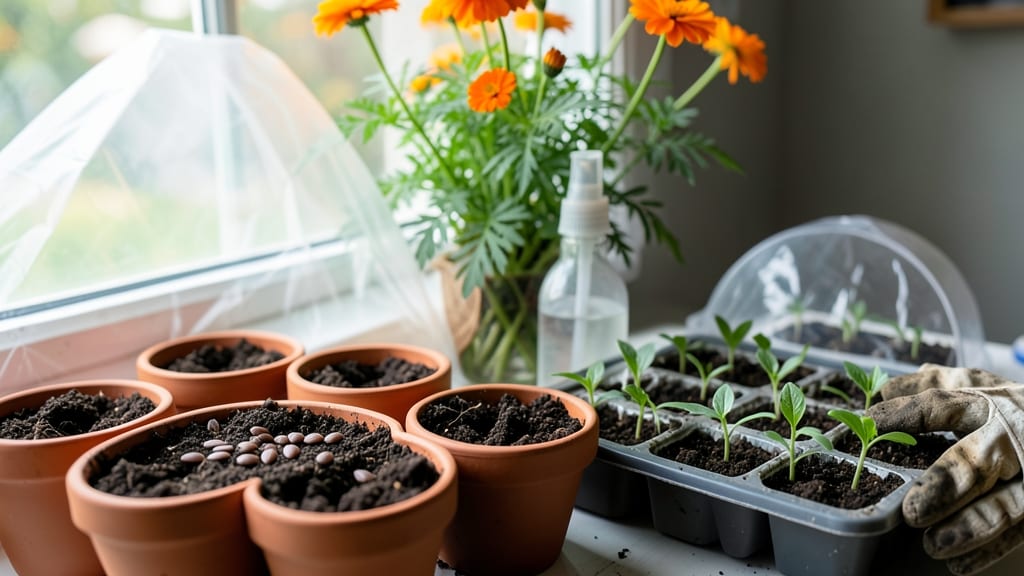
Growing calendula from seed in pots is the fastest way to get those bright orange blooms that make every garden feel like summer. 🌻 I’ve grown calendula in containers for years—it’s one of the easiest annuals for beginners, yet it still surprises with its bold color and medicinal properties.
The secret lies in keeping the soil warm, the pots well-drained, and the light bright enough to prevent those leggy seedlings that frustrate so many gardeners.
You’ll need just a few supplies: seed-starting mix, small pots (at least 2 inches deep), a sunny windowsill or grow light, and a spray bottle for gentle watering. Calendula seeds are tiny but tough—they germinate quickly, often within a week, and don’t need light to sprout.
The key is patience and consistency, especially when it comes to watering. Too much moisture leads to damping off, while too little causes stunted growth.
By week six, you’ll be pinching back the first true leaves to encourage bushier plants, and by week eight, those cheerful orange blooms will start appearing. The best part? Calendula thrives in pots, making it perfect for balconies, patios, or even kitchen windowsills.
It’s also a great companion plant, repelling pests like aphids and nematodes while attracting beneficial insects.
If your seedlings stretch toward the light or develop mold, don’t panic—adjust the light source or reduce watering. Calendula is forgiving, but it rewards attention to detail. Once established, these hardy flowers will bloom all season long, adding color and utility to your container garden. Ready to grow yours?
📚 In This Guide
- What you need
- Instructions
- Tips and common mistakes
- Wrapping up and next steps
What you need
- ● Calendula seeds: 1 packet (50–100 seeds, non-GMO or heirloom varieties like 'Bonanza' or 'Touch of Class' for best results).
- ● Containers: 2–3 4–6 inch diameter pots (for seedlings) with drainage holes.
- ● 1 12+ inch diameter pot (for mature plants) or a larger container if growing multiple calendulas.
- ● Potting mix: 2–3 gallons of well-draining, sterile seed-starting mix (avoid garden soil—it can compact and retain too much moisture).
- ● Grow lights or sunny windowsill: A full-spectrum LED grow light (12–16 hours/day) or a south-facing window (6+ hours of direct sunlight).
- ● Spray bottle: For gentle watering of seeds.
- ● Plastic wrap or humidity dome: To create a mini greenhouse for seedlings.
- ○ Fertilizer (optional but helpful): A balanced liquid fertilizer (5-5-5 or 10-10-10) diluted to half-strength.
- ● OR compost tea for organic growth.
- ● Seedling heat mat: Speeds up germination (70–75°F is ideal).
- ● Self-watering pot: Reduces maintenance for busy gardeners.
- ● Epsom salt: A pinch (1 tsp/gallon) in water can boost magnesium for lush foliage.
- ● Decorative pot or hanging basket: For a cute display once your calendula matures!
Step-by-step guide to growing calendula from seed in pots
Here's how to nurture vibrant calendula from seed to bloom using containers—no garden bed required.
🌱 Step 1: Prepare Pots and Seed Starting Mix
Choose 4-inch diameter pots with drainage holes for your calendula. Fill each pot with sterile seed-starting mix—never garden soil, as it compacts too easily and may harbor fungal spores. I prefer a blend of 50% peat moss, 30% perlite, and 20% vermiculite for ideal drainage and aeration. Moisten the mix until it feels like a damp sponge, but not dripping.
Tap the pot gently on the table to settle the soil without compacting it. This ensures roots can spread easily once germination begins. The reason we avoid compacted soil is that calendula roots are shallow but sensitive to waterlogging. A loose mix prevents rot while holding enough moisture for consistent germination.
🌱 Step 2: Sow Seeds at the Right Depth and Spacing
Sprinkle 2-3 seeds per pot—calendula germinates readily, and you can thin later. Press them ¼ inch deep into the soil, as deeper planting delays germination. I use a toothpick to create small holes for each seed, making placement precise. Cover lightly with a fine layer of additional seed-starting mix, just enough to obscure the seeds.
Mist the surface with a spray bottle until evenly damp. Avoid heavy watering, which can dislodge seeds or create a crust that blocks light. Place the pots in a seedling heat mat set to 70-75°F—calendula thrives in warmth during germination. You’ll see sprouts in 7-10 days, but be patient if your home runs cooler.
☀️ Step 3: Provide Light and Maintain Moisture
Once sprouts emerge, move pots to a south-facing windowsill or under grow lights for 12-14 hours daily. Calendula needs bright light to prevent leggy growth—thin, stretched stems that never recover. You’ll know light is sufficient when seedlings develop bold green leaves and grow upright. If leaves appear pale or stems elongate, raise the grow light closer or rotate pots weekly for even exposure.
Water when the top inch of soil feels dry to the touch. Overwatering is the fastest way to kill young calendula—roots rot quickly in soggy conditions. I use a small watering can with a fine rose attachment to deliver moisture directly to the soil, avoiding wet foliage. After watering, let excess drain completely before replacing pots in saucers.
✂️ Step 4: Thin Seedlings and Encourage Bushy Growth
When seedlings reach 2 inches tall and develop 2-3 true leaves, thin to the strongest plant per pot. Use scissors to snip weak stems at the soil line—this prevents disturbing roots of remaining plants. Calendula handles thinning well, and you can replant the thinned seedlings in spare pots or share them with fellow gardeners.
Pinch back the top set of leaves when plants are 4 inches tall to encourage bushier growth. This simple step promotes more blooms by stimulating lateral branching. Fertilize lightly with a balanced liquid fertilizer (10-10-10) diluted to half-strength every 2 weeks once true leaves appear. Too much fertilizer leads to lush foliage but fewer flowers—calendula prioritizes blooms over leaves.
🌿 Step 5: Transplant and Care for Mature Plants
After 4-6 weeks, when seedlings have 5-6 leaves and strong stems, transplant to 6-inch pots if desired. Calendula adapts well to containers but benefits from extra space as it matures. Gently remove plants from their starter pots, tease apart roots if crowded, and replant at the same depth they grew previously. Water thoroughly after transplanting to settle the soil around roots.
Continue providing full sun (6+ hours daily) and moderate watering—calendula is drought-tolerant once established but blooms best with consistent moisture. Deadhead spent blooms by snipping stems just above the next set of leaves to encourage continuous flowering. With proper care, your pots will burst with bright orange and yellow blooms in as little as 6 weeks from sowing.
Tips & tricks for growing calendula in containers
Here's what nobody tells you about growing vibrant calendula from seed that makes all the difference between struggling sprouts and lush blooms.
Heat Mat Hack: That 70-75°F heat mat isn't just a suggestion—it's the difference between germination in 7 days versus 2 weeks. If your home runs cooler, place pots on top of a refrigerator or in a sunny spot near a warm wall. Just beware of drafts—calendula seeds need consistent warmth, not fluctuating temperatures. I've seen germination rates drop by 50% when seeds experience temperature swings.
Lighting Secret: The 12-14 hours of daily light requirement is non-negotiable for preventing leggy seedlings. If your windowsill isn't bright enough, supplement with a simple LED grow light—even a basic 6-inch bulb on a timer works wonders. Watch for pale leaves as your first warning sign of insufficient light, and act immediately by raising the light closer or extending the exposure time by 1-2 hours.
Soil Settlement Technique: When you tap those pots to settle the soil in Step 1, don't just give it a half-hearted tap. Give it a firm but gentle knock on the table edge—this creates the perfect loose, aerated texture calendula roots crave. The goal is to eliminate air pockets while maintaining that fluffy consistency. I've ruined three batches by compacting the soil too much, leading to waterlogged conditions that suffocate delicate roots.
Transplanting Timing: Those 4-6 weeks until transplanting might seem like a long wait, but it's crucial for root development. Look for plants with 5-6 leaves and stems that can support themselves when gently tugged—this indicates they've built enough strength for the transition. I recommend transplanting on an overcast day to reduce stress from harsh sunlight during the adjustment period.
Pro Tips for Growing Calendula From Seed In Pots
- Here's what nobody tells you about growing vibrant calendula from seed that makes all the difference between struggling sprouts and lush blooms.
- Heat Mat Hack: That 70-75°F heat mat isn't just a suggestion—it's the difference between germination in 7 days versus 2 weeks.
- Lighting Secret: The 12-14 hours of daily light requirement is non-negotiable for preventing leggy seedlings.
Frequently asked questions
Got questions about growing calendula from seed in pots? You’re not alone! Here are answers to the most common concerns—from timing to troubleshooting—so you can grow these cheerful blooms with confidence.
How long does it take for calendula seeds to germinate?
Calendula seeds typically sprout in 7 to 14 days when kept in warm (65–75°F), moist soil. For faster germination, pre-soak seeds for 4–6 hours or use a heat mat. Patience is key—don’t overwater, or seeds may rot!
Can I grow calendula indoors year-round in pots?
Yes! Calendula thrives indoors with 6–8 hours of sunlight daily (a south-facing window or grow lights work). Keep soil consistently moist and fertilize lightly every 4–6 weeks. Just watch for pests like aphids—spray with neem oil if needed.
What if my calendula plants look leggy or weak?
Leggy growth usually means too little light. Move pots to a brighter spot or supplement with grow lights. Pinch back tips to encourage bushier growth. Overcrowding can also weaken plants—thin seedlings to 12 inches apart once they’re 2–3 inches tall.
Do calendula seeds need cold stratification?
Nope! Unlike some flowers, calendula seeds don’t require cold treatment. Simply plant them ¼ inch deep in warm soil, and they’ll germinate happily. Direct sowing works best for pots—just keep the soil warm and moist.
Can I reuse the same pot for multiple calendula harvests?
After harvesting, rinse the pot, let it dry, and refresh the soil with compost. Calendula is annual, so you’ll replant each season anyway. Just ensure pots have drainage holes to prevent root rot.
Wrapping up and next steps
Growing calendula from seed in pots is a rewarding journey that brings vibrant color and healing properties to your space—all in just six weeks!
With the right containers, soil, and a little patience, you’ll enjoy lush blooms perfect for edible gardens, natural remedies, or simply brightening up your home. 🌼
Now that you’re armed with the know-how, why not take the next step? Try experimenting with different pot sizes or even succession planting to keep your calendula blooming all season long. Happy growing—your future harvest is waiting! 🌱