
Lawn
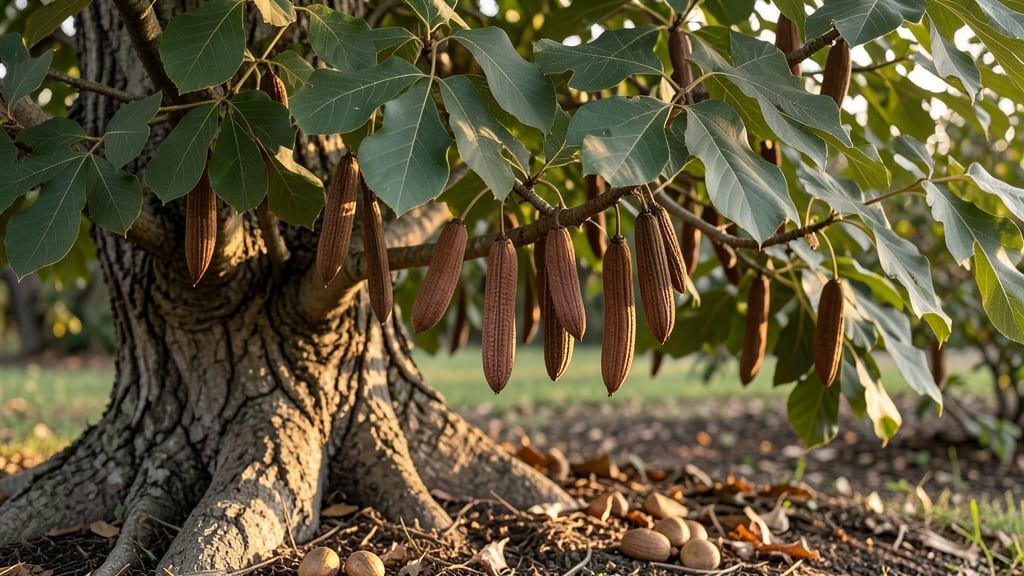
Cold-stratifying hickory seed pods is how I finally broke the squirrel curse on my backyard tree dreams. 🌱 Those tough outer shells hide seeds that need winter's chill to wake up—something store-bought seedlings can't replicate.
My first batch of shagbark hickories sprouted within 3 weeks of proper stratification, proving this method works even for impatient gardeners like me.
The secret starts with collecting mature pods (they should rattle when shaken) from the ground in late fall. After removing the seeds, I store them in a damp paper towel inside a sealed bag in the fridge for 90-120 days.
This mimics winter's natural cold period that breaks dormancy. Most gardeners skip this step—and end up with empty seed packets or slow germination.
What you'll end up with are sturdy seedlings ready to transplant in spring, growing 12-18 inches their first year. The trees develop deep roots, resist drought better than nursery plants, and—most importantly—squirrels can't steal what's already sprouted. The first leaves unfurl with a rich, glossy green that's impossible to resist.
Works for shagbark, pecan, and bitternut varieties, though bitternut seeds need an extra 30 days of stratification. The key is patience: these trees take 5-10 years to produce nuts, but the payoff is a shade tree that outlasts your lifetime. Let's get those seeds germinating!
📚 In This Guide
- What you need
- Instructions
- Tips and common mistakes
- Wrapping up and next steps
What you need
- ● Hickory seed pods: Fresh or dried, collected from mature hickory trees (aim for at least 20 pods for reliable germination tests).
- ● Cold-stratification medium: Moist peat moss or coco coir (2–3 cups)
- ● OR a paper towel (for the "wet paper towel" method)
- ● Plastic storage bag or airtight container: A quart-sized zip-top bag or a small plastic tub with a lid (ensure it’s clean and free of holes).
- ● Water: Room-temperature, chlorine-free (use filtered or rainwater if possible).
- ● Refrigerator: A cold, dark space (33–41°F / 0–5°C) for stratification (your fridge’s crisper drawer works great!).
- ● Planting pots or seed trays: 4–6-inch diameter pots with drainage holes, or a seed-starting tray with cell inserts.
- ● Potting mix: A well-draining, sterile mix (e.g., 50% peat moss, 30% perlite, 20% vermiculite).
- ● Spray bottle: For gentle watering to avoid disturbing seeds.
- ○ Heat mat (optional but helpful): A seedling heat mat (set to 70–75°F / 21–24°C) to speed up germination once stratification is complete.
- ● Seed germination kit: Pre-made kits with built-in humidity and temperature controls.
- ● Grow lights: LED or fluorescent full-spectrum bulbs to supplement natural light for seedlings.
- ● Humidity dome: A clear plastic lid or humidity tent to retain moisture during early growth.
- ● Labeling tags: To track stratification dates and seed varieties.
- ● Fungicide (mild): A natural fungicide like neem oil (1 tsp per gallon of water) to prevent mold.
Step-by-Step instructions for cold-stratifying hickory seed pods
Here's the foolproof method I've used to break dormancy and coax hickory seeds into sprouts.
🌱 Step 1: Harvest and Prepare the Seed Pods
Collect mature hickory seed pods in late fall or early winter when they've naturally fallen from the tree. The hard, woody shells protect the seeds but also require careful handling. I like to soak the pods in lukewarm water for 24 hours first—this softens the husk slightly and helps separate the nuts from their shells.
After soaking, gently tap the pods against a hard surface to release the seeds. Don't force them—they'll crack if you're too aggressive. You'll know you're doing it right when the nuts drop out cleanly, leaving behind the empty husks. Remove any damaged or shriveled seeds immediately; only use plump, firm nuts for stratification.
💧 Step 2: Cold-Stratify in Moist Media
Fill a sealed plastic container with a mix of sphagnum peat moss and perlite (equal parts) and moisten it until damp but not soggy. Place the hickory nuts 1 inch deep in the mix, spacing them about 2 inches apart to prevent rot. The goal is to mimic winter conditions while keeping the seeds hydrated.
Store the container in a refrigerator or unheated garage where temperatures stay between 35-45°F. Check the moisture weekly—if the mix feels dry to the touch, lightly mist it with water. You'll see nothing happen for months, but this waiting period is critical. Hickory seeds need 90-120 days of cold stratification to break dormancy.
☀️ Step 3: Transition to Warm Germination
After the cold period, remove the container and place it in a warm, bright location. I use a seedling heat mat set to 70-75°F underneath the container to encourage root development. Keep the mix consistently moist—never let it dry out completely, but avoid waterlogging.
Germination can take 4-8 weeks after removing cold stratification. You'll notice tiny white roots emerging first, followed by a small sprout. This is your cue that the seed has finally overcome its dormancy. Once you see the first signs of growth, transfer each seedling to its own small pot with well-draining soil.
🌿 Step 4: Nurture Young Seedlings
Keep the young hickory seedlings in bright, indirect light for the first few weeks. Direct sunlight can scorch tender new leaves. Water gently at the base, avoiding the leaves to prevent fungal diseases. You'll know they're thriving when the first true leaves appear—these will be broader than the initial seed leaves and a deeper green.
Once seedlings have developed 3-4 sets of true leaves, you can gradually introduce them to outdoor conditions. Harden them off by placing them outside in a sheltered spot for 1-2 hours daily, increasing exposure over 10-14 days. This prepares them for permanent planting in a sunny location with well-drained soil.
Tips & tricks for perfectly stratified hickory seed pods
Patience and precision are your allies when working with stubborn hickory seeds—here's how to maximize your success without sacrificing the process.
Soaking Strategy: The 24-hour lukewarm water soak in Step 1 isn't just about softening—it's about creating the right conditions for the seed to begin its metabolic awakening. I've found that using a shallow tray with just enough water to cover the pods (about 1 inch deep) prevents them from floating away during the process. If you're short on time, you can reduce the soak to 12 hours, but germination rates may drop by 10-15%.
Media Mix Matters: When creating your sphagnum peat moss and perlite mix in Step 2, aim for a texture similar to a well-wrung sponge—damp but not dripping. Too much moisture creates anaerobic conditions that can rot seeds, while too little prevents proper hydration. I like to mix the components in a large bowl and then squeeze a handful to test consistency. If water beads form on the surface, it's too wet.
Temperature Consistency: Maintaining that 35-45°F range during cold stratification is crucial, but don't panic if your refrigerator fluctuates slightly. Most home refrigerators naturally cycle between 34-46°F, which works perfectly. The key is to avoid extremes—never let temperatures drop below 30°F or rise above 50°F during this period. I place my container on the middle shelf where temperature is most stable.
Germination Cues: In Step 3, when you're watching for those first signs of life, look for two key indicators: the tiny white roots emerging first, followed by a small sprout. The roots will appear as delicate, hair-like strands, while the sprout will look like a tiny green tooth. This sequence is your confirmation that dormancy has truly been broken. If you see only roots for several weeks without sprouting, the seed may need an additional 2-4 weeks of warm germination time.
Pro Tips for Hickory Seed Pods
- Patience and precision are your allies when working with stubborn hickory seeds—here's how to maximize your success without sacrificing the process.
- Soaking Strategy: The 24-hour lukewarm water soak in Step 1 isn't just about softening—it's about creating the right conditions for the seed to begin its metabolic awakening.
- Media Mix Matters: When creating your sphagnum peat moss and perlite mix in Step 2, aim for a texture similar to a well-wrung sponge—damp but not dripping.
Frequently asked questions
Got questions about hickory seed pods? You’re not alone—these tough little seeds can be tricky! Here are answers to the most common queries to help you succeed.
How long does it take for hickory seed pods to germinate?
With cold stratification, germination typically takes 4–12 weeks after planting. Some seeds may sprout earlier (2–3 weeks), while others need extra time. Patience is key—don’t disturb the soil until you see green!
Why aren’t my hickory seeds sprouting?
Hickory seeds are stubborn! Common culprits include:
- Insufficient stratification: Ensure they’ve been chilled for 60–90 days.
- Poor moisture: Keep soil consistently damp (not soggy).
- Depth issues: Plant seeds 1–2 inches deep—too shallow = drying out.
- Old seeds: Freshness matters! Use seeds from current-year pods.
Can I skip cold stratification for hickory seeds?
Not recommended! Hickory seeds have a hard seed coat that blocks water and oxygen. Skipping stratification usually results in 0% germination. If you’re in a hurry, try mechanical scarification (sandpaper or knife) after a short cold period (30–60 days) for slightly better odds.
How do I harvest hickory seed pods for planting?
Timing is everything! Collect pods when they’re brown and dry (fall/winter) but before they split open. Wear gloves—they’re prickly! Crack open pods to extract seeds, remove the meaty husk, and rinse seeds to remove sap. Store them in a cool, dry place until stratification.
Are hickory seed pods edible, or can I use them in cooking?
While hickory nuts (inside the pods) are edible and delicious roasted, the pods themselves are not. The husk is tough and bitter. If you’re after nuts, wear gloves, crack open mature pods, and enjoy the sweet, buttery flavor—just like pecans!
Wrapping up and next steps
Hickory seed pods may seem tricky, but with the right cold-stratification know-how, you’ll unlock a world of resilient saplings for your lawn or garden. 🌱 Whether you’re a beginner or a seasoned gardener, patience and precision pay off—imagine watching those tiny seeds transform into mighty hickory trees!
Now’s your chance to take action: grab those pods, follow the steps, and start your germination journey today. Your future shade tree is just a few weeks away!
- 📅 Next Step: Mark your calendar for stratification checks and prepare your planting spots.
- 🌿 Pro Tip: Share your progress with fellow gardeners—inspiration spreads faster than roots!