
Lawn
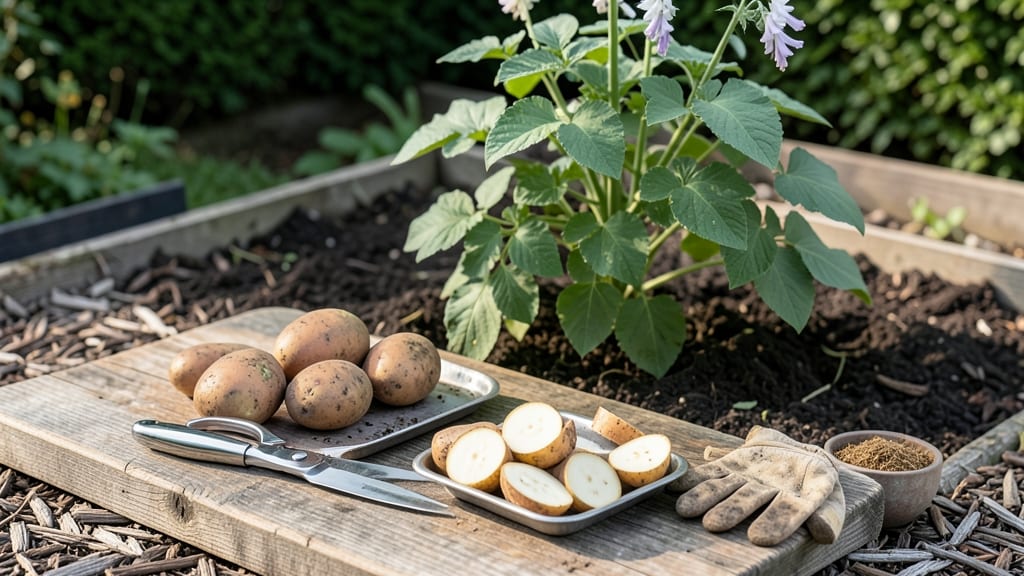
Cutting seed potatoes the right way doubles your harvest without the guesswork. ✂️ I’ve turned a single potato into six strong plants by mastering this simple technique—no green thumbs required. The key is choosing the right tubers, making clean cuts, and letting them heal before planting.
Start with certified disease-free seed potatoes (never grocery store spuds) and cut them into 2-ounce chunks with at least two "eyes" per piece. Use a sharp knife to avoid squishing the potato, and let the cuts dry for 24 hours—this prevents rot and gives you healthier starts.
Store them in a cool, dark place until planting.
You’ll end up with vigorous plants that grow faster and produce more tubers than uncut potatoes. The secret? Each chunk has its own energy source (the stored starch) and multiple growth points (the eyes).
Just plant them 4 inches deep, eyes up, and watch them transform into a lush potato patch.
Works for all varieties—russets, reds, or fingerlings—and saves money while giving you better control over your harvest. Here’s how to do it without the common pitfalls that waste tubers every season.
📚 In This Guide
- What you need
- Instructions
- Tips and common mistakes
- Wrapping up and next steps
What you need
- ● Seed potatoes: Choose certified disease-free, organic, or heirloom potatoes (e.g., Yukon Gold, Red Pontiac, or Fingerlings). Aim for 3–4 medium-sized potatoes per pound of planting area (e.g., 10–12 potatoes for a 10-foot row).
- ● Sharp knife or pruning shears: A clean, stainless-steel knife (like a chef’s knife or a dedicated potato cutter) or sterilized pruning shears for precision cuts.
- ● Cutting board or clean surface: A hard, flat surface (like a wooden board or plastic tray) to protect your counter and keep cuts safe.
- ○ Disinfectant (optional but recommended): Rubbing alcohol (70%+ isopropyl) or bleach solution (1 part bleach to 9 parts water) to sterilize tools and prevent bacterial/fungal spread.
- ● Paper towels or newspaper: For drying cuts and absorbing excess moisture.
- ○ Newspaper or egg cartons (optional): To cure and store cut potatoes for 1–3 days before planting (helps heal cuts and prevent rot).
- ● Timing: Cut potatoes 2–4 weeks before planting (or up to 2 weeks if using immediately). Plant when soil reaches at least 45°F (7°C).
- ● Space: A well-ventilated area (like a garage, basement, or covered porch) for curing cuts if storing before planting.
- ○ Safety: Wear gloves (optional) if you’re squeamish about potato skin or handling raw potatoes.
Step-by-Step instructions for cutting seed potatoes
Here's my foolproof method to slice seed potatoes into perfect chunks that grow into vigorous plants.
🪴 Step 1: Choose and Prep Your Seed Potatoes
Start with certified disease-free seed potatoes—regular grocery store potatoes won't cut it. Look for ones with multiple "eyes" (dormant buds), which will become your new plants. Place them in a bright, cool spot for 4-6 weeks to encourage eye development (this is called "chitting"). You'll see tiny green sprouts forming—those are your future stems.
Wash the potatoes gently to remove dirt, then pat completely dry with a paper towel. This prevents rot when you cut them. I like to work on a clean cutting board with a sharp knife—dull blades crush the potato instead of making clean cuts, which stresses the plant tissue.
✂️ Step 2: Cut Into Stress-Free Chunks
Cut each potato into pieces with 2-3 eyes per chunk—never fewer, or you'll end up with weak, stunted plants. Use your knife to make 1-inch deep cuts between the eyes, ensuring each piece has at least one eye. The reason for depth? Shallow cuts dry out faster and may not root properly.
Here's the thing—don't cut too close to the eyes. Leave a ½-inch margin around each bud. If you slice right through an eye, that piece won't grow. I also avoid cutting through any green skin (which contains toxins) unless it's part of the discard. Place the cut pieces on a tray to dry for 1-2 hours—this lets the cut surfaces callus over, preventing rot later.
💧 Step 3: Cure the Cuts for Stronger Roots
The drying step is critical. After cutting, let the pieces sit in a cool, dry place (around 60-65°F) for 24-48 hours
While they cure, I like to organize the pieces by size. Larger chunks (with 3 eyes) will grow into bigger plants, while smaller ones (2 eyes) are fine for filling gaps. Just don't let them dry out completely—wrinkled potatoes won't sprout well. Once cured, they're ready for planting or storage until your last frost date. Plant the cured chunks 4 inches deep in loose, well-draining soil. The eyes should face upward—if they're buried too deep, the sprouts won't reach the surface. Space them 12 inches apart in rows, giving each plant room to spread. I like to add a handful of compost to the planting hole for extra nutrients. Water gently after planting, but don't soak the soil. You want it moist but not soggy. The key is patience—wait until sprouts emerge 2-3 inches tall before adding more water. This prevents rot and encourages strong root development. Mulch around the base with 2-3 inches of straw to retain moisture and regulate soil temperature.☀️ Step 4: Plant the Chunks at the Right Depth
Tips & tricks for perfect seed potato chunks
These little details make all the difference between healthy plants and wasted effort.
Eye Count Matters: When cutting in Step 2, aim for 2-3 eyes per chunk—this is non-negotiable for strong plants. I've learned the hard way that pieces with only one eye often fail to produce healthy sprouts. If you're working with small potatoes, it's better to keep them whole rather than risk cutting them into single-eye pieces. The extra effort now means fewer disappointments later when your garden starts growing.
Cutting Board Prep: Before you begin, sanitize your cutting board and knife with hot, soapy water. Seed potatoes are susceptible to disease, and any bacteria on your tools can transfer to the cut surfaces. I like to use a dedicated board for gardening tasks to avoid cross-contamination. Also, keep your knife sharp—dull blades crush the potato tissue, which stresses the plant and can lead to slower growth or rot.
Temperature Control: The 60-65°F curing range in Step 3 is ideal, but your home might not be perfectly calibrated. If your kitchen runs warmer, move the tray to a cooler spot like a basement or garage. Too much heat speeds up the drying process and can cause the cut edges to become leathery instead of developing the protective callus. A simple thermometer helps monitor the environment if you're unsure.
Storage Hack: After curing, store your potato chunks in a paper bag in the refrigerator until planting. The breathable material allows for slight moisture exchange while preventing condensation that could cause rot. I like to label bags with the date and variety—this helps track which potatoes are ready for spring planting. Keep them in the crisper drawer where humidity is slightly higher to maintain freshness.
Pro Tips for Cut Seed Potatoes
- These little details make all the difference between healthy plants and wasted effort.
- Eye Count Matters: When cutting in Step 2, aim for 2-3 eyes per chunk—this is non-negotiable for strong plants.
- Cutting Board Prep: Before you begin, sanitize your cutting board and knife with hot, soapy water.
Frequently asked questions
Got questions about cutting seed potatoes?
You’re not alone! Here are some of the most common concerns—and straightforward answers—to help you grow like a pro.
Can I cut seed potatoes too close to planting time?
Ideally, cut seed potatoes 2–3 weeks before planting to let the cut surfaces heal and form calluses. This reduces rot risk and encourages faster sprouting. If you’re in a hurry, a 1-week minimum works, but avoid planting freshly cut potatoes—they’re more prone to disease.
What’s the best temperature to store cut seed potatoes before planting?
Store them in a cool, dark, and humid spot (around 40–50°F)—think basement or garage. Avoid refrigeration (below 40°F), as it converts starch to sugar, making potatoes sweet and less viable. A paper bag with a damp towel keeps them happy until planting!
Do I need to use a sterilized knife when cutting?
Yes!
Disinfect your knife with rubbing alcohol or bleach water (1 part bleach to 9 parts water) to prevent spreading bacteria or fungus. Dirty tools can introduce diseases like blackleg or soft rot, which weaken or kill your potato plants.
What if my cut potatoes don’t sprout after a few weeks?
Don’t panic! Store them in a bright, warm spot (60–70°F) to encourage sprouting. If they’re still dormant, check for shriveling or mold—discard those. Healthy potatoes may take 2–4 weeks to show signs of life. Pro tip: Gently rub the cut sides with a damp cloth to stimulate growth.
Can I reuse leftover potato pieces that didn’t sprout?
Not for planting! Unsprouted pieces lack the energy to grow new plants. But don’t toss them—chop them into small cubes, boil or roast them for mashed potatoes, or toss them into soups. Just don’t plant them again; they won’t produce reliable tubers.
Wrapping up and next steps
Cutting seed potatoes may feel intimidating at first, but with the right tools and technique, you’ll grow healthy, robust plants in no time! Remember: clean cuts, proper curing, and patience are your best friends—soon, you’ll be harvesting a bountiful crop.
Ready to take the next step? Plant those chunks in well-draining soil, give them sunlight, and watch your garden thrive! 🌱✨
Now that you’re prepped, check out our planting guide to keep your potatoes on track for success!