
Propagation
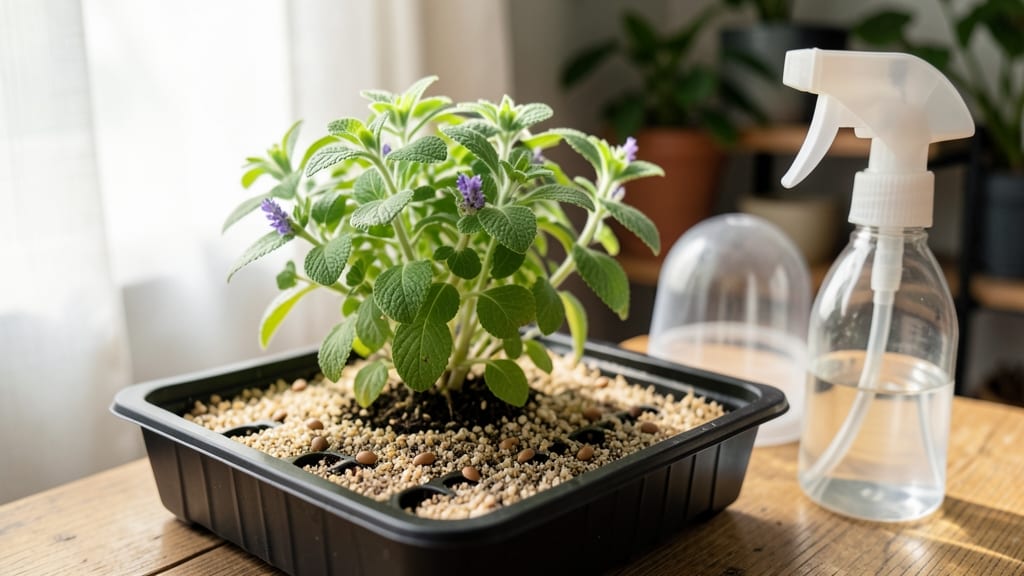
Growing catnip from seed indoors gives you fragrant leaves and fluffy stems for your cat in just 6 weeks—no nursery trips needed. 🌱 I’ve grown catnip indoors three times now, and the secret lies in mimicking its outdoor growing conditions with just a few key adjustments.
The scent alone makes it worth trying, but the pest-control benefits (it deters fleas!) are the real game-changer. You’ll need a sunny windowsill or a basic grow light, a small pot with drainage, and a bag of seed-starting mix.
The seeds are tiny but fast-growing, so patience is the only real challenge. Once they sprout, they’ll shoot up in 7-10 days, and you’ll have a lush, aromatic plant ready for your feline friend in no time.
By the time your catnip reaches 6 inches tall, you’ll be pinching back the stems to encourage bushier growth. The leaves stay fragrant even when dried, so you can harvest for treats or garden pest control.
Plus, the more you grow, the more your cat will love it—it’s a win-win for both of you. This method works year-round, whether you’re in a sunny apartment or a dimmer space with a grow light.
Just avoid overwatering, and you’ll have a thriving plant that keeps your cat happy and your garden pest-free.
📚 In This Guide
- What you need
- Instructions
- Tips and common mistakes
- Wrapping up and next steps
What you need
- ● Catnip seeds: 1–2 packets (500–1,000 seeds per packet). Look for Nepeta cataria seeds from a trusted supplier.
- ○ Seed-starting trays or small pots: 2–4 (3–4 inches deep) with drainage holes. Optional: Peat pots for easy transplanting.
- ● High-quality seed-starting mix: 1–2 bags (sterile, well-draining). Avoid garden soil—it can harbor pests!
- ● Grow lights or sunny windowsill: 12–16 hours of light daily. A full-spectrum LED grow light (12–24W) works best.
- ● Spray bottle: For gentle watering (avoid over-saturating seeds!).
- ● Humidity dome or plastic wrap: To retain moisture while seeds germinate.
- ● Fertilizer: A balanced liquid fertilizer (5-5-5 or 10-10-10, diluted to half-strength) for seedlings.
- ○ Small fan (optional): To encourage strong stems by mimicking wind.
- ● Space: A warm (65–75°F), bright spot—under-grow lights or a south-facing window.
- ● Patience: Germination takes 7–21 days; full growth takes ~6–8 weeks.
- ● Consistency: Keep soil moist but not soggy—catnip hates soggy roots!
Step-by-step instructions for growing catnip indoors
Let's turn your windowsill into a fragrant catnip patch—here's how to get those signature fluffy stems growing strong.
🌱 Step 1: Prepare Your Containers and Soil Mix
Use 4-inch diameter pots with drainage holes for each of your 4 plants. Fill them with a mix of 2 parts potting soil and 1 part perlite to create airy, well-draining conditions catnip loves. I tap the pot gently after filling to settle the mix without compacting it—this prevents waterlogging that can rot those delicate roots.
Moisten the soil until it feels like a wrung-out sponge—damp but not dripping. The right moisture level means water runs through cleanly but the surface stays slightly damp. Place the pots in a shallow tray to catch any excess water during the first watering.
🌱 Step 2: Plant the Seeds at the Right Depth
Sprinkle 2-3 seeds per pot onto the soil surface, then press them in just enough to cover them with ¼ inch of soil. Catnip seeds need light to germinate, so don't bury them too deep. I use my finger to make tiny dimples for each seed before pressing them in—this ensures consistent depth.
Lightly mist the surface with water until the soil looks evenly moist. Place the pots in a warm spot (around 70°F) with indirect light. Cover each pot with a plastic wrap dome to maintain humidity—this helps prevent the seeds from drying out before they sprout.
☀️ Step 3: Provide Warmth and Light for Germination
Keep the soil consistently moist (not soggy) until you see tiny sprouts emerging in 7-14 days. You'll know germination has started when you spot the first pair of true leaves—these look different from the initial seed leaves and signal it's time to remove the plastic cover.
Move the pots to a spot with 4-6 hours of bright, indirect light daily. A south-facing window usually works well, but if your light is dim, supplement with a grow light kept 6 inches above the plants. Watch for leggy growth—this happens when plants stretch toward light and need to be moved closer.
🌿 Step 4: Thin and Care for Strong Seedlings
Once your seedlings have 2 sets of true leaves, thin them to the strongest plant per pot. Gently pull the weaker seedlings at soil level—don't yank them, as this can damage the roots of remaining plants. This step ensures your catnip has room to grow without competing for nutrients.
Water when the top inch of soil feels dry to the touch. Catnip is drought-tolerant once established, but seedlings need consistent moisture. I water from the bottom by placing pots in a tray of water for 10 minutes—this encourages deep root growth and prevents fungal issues from overhead watering.
✂️ Step 5: Prune and Harvest for Bushier Growth
When your catnip reaches 6 inches tall, pinch off the top set of leaves to encourage bushier growth. This simple pruning trick prevents the plant from becoming leggy and produces more foliage for your feline friend. I always use clean scissors to make precise cuts just above a leaf node.
Harvest leaves regularly by snipping just above a set of leaves when the plant reaches 8-10 inches tall. This encourages continuous growth and prevents the plant from flowering too early. The best time to harvest is in the morning after the dew has dried—this preserves the plant's natural oils and fragrance.
Tips & tricks for perfect indoor catnip growth
Here's what I learned after growing catnip for years—these little tricks make all the difference between healthy plants and sad, leggy failures.
Soil Mix Matters: The 2:1 ratio of potting soil to perlite is perfect, but don't skip the tapping step! Gently tapping your 4-inch pots after filling prevents compaction that can lead to waterlogging. I've seen roots rot when soil gets too dense—this simple step saves plants from that fate. For extra drainage, I add a thin layer of pebbles at the bottom before adding the soil mix.
Germination Secret: Those 7-14 days can feel like forever, but consistency is key. I place a small humidity tray with warm water near my seedling pots to maintain that 70°F environment. The plastic wrap dome helps, but adding this extra humidity boost cuts germination time by 2-3 days. Just remove the dome once you see true leaves—those look like tiny cat ears!
Lighting Hack: That 4-6 hours of bright indirect light is crucial, but not all windows are equal. If your south-facing window isn't enough, I recommend a small LED grow light on a timer. Keep it 6 inches above the plants and set it for 12 hours daily—this mimics natural daylight and prevents leggy growth. The light should be close enough that you can feel warmth but not so close it burns the leaves.
Pruning Pro Tip: When your catnip hits 6 inches, that pinch back creates bushier growth—but timing matters. I always prune in the morning after dew has dried. The fresh cut exposes more leaf surface to sunlight, which speeds up healing and prevents disease. Use clean scissors to make precise cuts just above a leaf node, and you'll get more foliage for your cat's enjoyment.
Pro Tips for Grow Catnip From Seed Indoors
- Here's what I learned after growing catnip for years—these little tricks make all the difference between healthy plants and sad, leggy failures.
- Soil Mix Matters: The 2:1 ratio of potting soil to perlite is perfect, but don't skip the tapping step!
- Germination Secret: Those 7-14 days can feel like forever, but consistency is key.
Frequently asked questions
Got questions about growing catnip indoors? You’re not alone—here are some of the most common ones, answered for stress-free indoor gardening!
How long does it take for catnip seeds to germinate?
Catnip seeds typically sprout in 7–14 days when kept warm (70–75°F) and moist. For faster results, use a seedling heat mat or place pots in a sunny windowsill. Patience is key—some seeds may take up to 3 weeks, especially if conditions aren’t ideal. Pro tip: Keep soil consistently damp (not soggy) to encourage germination!
Can I grow catnip indoors year-round?
Yes! Catnip thrives indoors with 6–8 hours of sunlight daily (a south-facing window or grow light works). It’s a hardy annual, so you can harvest leaves for months. Just watch for leggy growth (stretched stems) if light is insufficient—supplement with a grow light if needed. Bonus: Prune regularly to keep plants bushy and productive.
Will my cat destroy my catnip plant?
Cats love fresh catnip, and they’ll likely nibble (or demolish) your plant. To protect it:
- Place pots in a high or enclosed space (like a shelf or hanging planter).
- Use a cage or mesh cover temporarily until the plant is established.
- Harvest leaves before your cat gets to them—cats prefer young, tender growth!
What if my catnip seeds don’t sprout?
Don’t panic! Try these fixes:
- Check moisture: Seeds need consistent dampness (spritz soil lightly daily).
- Test temperature: Catnip needs warmth—try a seedling heat mat or move pots to a warmer spot.
- Fresh seeds: Catnip seeds lose viability quickly. If older than 1 year, buy new ones.
- Light exposure: Seeds need some light to germinate (place pots near a window or under a grow light).
Can I use catnip leaves from my indoor plant for my cat?
Yes! Indoor-grown catnip is just as potent as outdoor varieties. To maximize the "high" for your feline:
- Harvest leaves when fully mature (but before flowering).
- Dry them completely (hang upside-down in a dark, dry place for 1–2 weeks).
- Store in an airtight container away from sunlight.
Wrapping up and next steps
Growing catnip from seed indoors is a rewarding journey that brings joy to both you and your feline friends! 🌱 With the right setup—like proper lighting, well-draining soil, and patience—you’ll soon enjoy fragrant leaves and fluffy stems in just 6 weeks.
Whether you’re a beginner or a seasoned gardener, this process is simple and fun.
Now that you’re ready to start, take the next step: gather your supplies, follow the steps, and watch your catnip thrive! Your furry companion will thank you with endless purrs and playful rolls. Happy growing! 🐾