
Size
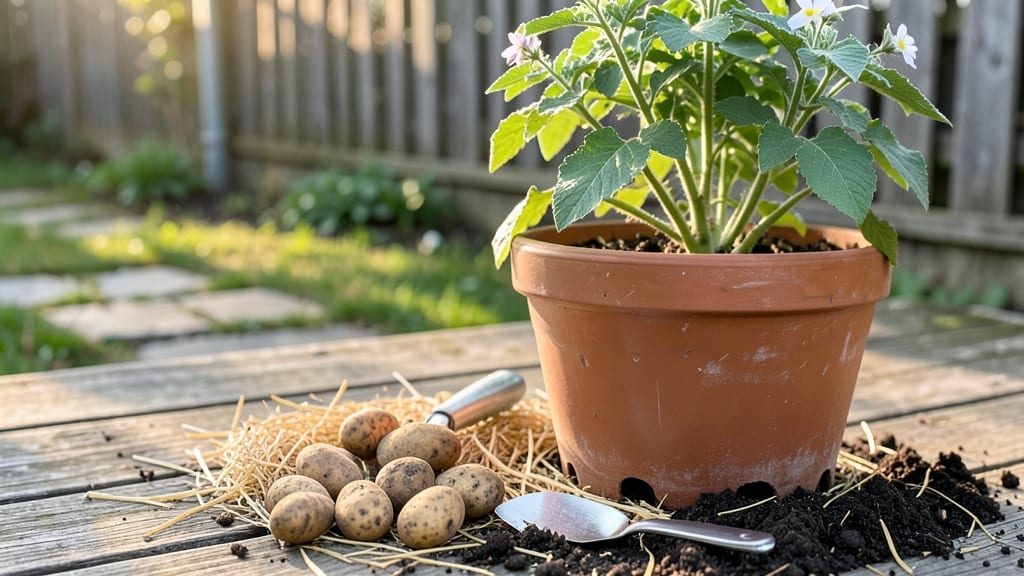
Growing seed potatoes in pots lets you turn a balcony into a harvest goldmine. 🌱 I've filled my small-space garden with crisp, homegrown spuds using nothing but a few containers and some basic supplies—no digging required.
The secret starts with the right varieties (like 'Yukon Gold' or 'Red Pontiac') and a deep enough pot (at least 12 inches) to accommodate growing tubers. You'll plant cut seed potatoes in early spring, keep them in bright light, and watch as stems emerge like green whips within weeks.
By midsummer, you'll be harvesting fingerling-sized potatoes that taste better than anything from the store. The best part? No backbreaking work—just lift the pot and scoop out your bounty when the foliage yellows. Perfect for urban gardens, patios, or even sunny windowsills.
Here's how to get started without the mess of in-ground planting!
📚 In This Guide
- What you need
- Instructions
- Tips and common mistakes
- Wrapping up and next steps
What you need
- ● Seed potatoes: 2–4 certified disease-free seed potatoes (choose varieties like Yukon Gold, Red Pontiac, or Fingerlings). Pro tip: 💡 Buy from a reputable supplier to avoid blight or pests!
- ○ Containers: 5–10 gallon pots (or larger) with drainage holes. Optional: Use fabric grow bags or buckets if pots aren’t available.
- ● Potting mix: Lightweight, well-draining soil blend (avoid garden soil—it compacts!). A mix of 50% potting soil + 50% perlite or compost works well.
- ○ Chitting tray (optional but helpful): A tray or egg carton to pre-sprout potatoes indoors before planting.
- ● Watering can or hose: With a gentle spray nozzle to avoid disturbing soil.
- ● Fertilizer: Balanced, slow-release granular fertilizer (e.g., 10-10-10) or organic options like composted manure.
- ○ Mulch (optional): Straw or shredded leaves to retain moisture and regulate temperature.
- ● Trowel or small shovel: For planting and soil adjustments.
- ● Gloves: To keep hands clean while handling soil and potatoes.
- ● Plant labels: To track varieties and planting dates.
- ● Sunlight or grow lights: A sunny windowsill, balcony, or grow light setup (6–8 hours of light daily).
- ○ Potato harvester (optional): A small fork or hand trowel for gentle digging at harvest time.
Step-by-step instructions for growing seed potatoes in pots
Here’s my foolproof method for turning seed potatoes into a full harvest—no garden required!
🪴 Step 1: Choose and Prepare Your Containers
Pick 5-gallon buckets or large pots with drainage holes—these hold enough soil to support multiple potato tubers. I like fabric grow bags because they’re breathable and prevent root circling. Fill each container ¾ full with loose, well-draining potting mix (never garden soil—it compacts and suffocates roots). Tap the pot gently to settle the mix without packing it down.
Add a 3-inch layer of compost mixed into the top 6 inches of soil. This gives your potatoes a nutrient boost right where they’ll grow. Avoid fresh manure—it can burn tender potato sprouts. If your pots lack drainage, drill holes in the bottom now. Cover them with mesh or broken pottery to keep soil in while letting water out.
🌱 Step 2: Chit and Plant Your Seed Potatoes
Place your seed potatoes in a bright, cool spot (50-60°F) for 2-3 weeks before planting. This lets them develop 1-inch "chits" (sprouts). Once they’ve sprouted, cut larger potatoes into 2-3 pieces, ensuring each has at least 2-3 eyes (the little dimples where sprouts grow). Let the cut pieces dry for 24 hours to prevent rot.
Plant each piece 4 inches deep, with the chits facing up. Space them 6 inches apart in the pot. If your container is wide enough for multiple potatoes, arrange them in a circle—this makes harvesting easier later. Gently firm the soil around them but don’t pack it down. Water lightly to settle the soil without displacing the potatoes.
☀️ Step 3: Provide Light and Water for Healthy Growth
Move your pots to a spot with full sun (6+ hours daily). A south-facing window or grow light works, but natural light is best. As the stems grow, pile soil around them up to the leaves every 2-3 weeks—this encourages more tubers to form underground. Stop earthing up when flowers appear (around 8-10 weeks), as this signals the potatoes are maturing.
Water deeply once a week, letting 1 inch of water soak in. The soil should stay moist but not soggy—potatoes rot in waterlogged conditions. You’ll know it’s time to water when the top inch feels dry. Avoid wetting the leaves to prevent disease. Mulch with 2 inches of straw to retain moisture and keep soil temperatures stable.
⏰ Step 4: Harvest at the Right Time
New potatoes are ready 10-12 weeks after planting when the flowers start fading. For a full harvest, wait until the foliage yellows and dies back (about 14-16 weeks). Gently tip the pot and slide out the potatoes—don’t dig to avoid damaging them. Brush off excess soil and let them cure in a dry, dark place for 1-2 weeks before storing.
If you planted multiple potatoes in one pot, separate them carefully. Smaller "new" potatoes form near the top, while larger ones develop deeper. Store them in a cool (40-50°F), humid place—a paper bag in the fridge works. They’ll keep for 2-3 months this way. Save the best ones for next year’s seed potatoes!
Tips & tricks for perfect potato harvests in pots
Here's what I learned after growing potatoes in containers for years—these tricks make all the difference for a bountiful harvest.
Container Selection Matters: While 5-gallon buckets work, I've found fabric grow bags create the best conditions—they're breathable, prevent root circling, and allow excess water to evaporate naturally. If using plastic pots, add extra drainage holes (cover with mesh to keep soil in). The key is preventing waterlogged soil, which causes rot. For multiple potatoes, use wide, shallow containers—they allow better access to tubers during harvest.
Chitting is Non-Negotiable: The 2-3 week chitting period at 50-60°F isn't optional—it gives you a head start on growth. Place your seed potatoes in a bright windowsill (not direct sun) where they'll develop those crucial 1-inch sprouts. Pro tip: I use egg cartons to hold them upright and prevent rot. Once chitted, cut only when ready to plant—don't store cut pieces longer than 24 hours or they'll dry out.
Soil Layering Technique: When earthing up (adding soil) every 2-3 weeks, I mix in 1/4 cup of balanced fertilizer with each addition. This gives your potatoes a steady nutrient supply as they grow. The top 6 inches should always have that compost boost—this is where most tubers form. And here's a secret: if your stems turn yellow before flowering, they need more nitrogen—add a handful of blood meal to the next soil layer.
Harvesting Without Damage: When it's time to harvest, I gently tip the pot rather than digging. This preserves the soil structure and prevents bruising the tubers. For stubborn potatoes, run a knife around the edges first to loosen them. After harvesting, I brush off soil with a soft cloth—don't wash them! Moisture causes rot during storage. Let them cure in a dark, well-ventilated spot for 24 hours before storing.
Pro Tips for Grow Seed Potatoes In Pots
- Here's what I learned after growing potatoes in containers for years—these tricks make all the difference for a bount...
- Container Selection Matters: While 5-gallon buckets work, I've found fabric grow bags create the best conditions—they...
- Chitting is Non-Negotiable: The 2-3 week chitting period at 50-60°F isn't optional—it gives you a head start on growt...
Frequently asked questions
Got questions about growing seed potatoes in pots? You're not alone! Here are answers to the most common queries to help you grow like a pro—even in small spaces.
What’s the best container size for growing seed potatoes?
Use pots at least 10–12 inches deep and 12–18 inches wide per potato. Larger pots (like 5-gallon buckets) work great for multiple seed potatoes, as they allow room for tubers to expand. If space is tight, opt for fabric grow bags—they’re breathable and reduce rot.
When is the best time to plant seed potatoes in pots?
Plant 4–6 weeks before your last frost date (spring) for a summer harvest. If you’re in a warm climate, you can also try a fall planting for a winter crop. Just ensure soil temps stay above 40°F (4°C)—potatoes hate cold soil!
Can I reuse soil from last year’s potato harvest?
Nope! Never reuse soil from potatoes—it may harbor Verticillium or Phytophthora diseases. Instead, mix fresh potting soil with compost or well-rotted manure for nutrients. Sterilize containers with a 10% bleach solution if reusing them.
How do I prevent pests like wireworms or aphids in potted potatoes?
Keep pests at bay with these tricks:
- Neem oil spray (weekly) deters aphids and beetles.
- Use row covers if squirrels or rabbits raid your pots.
- Rotate crops yearly—don’t grow potatoes in the same spot.
- Check for early blight (brown spots on leaves) and remove infected foliage.
How do I know when my potted potatoes are ready to harvest?
Potatoes are ready when:
- The flowers fade (if they bloom).
- Leaves start yellowing and dying back.
- You can gently dig around the pot and spot small tubers (about 2–3 inches in size).
For larger potatoes, wait until 2–3 weeks after flowering or when the foliage fully dies. Harvest on a dry day to avoid muddy tubers!
Wrapping up and next steps
Growing seed potatoes in pots is a rewarding way to enjoy a homegrown harvest—even with limited space! With the right containers, healthy seed potatoes, and a little patience, you’ll soon be feasting on fresh, homegrown spuds. Start small, experiment with varieties, and watch your green thumbs shine!
Ready to take the next step? Try planting a few more pots or share your success with fellow gardeners—your potato-growing journey is just beginning! 🌱