
Lawn
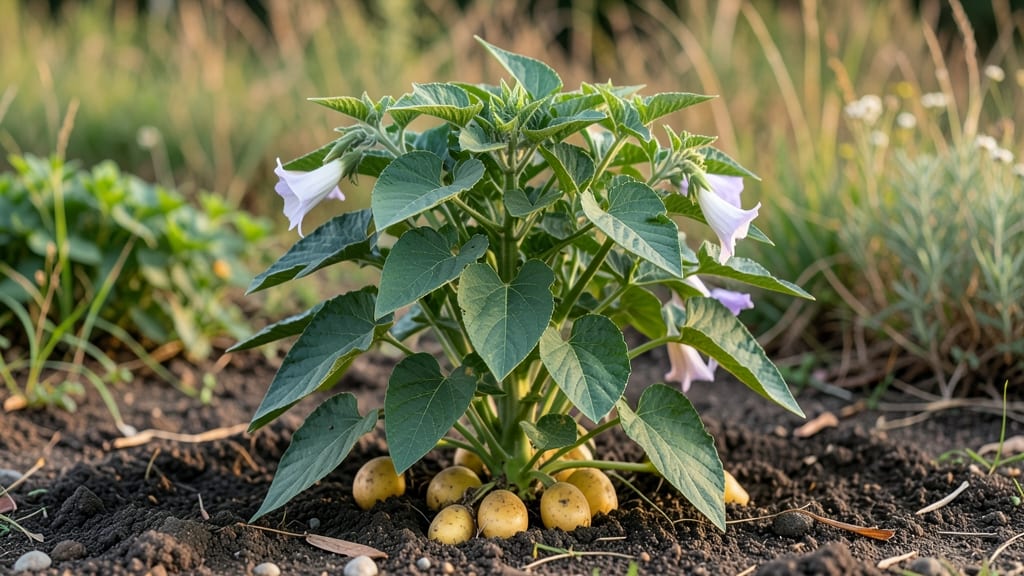
Growing Huckleberry Gold seed potatoes means reliable harvests even when spring lingers cold. 🌱 I’ve planted these in chilly Zone 4 gardens where other varieties fail—this variety thrives when others wilt, producing crisp, buttery tubers with a flavor that rivals store-bought favorites.
The secret starts with soil prep: loosen 12 inches deep, mix in compost, and avoid fresh manure (it burns tender roots). Plant cut seed potatoes 4 inches deep, 12 inches apart, in rows spaced 3 feet apart—this gives plants room to sprawl without crowding.
Early planting (as soon as soil reaches 40°F) lets them establish before pests arrive. You’ll harvest 100-120 days after planting, but the real magic happens when you taste them: their golden flesh stays firm even after cooking, and the skin holds up to long storage.
The first few harvests might be small, but each year’s tubers get bigger as the soil improves. Perfect for early springs, short seasons, or gardeners who hate waiting—just avoid planting too deep or you’ll struggle to dig them later. Here’s how to do it right the first time.
📚 In This Guide
- What you need
- Instructions
- Tips and common mistakes
- Wrapping up and next steps
What you need
- ● Huckleberry Gold seed potatoes: 5–10 lbs (or ~20–40 certified disease-free tubers). Choose organic or heirloom seeds for best results.
- ● Growing containers or garden bed: Containers: 5-gallon pots or larger (1–2 tubers per 5 gallons). Use drainage holes and lightweight materials (fabric grow bags work great!).
- ● Garden bed: Loose, well-draining soil with 6+ inches of depth and partial shade (ideal for cold climates).
- ● High-quality potting mix or compost: 2–3 cubic feet (or enough to fill containers). Opt for a blend with 50% compost and 50% perlite/sand for aeration.
- ● Organic fertilizer: Balanced (5-5-5 or 10-10-10) or potassium-rich (like banana peel tea or greensand) for cold resistance.
- ● Hand trowel or transplanter: For planting and harvesting delicate tubers.
- ● Garden gloves: Protects hands from soil and sharp potato edges.
- ● Row cover or frost cloth: Essential for early spring or late fall planting in cold zones (Zone 3+).
- ● Drip irrigation or watering can: Consistent moisture is key—avoid overhead watering to prevent disease.
- ● Mulch (straw or leaves): Helps retain moisture and regulate soil temp.
- ○ Potato clipper or knife: For harvesting (optional but handy!).
Step-by-step instructions for planting Huckleberry Gold seed potatoes
Here's my foolproof method for growing this cold-hardy variety—tested in early spring when frost still lingers.
🌱 Step 1: Chit Your Seed Potatoes Before Planting
Place your Huckleberry Gold seed potatoes in a cool, bright spot (around 50-55°F) for 4-6 weeks before planting. You'll see small sprouts (called "chits") emerge from the eyes—this jumpstarts growth so plants mature faster in cooler weather. I use egg cartons to keep them organized and prevent rot.
Check weekly for moisture—you want the potatoes slightly damp but not soggy. If you notice any sprouts turning black or mushy, remove that potato immediately. Healthy chits should be firm, white, and about ½ inch long before planting.
🪴 Step 2: Prepare the Planting Site Early
Huckleberry Gold thrives in well-draining soil, so work in 2-3 inches of compost or aged manure 2 weeks before planting. These potatoes are cold-resistant but still need loose soil to prevent rot. Test your soil's moisture—it should crumble when squeezed but not stick together.
Choose a location with 4-6 hours of sun daily, even if it's partially shaded. I plant mine in a raised bed because it warms up faster in spring. Space rows 30-36 inches apart to allow for hill-building later.
🌿 Step 3: Plant Chitted Potatoes at Proper Depth
Dig trenches 4-6 inches deep—deeper planting delays harvest but helps in cold climates. Place each potato with its chits facing up, spacing them 12 inches apart in the row. Cover lightly with soil, leaving the top 1-2 inches exposed so the chits stay above ground.
Water gently right after planting to settle the soil. Avoid heavy watering—you want the soil moist but not waterlogged. Once sprouts reach 4-6 inches tall, mound soil around the base to encourage more tuber formation. Repeat this "hilling" every 2-3 weeks until summer.
☀️ Step 4: Maintain Moisture and Fertility
Keep the soil consistently moist but never soggy—Huckleberry Golds are prone to scab disease in dry conditions. Water 1-2 inches per week, aiming for the base of plants rather than overhead. I use drip irrigation to prevent fungal issues.
Side-dress with compost or balanced fertilizer when flowers appear (usually 6-8 weeks after planting
New potatoes form early—you can dig a few 3-4 weeks after flowering for tender young tubers. For full-sized potatoes, wait until the plant tops die back naturally, usually 90-120 days after planting. Use a fork to gently loosen soil around the base before lifting. Cure potatoes in a dark, 50-60°F space for 1-2 weeks to toughen skins. Brush off excess soil but don't wash them—moisture promotes rot. Store in a cool (35-40°F), humid place for long-term keeping.⏰ Step 5: Harvest at Peak Maturity
Tips & tricks for perfect Huckleberry Gold potato planting
These cold-hardy tubers reward patience—here's how to maximize your harvest from start to finish.
Chitting Strategy: The 4-6 week chitting period is your secret weapon for early growth, especially in cool climates. Place potatoes in a well-ventilated cardboard box with bright indirect light—this mimics spring conditions without direct sun damage. I've found that positioning them near an east-facing window gives just enough light without overheating. The goal is to develop chits that are firm and white, not leggy or yellowed, which indicates too much light or heat.
Soil Preparation Insight: The 2-3 inches of compost you work into the soil should be fully decomposed—fresh manure can burn tender potato roots. I like to mix in a handful of wood ash (sparingly) to raise pH slightly, as Huckleberry Golds prefer a range of 5.0-6.0. Test your soil moisture by squeezing a handful—it should crumble like cookie dough when dry, not stick together like wet sand. This prevents both waterlogging and drought stress.
Planting Depth Secret: While the instructions call for 4-6 inches deep, I've found that in truly cold climates, planting 6-8 inches deep with just the top 1-2 inches exposed gives even better frost protection. The key is keeping those chits above ground—this prevents rot while allowing roots to establish in warmer soil below. Use a ruler to ensure consistent depth across your planting trenches.
Hilling Technique: When your plants reach 4-6 inches tall, mound soil around the base to encourage tuber formation. I do this every 2-3 weeks until summer, adding about 4-6 inches of soil each time. This creates a natural barrier against light, preventing potatoes from turning green (and toxic). Use a hoe to create gentle mounds rather than piling soil directly against stems, which can cause rot.
Pro Tips for Huckleberry Gold Seed Potatoes
- These cold-hardy tubers reward patience—here's how to maximize your harvest from start to finish.
- Chitting Strategy: The 4-6 week chitting period is your secret weapon for early growth, especially in cool climates. ...
- Soil Preparation Insight: The 2-3 inches of compost you work into the soil should be fully decomposed—fresh manure ca...
Frequently asked questions
Got questions about growing Huckleberry Gold seed potatoes? You’re not alone! This cold-hardy variety is a favorite, but every gardener has a few burning questions—especially when it comes to timing, care, and troubleshooting. Below, we’ve rounded up the most common queries to help you grow a thriving harvest with confidence.
What makes Huckleberry Gold potatoes different from other varieties?
Huckleberry Gold potatoes are prized for their exceptional cold resistance—they thrive in cooler climates and can even handle light frosts. They also produce high yields of golden-yellow, waxy-skinned tubers with a buttery texture, making them perfect for roasting, mashing, or frying. Plus, their disease resistance means fewer pesticides and more hassle-free growing!
When is the best time to plant Huckleberry Gold seed potatoes?
For optimal growth, plant your seed potatoes 2–4 weeks before your last expected frost in spring. They can handle cooler soil, so don’t wait until the ground is warm—just make sure it’s workable (around 40–50°F). In colder regions, you can even plant them as early as March! Pro tip: If you’re in a short-season area, try a second planting in early summer for a fall harvest.
How do I protect Huckleberry Gold potatoes from frost or late-season cold snaps?
Huckleberry Golds are tolerant of light frost, but prolonged cold or hard freezes can still damage emerging plants. Use row covers or mulch (straw or leaves) to insulate the soil and protect tender shoots. If a late frost threatens, consider covering plants with old blankets or cardboard until temperatures rise. Once plants are established (6+ inches tall), they’ll bounce back resiliently!
Can I plant Huckleberry Gold potatoes in containers or raised beds?
These potatoes adapt well to containers (at least 12–18 inches deep) or raised beds, making them ideal for small spaces, patios, or urban gardens. Use a lightweight, well-draining potting mix and plant seed potatoes 4–6 inches deep. Just remember to hill soil around stems as plants grow to encourage tuber formation. Containers also help deter pests like wireworms!
What should I do if my Huckleberry Gold potatoes develop blight or pests?
While Huckleberry Golds are disease-resistant, blight (especially late blight) can still occur in humid conditions. At the first sign of brown spots or wilting leaves, remove affected foliage and water at the base (not overhead) to reduce spread. For pests like Colorado potato beetles, handpick adults or use neem oil as a natural deterrent. Crop rotation and healthy soil go a long way in prevention!
Bonus Tip: How do I store harvested Huckleberry Gold potatoes?
After harvest, cure potatoes in a dark, well-ventilated space (50–60°F) for 1–2 weeks to toughen skins. Then store them in a cool (35–40°F), humid (85–90%) environment, like a root cellar or paper bag. Avoid plastic bags—they trap moisture and cause rot! With proper storage, these potatoes stay fresh for 4–6 months.
Wrapping up and next steps
Growing Huckleberry Gold seed potatoes is your ticket to a reliable, cold-hardy harvest—even in less-than-ideal climates! 🌱 These versatile spuds thrive in cooler weather, resist disease, and deliver buttery, flavorful tubers perfect for everything from mashed potatoes to crispy fries.
Whether you're a seasoned gardener or a curious beginner, their adaptability makes them a smart choice for any yard.
Ready to plant your patch? Start by sourcing certified seed potatoes, prepping your soil, and marking your calendar for early spring or late fall. With a little patience and care, you’ll be savoring homegrown goodness in no time. Happy digging! 🚜✨