
Lawn
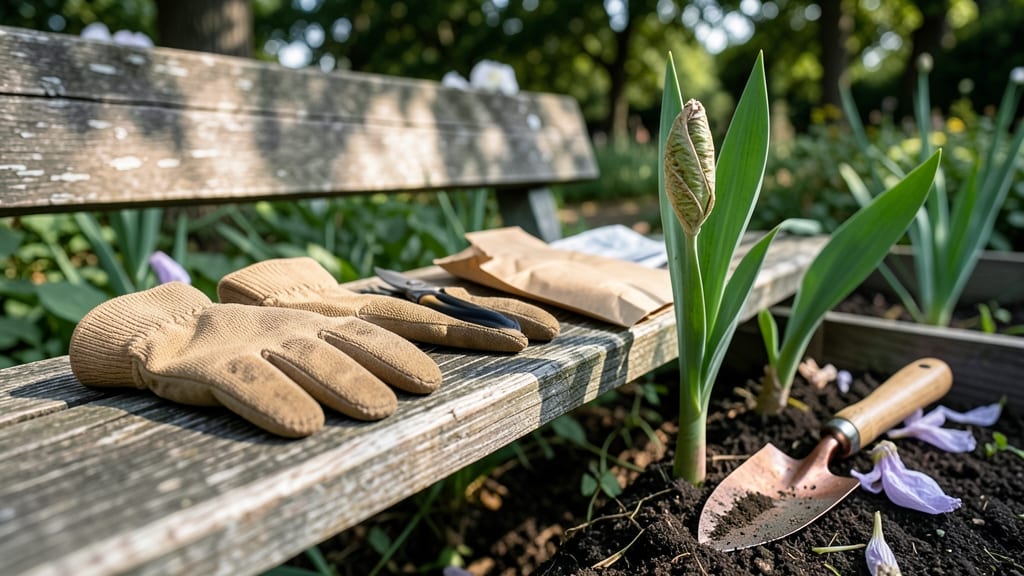
Harvesting iris flower seed pods at the right moment means spring blooms you'll actually get to see—no more waiting years for seedlings to mature. 🌱 The key is patience: pods turn from green to brown over 6-8 weeks, signaling they're ready to collect, but rush it and you'll end up with shriveled seeds that won't germinate.
Start by gently twisting mature pods from the stem (no cutting—they're fragile). Inside, you'll find flat, papery seeds that look more like tiny brown coins than what you'd expect.
Store them in a paper envelope in a cool, dry place until planting—moisture is the enemy here, as damp seeds rot faster than they sprout.
Once you're ready to plant, scatter seeds on well-draining soil in early fall (they need cold stratification to break dormancy). Press them just ¼ inch deep—no covering needed—and keep the soil lightly moist.
Within 1-2 years, you'll see sword-shaped leaves emerge, followed by blooms that'll make your neighbors ask, "What'd you do differently?"
Pro tip: Iris seeds are temperamental, so don't expect 100% germination. Even with perfect conditions, 20-30% of seeds might not make it—but the ones that do will reward you with clumps that multiply faster than weeds. Start small, and scale up once you've mastered the timing.
📚 In This Guide
- What you need
- Instructions
- Tips and common mistakes
- Wrapping up and next steps
What you need
- ● Mature iris seed pods: Fully dried, brown pods (harvest when they split open naturally or are slightly cracked). Aim for at least 5-10 healthy pods per plant for best results.
- ● Pruning shears or sharp scissors: Sterilized to prevent disease transfer (rubbing alcohol wipe works!).
- ● Brown paper bags or breathable mesh sacks: 2-3 medium-sized bags (1 per 5-10 pods) to store seeds while drying.
- ● Labeling tags or masking tape + marker: To note harvest date and iris variety (e.g., "Germanica – June 2024").
- ○ Gloves (optional but recommended): Protect your hands from iris rhizome sap, which can irritate skin.
- ● Small hand trowel: For gently digging around rhizomes if pods are low to the ground.
- ● Newspaper or cardboard: Lay on a flat surface to spread pods for drying (avoids moisture buildup).
- ○ Fine-mesh sieve or sifter: Optional for separating seeds from chaff later.
- ○ Spray bottle with water: Optional for lightly misting pods if your climate is very dry.
- ● Seed envelope or airtight container: For long-term storage (e.g., paper envelopes or glass jars with silica gel).
- ● Patience: Wait until pods are fully brown and dry (typically 6-8 weeks after flowering). Harvesting too early = non-viable seeds!
- ● Dry, overcast day: Avoid harvesting in direct sun or rain to prevent mold or premature seed release.
- ● Knowledge of iris varieties: Some irises (like bearded irises) produce better seeds than others—research your type!
How to harvest iris seed pods for healthy spring blooms
Here's the simple method I use to collect iris seed pods without stressing your plants.
🌱 Step 1: Identify Mature Seed Pods
Wait until the pods turn from green to a tan or brown color—this signals they're fully mature and ready for harvest. I check my irises in late summer to early fall when the foliage starts yellowing naturally. The pods should feel dry and papery to the touch, not at all plump or green.
Gently squeeze the pod—if it makes a dry rattling sound when shaken, it's ready. Avoid harvesting pods that are still green or soft, as the seeds inside won't be viable. I always harvest on a dry, sunny morning so the pods have time to dry completely before storage.
✂️ Step 2: Carefully Remove Pods From Stems
Use clean, sharp pruning shears to snip the pods directly from the stem, leaving about 1 inch of stem attached. This prevents damaging the plant's energy reserves. I work slowly, removing only 2-3 pods per plant to avoid overstressing the iris.
Place the harvested pods in a paper bag (not plastic) to allow airflow while they finish drying. If you notice any pods splitting open on their own, transfer those seeds immediately to a small envelope for storage—they won't last long once exposed.
🪴 Step 3: Dry and Store Seeds Properly
Let the pods dry in a cool, dark place for 1-2 weeks, checking occasionally to ensure they're completely dry. I place mine on a wire mesh rack to prevent mold. Once fully dry, gently crush the pods over a white tray to release the seeds—iris seeds are tiny, so I use a fine mesh sieve to catch any that fall through.
Store the seeds in a sealed envelope with a moisture absorber packet in a cool, dry location (like a refrigerator). Iris seeds stay viable for 1-2 years this way. Label each envelope with the harvest date and iris variety—I can't tell you how many times I've forgotten which seeds I planted!
☀️ Step 4: Prepare for Spring Planting
In early spring, soak the seeds in lukewarm water for 24 hours before planting to soften the tough outer coating. I use a small glass jar with a lid to keep them hydrated. After soaking, plant them ¼ inch deep in a well-draining potting mix in 4-inch pots.
Place the pots in a bright, indirect light spot (like a north-facing window) and keep the soil evenly moist but not soggy. Germination can take 4-8 weeks, so patience is key. Once seedlings emerge, provide full sun and gradually harden them off before transplanting outdoors in late spring.
Tips & tricks for perfect iris seed pod harvesting
Avoid these common pitfalls—and I'll show you how to maximize your iris seed yield without harming your plants.
Timing Secret: Harvest only when pods are completely tan or brown, and the foliage shows natural yellowing. I've learned the hard way that harvesting too early (when pods are still green) results in non-viable seeds. The dry rattling sound when shaken is your golden cue—this means the seeds inside are fully developed and ready for collection.
Plant Preservation: Never remove more than 2-3 pods per plant, and always leave 1 inch of stem attached. I once took too many pods from a single iris, and it never bloomed again the following year. The stem attachment helps the plant recover its energy reserves, while limiting the number of pods prevents stress that could affect next year's blooms.
Storage Wisdom: For the 1-2 week drying period, I use a wire mesh rack in a cool, dark place to prevent mold. If you notice any pods splitting open during this time, transfer those seeds immediately to a sealed envelope—they won't stay viable once exposed to air. The moisture absorber packet in your storage envelope is crucial for maintaining seed viability beyond the initial 1-2 years.
Spring Planting Strategy: When you're ready to plant in early spring, I recommend using a small glass jar with a lid for the 24-hour soaking period. This keeps the water level consistent and prevents spills. After planting, maintain even moisture by checking soil daily—iris seeds need consistent dampness but won't tolerate soggy conditions, which can cause rot before germination.
Pro Tips for Iris Flower Seed Pod
- Avoid these common pitfalls—and I'll show you how to maximize your iris seed yield without harming your plants.
- Timing Secret: Harvest only when pods are completely tan or brown, and the foliage shows natural yellowing.
- Plant Preservation: Never remove more than 2-3 pods per plant, and always leave 1 inch of stem attached.
Frequently asked questions
Got questions about harvesting iris flower seed pods? You’re not alone! Here are some of the most common concerns—and their straightforward answers—to help you grow vibrant spring blooms with ease.
When is the best time to harvest iris seed pods?
Harvest iris seed pods after they turn brown and papery but before they split open (usually late summer to early fall). If left too long, seeds scatter, reducing viability. Aim for a dry, sunny day to preserve seed quality.
How long does it take for iris seeds to germinate?
Patience is key! Iris seeds often need cold stratification (4–6 weeks in the fridge) before planting. Once sown, germination can take anywhere from 6 months to 2 years—don’t rush it! Keep soil moist and consistent.
Can I grow irises from seed pods if I don’t have a garden?
Seed pods thrive in containers with well-draining soil. Use pots at least 6 inches deep, place them in a sunny spot (or under grow lights), and keep soil lightly moist. Just avoid overcrowding—iris roots need room to stretch!
Why aren’t my iris seed pods producing seeds?
If pods stay green or shrivel without seeds, check for pollination issues (irises need bees or wind) or over-fertilizing (too much nitrogen = fewer blooms). Try hand-pollinating with a soft brush or plant companion flowers to attract pollinators.
How do I store iris seed pods if I can’t plant them right away?
Store pods in a paper bag (not plastic!) in a cool, dry place. Keep them away from moisture to prevent mold. Label the bag with the harvest date—seeds stay viable for 1–2 years if stored properly.
Still stumped? Drop your question below—we’re happy to help you grow those dreamy iris blooms!
Wrapping up and next steps
Harvesting iris flower seed pods is a rewarding way to ensure vibrant spring blooms year after year—without the stress!
By following the right steps, you’ll protect those delicate seeds and give your garden a head start on beauty. 🌸 Whether you’re a seasoned gardener or just starting, patience and care are your best tools.
Ready to turn those pods into next season’s showstopper blooms? Grab your gloves, mark your calendar, and start planning your spring garden layout. Your future irises will thank you! 🌱