
Lawn
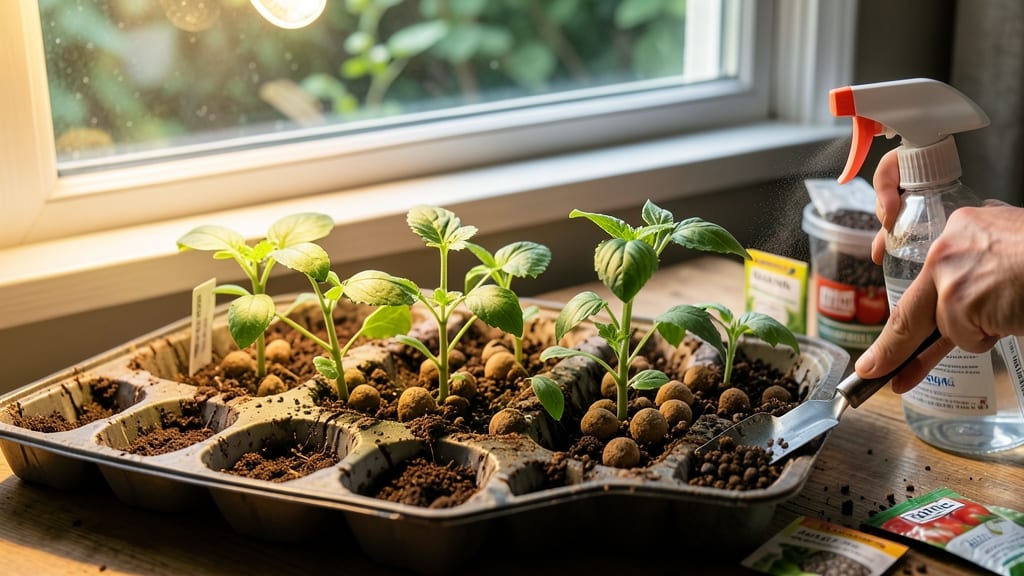
Jiffy seed starter trays how to use turns weak seedlings into sturdy plants with minimal fuss. 🌱 I’ve nursed dozens of delicate seedlings through their early stages using these little peat pots, and they’re the secret to avoiding the dreaded "leggy" sprout syndrome. The key lies in their perfect balance of moisture retention and air circulation—no more soggy bottoms or moldy messes. Start by soaking the trays in water for 10 minutes until they’re fully expanded. Fill each cell with your seed mix, tap it gently to settle, then plant seeds at the recommended depth (usually twice their width). Water lightly from the bottom to avoid displacing seeds, and keep them in a warm, bright spot—out of direct sunlight until sprouts appear. Once seedlings have two true leaves, they’re ready for bigger pots or the garden. The trays break down naturally when planted, so you won’t disturb roots during transplanting. My basil and tomato seedlings grow so strong they outpace store-bought plants every time. This method works for herbs, veggies, and flowers alike. Just avoid tiny seeds like carrots—they need finer soil. Here’s how to make it foolproof!
📚 In This Guide
- What you need
- Instructions
- Tips and common mistakes
- Wrapping up and next steps
What you need
- ● Jiffy seed starter trays: 1-2 trays (50-100 cells per tray, depending on seed size). Choose biodegradable versions for easy transplanting!
- ● Seedling mix: 1 bag (2-4 quarts). Opt for a lightweight, sterile mix (e.g., 50% peat moss, 30% perlite, 20% vermiculite).
- ● Seeds: Your preferred variety (check seed packet for spacing needs—some seeds need individual cells!).
- ● Water: Room-temperature, dechlorinated water (let tap water sit out for 24 hours or use filtered water).
- ● Spray bottle (16 oz) or watering can with a fine rose (avoid over-saturating the mix).
- ● Tray lid or plastic wrap: To retain moisture (if your trays don’t come with one).
- ● Flat surface or seedling tray stand: Elevate trays for airflow (prevents mold!).
- ● Grow lights or sunny windowsill: 12-16 hours of light daily (south-facing window or LED grow lights work best).
- ● Humidity dome: Keeps moisture in during germination (some trays include one).
- ● Plant labels: To track seed varieties (toothpicks + masking tape work too!).
- ● Fertilizer: Diluted fish emulsion or seaweed extract (1 tsp/gallon) for a nutrient boost after sprouts appear.
- ● Tweezers or seedling dibber: For precise seed placement in tiny cells.
Step-by-step instructions for using Jiffy seed starter trays
Here's how I get foolproof germination with zero fuss—just follow these simple steps.
🌱 Step 1: Soak the Peat Pellets for 10 Minutes
Place the Jiffy seed starter trays in a shallow container filled with warm water (around 70°F). The pellets will absorb water and expand to about 2-3 times their original size—this takes roughly 10 minutes. Don't skip this step; dry pellets won't hold moisture for germination.
Once fully soaked, the pellets should feel firm but still slightly springy, like a damp sponge. Drain any excess water from the tray—you don’t want them soggy, just evenly moist. I like to tap the tray gently on the counter to help them settle into the cells.
💧 Step 2: Plant Seeds at the Right Depth
Use the pre-marked planting guides on the tray to place 1-2 seeds per cell, depending on how crowded your seedlings can handle. Most seeds should go ¼ inch deep—just enough to cover them lightly. I tap the seed packet gently to release one seed at a time; planting too many leads to weak, competing seedlings.
For larger seeds like beans or peas, you can plant them a little deeper (½ inch). Press them in gently but don’t pack the soil—you want roots to push through easily. After planting, mist the surface lightly with water to ensure good seed-to-soil contact.
☀️ Step 3: Cover and Keep Warm Until Germination
Place the tray under a clear plastic dome or wrap it in plastic wrap to retain moisture and warmth. Germination works best at 70-75°F, so if your home runs cooler, consider using a seedling heat mat. You’ll see sprouts in 5-14 days, depending on the plant type.
Check daily but avoid lifting the cover—condensation inside is what keeps humidity high. Once 50% of seeds sprout, remove the cover immediately to prevent damping-off, a fungal disease that collapses seedlings overnight. You’ll know it’s time when you see the first tiny green shoots pushing through.
🌿 Step 4: Provide Light and Thin as Needed
Move the tray to a bright, indirect light source (like a south-facing window) or under grow lights for 14-16 hours daily. Seedlings need light to prevent leggy growth—if they stretch toward the window, your light is too far away. Strong seedlings have thick stems and deep green leaves spaced close together.
When the seedlings have 2-3 true leaves (not the first tiny cotyledons), thin to the strongest one per cell. Snip the weaker seedlings at the base with scissors—this avoids disturbing the roots of the plant you’re keeping. Water gently from the bottom by placing the tray in ½ inch of water for 10-15 minutes.
⏰ Step 5: Harden Off Before Transplanting
Two weeks before your last frost date, start hardening off the seedlings. Place them outside in a shaded, sheltered spot for 1-2 hours the first day, gradually increasing exposure over 7-10 days. This helps them adjust to wind, sun, and temperature swings before moving to the garden.
Watch for wilting or yellowing leaves—these are signs they’re not ready yet. Once they tolerate a full day outside without stress, they’re ready to transplant. Pop the Jiffy pellets out whole—they’ll break down in the soil, giving roots a cozy, nutrient-rich home.
Tips & tricks for perfect seedling sprouting with Jiffy trays
These simple tricks will help you avoid common pitfalls and get the strongest, healthiest seedlings every time.
Soaking Secrets: The 10-minute soak is non-negotiable—this is when the peat pellets truly activate. I've learned the hard way that skipping this step leads to uneven moisture distribution, which can cause some cells to dry out while others stay too soggy. After draining, give the tray a gentle shake to help the pellets settle properly into each cell. This creates a snug fit that prevents seeds from shifting during germination.
Planting Precision: When planting your 1-2 seeds per cell, use a toothpick to create a small hole for each seed—this ensures consistent depth. For most seeds at ¼ inch, I find a toothpick works perfectly, but for larger seeds like beans at ½ inch, you might need to use your finger. The key is to avoid pressing too hard, which can compact the peat and hinder root growth.
Germination Conditions: That 70-75°F temperature range is ideal, but if your home runs cooler, a simple seedling heat mat (around $15) makes all the difference. I've seen germination times double when keeping trays in cool basements—don't let that happen to you! Also, place a small dish of water near the tray to boost humidity without lifting the cover, which can disrupt the delicate moisture balance.
Lighting Strategy: For the 14-16 hours of daily light, position your grow lights about 2-3 inches above the seedlings. I use a timer to automate this so I never forget. Watch for leggy seedlings (long stems with small leaves)—this means they're stretching toward light. If you notice this after just a few days, move the lights closer immediately to encourage stronger stems.
Pro Tips for Jiffy Seed Starter Trays How To Use
- These simple tricks will help you avoid common pitfalls and get the strongest, healthiest seedlings every time.
- Soaking Secrets: The 10-minute soak is non-negotiable—this is when the peat pellets truly activate.
- Planting Precision: When planting your 1-2 seeds per cell, use a toothpick to create a small hole for each seed—this ensures consistent depth.
Frequently asked questions
Got questions about using Jiffy seed starter trays? You’re not alone! Here are answers to the most common ones to help you grow confidently.
How do I know when to transplant seedlings from Jiffy trays?
Transplant when seedlings have 2-3 true leaves (not just the initial seed leaves) and fill the tray’s root space. Gently squeeze the peat pot to check for roots circling the bottom—if they’re snug, it’s time! Harden off seedlings by placing them outside for a few hours before full transplant for 1-2 weeks.
Can I use Jiffy trays indoors without sunlight?
Yes! Place trays under grow lights (12-16 hours/day) or on a sunny windowsill. South-facing windows work best, but supplement with lights if seedlings look leggy (stretched and weak). Avoid heat sources like radiators, which can dry out the peat too quickly.
Why are my Jiffy trays drying out too fast?
Peat-based trays dry quickly, especially in dry air. Bottom-watering (place trays in a shallow tray of water) or misting lightly keeps moisture even. Avoid overwatering—soggy trays can suffocate roots. A humidity dome (plastic wrap over trays) helps retain moisture for the first week.
What if I don’t have Jiffy trays—what’s a good alternative?
No problem! Use biodegradable pots (like coconut coir or paper), small plastic cups with drainage holes, or even egg cartons (cut into squares). Just ensure they’re 2-3 inches deep for most seeds. Mix your soil with perlite or vermiculite for better drainage.
Can I store unused Jiffy trays for later use?
Store them in a cool, dry place (like a sealed container) until planting season. Avoid humidity or heat, which can degrade the peat. If trays feel brittle or crumble easily, they’ve dried out—soak them in water for 10 minutes before reuse. Label them by seed type or date for organization!
Wrapping up and next steps
Mastering Jiffy seed starter trays is your golden ticket to nurturing vibrant seedlings with minimal fuss! 🌱 These eco-friendly trays simplify germination, ensuring stronger roots and healthier plants. Whether you're a gardening newbie or a seasoned green thumb, the key is patience, proper hydration, and a little sunlight.
Now that you’re armed with the know-how, grab those trays and start your next gardening adventure! Ready for the next step? Experiment with different seeds or explore transplanting your seedlings into the garden or larger pots. Happy growing! 🌿