
Propagation
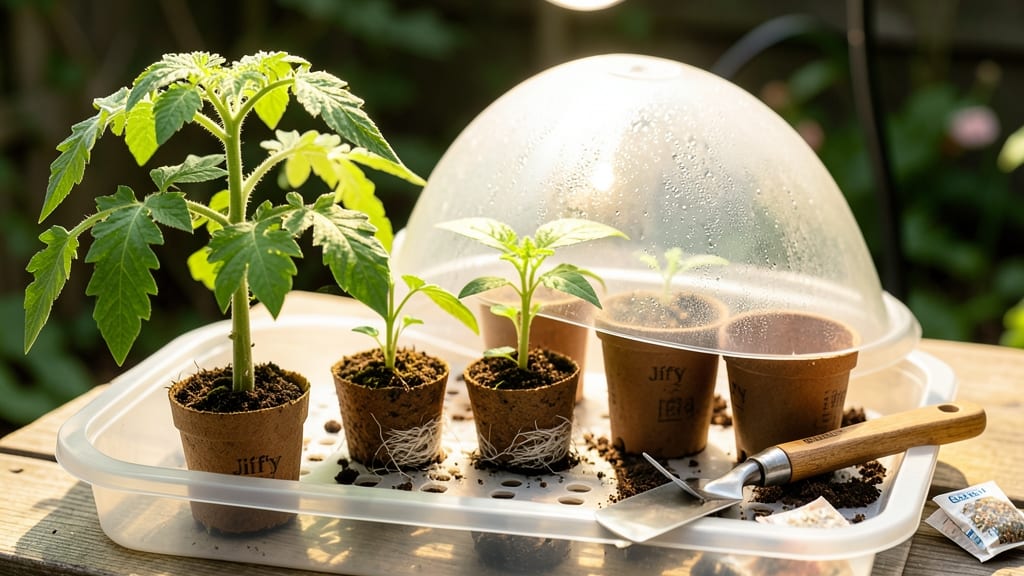
A Jiffy seed starting kit turns messy seed-starting into a foolproof system. 🌱 These peat pods eliminate the guesswork of soil mixes, pots, and transplant shock—just twist, plant, and watch your seeds germinate without fuss.
I’ve used them for years, and they’ve saved me from drowning seedlings or struggling with tangled roots.
The pods hold just enough moisture to keep seeds happy while preventing rot, and their biodegradable design means you can pop them straight into the garden later. No need for complicated setups or expensive equipment—just water, light, and patience. Perfect for beginners or anyone tired of seed-starting headaches.
You’ll end up with sturdy seedlings ready for transplanting in just a few weeks, with minimal fuss. The pods break down naturally, so your plants won’t suffer from root disturbance. Plus, they’re compact enough to fit on a sunny windowsill or under grow lights.
Compared to traditional seed-starting methods, Jiffy pods cut down on mess and stress—no repotting, no soil spills, and no wasted space. Just focus on giving your seeds the right conditions, and you’ll see faster, healthier growth. Here’s how to make the most of them!
📚 In This Guide
- What you need
- Instructions
- Tips and common mistakes
- Wrapping up and next steps
What you need
- ● Jiffy Seed Starting Pods – A pack of 50–100 pods (depending on your needs; standard kits often include 50). Look for the Jiffy-7® or Jiffy-7B® pods for optimal drainage.
- ● Seedling tray or flat – A shallow tray with drainage holes to hold the pods. A 10"x20" tray is ideal for most starter kits.
- ● Potting soil or seed-starting mix – A lightweight, sterile mix designed for seedlings (avoid garden soil—it’s too dense!). A 4–5 quart bag is plenty for beginners.
- ● Seeds – Choose fast-growing varieties like lettuce, basil, or marigolds for quick results. Check seed packets for spacing recommendations.
- ● Watering can or spray bottle – A gentle spray bottle (for misting) or a can with a fine rose attachment to avoid disturbing the pods.
- ● Grow lights or sunny windowsill – A full-spectrum LED grow light (12–16 hours/day) or a south-facing window with 6+ hours of sunlight.
- ○ Humidity dome or plastic wrap – Optional but helpful for retaining moisture while seeds germinate.
- ● Heat mat – Speeds up germination for slow-starting seeds (like tomatoes or peppers). Look for a 10"x20" mat with adjustable temperature settings.
- ● Fertilizer (diluted) – A balanced, water-soluble fertilizer (5-10-5 or 10-10-10) to nourish seedlings after germination.
- ● Twine or labels – To mark pods by seed type and planting date.
- ● Fan (small clip-on) – Encourages stronger stems by providing gentle airflow (run it 24/7 for 5–10 minutes daily).
How to use a Jiffy seed starting kit for perfect germination
Here’s the simple, foolproof way to get strong seedlings without the fuss of traditional seed-starting.
🌱 Step 1: Soak the Jiffy Pods for 10 Minutes
Fill a shallow tray with room-temperature water and submerge the Jiffy pods completely. Let them soak for exactly 10 minutes—they’ll expand to about twice their original size and feel firm to the touch. Over-soaking weakens the structure, so don’t let them sit longer. Once expanded, drain any excess water and let them rest for 5 minutes on a paper towel to remove surface moisture.
This step is critical: the pods need to absorb water evenly to create the ideal germination environment. If they feel spongy but still small, soak another 2-3 minutes. You’ll know they’re ready when they hold their shape and don’t collapse when gently squeezed.
🌱 Step 2: Plant Your Seeds Directly Into the Pods
Open the pod by gently pulling the top apart—no twisting needed. For most seeds, plant 1-2 seeds per pod at a depth of ¼ inch, roughly twice the seed’s diameter. Press them lightly into the soil to ensure good contact. I like to use a toothpick for precision, especially with tiny seeds like lettuce or basil.
Cover the seeds with a light sprinkle of the pod’s soil mix—just enough to hide them. Avoid pressing down; you want the soil to stay loose so roots can penetrate easily. If you’re planting larger seeds like beans or peas, you can skip the covering entirely.
💧 Step 3: Mist and Cover for Germination
Use a spray bottle to mist the pods until the soil looks evenly damp but not soggy. The goal is to keep the environment humid without waterlogging. Place the pods in a seedling tray or a shallow container, then cover them with a clear plastic dome or plastic wrap to trap moisture and warmth.
Set the tray in a warm location (ideally 70-75°F)—a sunny windowsill, under a grow light, or on top of a refrigerator works well. Check daily for condensation on the dome; if it’s dry, mist lightly again. Most seeds germinate in 5-14 days, depending on the variety. You’ll see the first sprouts push through the soil like tiny green arrows.
☀️ Step 4: Provide Light and Ventilate Seedlings
Once the first true leaves appear (not the initial seed leaves), remove the dome immediately to prevent damping-off disease, which causes seedlings to collapse. Place the pods under bright, indirect light for the first 2-3 days to help them acclimate. After that, shift them to 12-16 hours of light daily—a grow light is best for consistent results.
Keep the soil moist but not wet—water from the bottom by placing the tray in ½ inch of water for 10-15 minutes every 2-3 days. You’ll know the moisture level is right when the pods feel damp but not heavy. Avoid overhead watering, which can dislodge seedlings or spread disease.
⏰ Step 5: Transplant Directly Into the Garden or Pots
When seedlings have 3-4 true leaves (usually 3-6 weeks after planting), they’re ready to move. The beauty of Jiffy pods is that you can plant them whole—no need to disturb the roots. Simply tear the pod open and place the seedling 1 inch deeper than it was growing in the pod to encourage stronger root development.
Water deeply after transplanting to help the roots establish. If planting outdoors, do it on a cloudy day or in the early evening to reduce stress. For container gardening, use pots that are at least 4 inches deep to give roots room to grow. You’ll notice new growth within 5-7 days, signaling a successful transition.
Tips & tricks for perfect Jiffy seed starting
Here's what I've learned after years of using Jiffy pods—these little details make all the difference between weak seedlings and thriving plants.
Soaking Precision: The 10-minute soak is non-negotiable, but here's the secret: use water that's just slightly warmer than room temperature (around 70°F). This helps the pods expand faster without weakening their structure. After draining, I place them on a clean kitchen towel rather than paper towels—they absorb excess moisture better and create less friction when handling. This step prevents that dreaded "mushy pod" scenario that can smother seeds.
Seed Spacing Secret: In Step 2, when planting your 1-2 seeds per pod, here's a pro move: use a toothpick to create a tiny divot in the soil mix. This ensures consistent depth and prevents seeds from getting buried too deeply. For larger seeds like beans, I actually press them just slightly into the soil rather than covering them—this gives them better access to moisture while still keeping them secure. The goal is to mimic their natural environment where they wouldn't be buried under soil.
Germination Environment: The 70-75°F range mentioned in Step 3 is perfect, but I've found that placing the tray on top of a refrigerator (not inside) creates an ideal microclimate. The warmth rises naturally without risking overheating. For humidity, I double up the plastic wrap by placing a second layer loosely over the first—this creates a more stable moisture environment without trapping too much heat. Watch for condensation every morning; if it's dry, that's your cue to mist again.
Transplanting Transition: When your seedlings reach the 3-4 true leaves stage in Step 5, I recommend doing a "soft transplant" test first. Gently tug on the pod—if the seedling comes out easily with minimal root disturbance, it's ready. For outdoor planting, I always do this in the evening when temperatures are cooler. The pods' biodegradable nature means you can actually plant them whole, but I like to tear them open just enough to expose the roots to air for 10 minutes before final planting—this helps prevent transplant shock.
Pro Tips for Jiffy Seed Starting Kit
- Here's what I've learned after years of using Jiffy pods—these little details make all the difference between weak seedlings and thriving plants.
- Soaking Precision: The 10-minute soak is non-negotiable, but here's the secret: use water that's just slightly warmer than room temperature (around 70°F).
- Seed Spacing Secret: In Step 2, when planting your 1-2 seeds per pod, here's a pro move: use a toothpick to create a tiny divot in the soil mix.
Frequently asked questions
Got questions about your Jiffy Seed Starting Kit? You’re not alone! Here are answers to the most common queries to help you grow with confidence.
Can I reuse Jiffy peat pots after transplanting?
Unfortunately, no—Jiffy peat pots are designed for one-time use. Once they break down in water, they can’t be replanted. However, you can plant them directly into the ground or a larger pot to minimize root disturbance. For extra care, gently tear the pot open before transplanting to avoid circling roots.
How long does it take for seeds to germinate in a Jiffy pod?
Germination time varies by seed type, but most Jiffy pods sprout within 7–14 days under ideal conditions (warmth, moisture, and light). Check your seed packet for specifics—some fast growers (like radishes) may appear in 3–5 days, while slower ones (like tomatoes) could take 2–3 weeks. Keep the pods moist but not soggy!
What if my Jiffy pod isn’t holding water?
If your pod leaks or collapses, it might be overwatered or underdeveloped. Try these fixes:
- Squeeze excess water out gently.
- Place the pod in a shallow tray of water for 5–10 minutes to rehydrate.
- If it’s still weak, transfer seeds to a fresh pod or a small container with damp paper towels until roots form.
Are Jiffy pods better than regular seed-starting soil?
Jiffy pods offer convenience and consistency—they’re pre-moistened, lightweight, and provide gentle root support without transplant shock. However, they’re not a replacement for high-quality seed-starting mix if you’re growing long-term (e.g., herbs or veggies needing bigger pots). For most seedlings, pods are a fantastic shortcut!
Can I use Jiffy pods in cold weather?
Jiffy pods work best in warm conditions (60–75°F). For cold starts:
- Use a seedling heat mat to maintain warmth.
- Place pods near a sunny window or under grow lights.
- Avoid drafts—cold air can slow germination.
What’s an alternative if I don’t have Jiffy pods?
No problem! Try these DIY options:
- Coconut coir pellets (similar to Jiffy pods).
- Paper towels (dampen and fold seeds inside).
- Egg cartons (poke holes in the bottom for drainage).
- Small pots with seed-starting mix (lightweight and biodegradable).
Wrapping up and next steps
Ready to dive into the world of seed starting with ease? The Jiffy Seed Starting Kit makes germination a breeze—no mess, no stress, just pure, twist-free convenience! 🌱 Whether you're a beginner or a seasoned gardener, these pods simplify the process, helping you grow strong, healthy plants from day one.
Now that you’re armed with all the tips and tricks, take the next step—grab your kit, pick your favorite seeds, and let nature do the rest! Happy planting, and may your garden flourish! 🌿✨