
Lawn
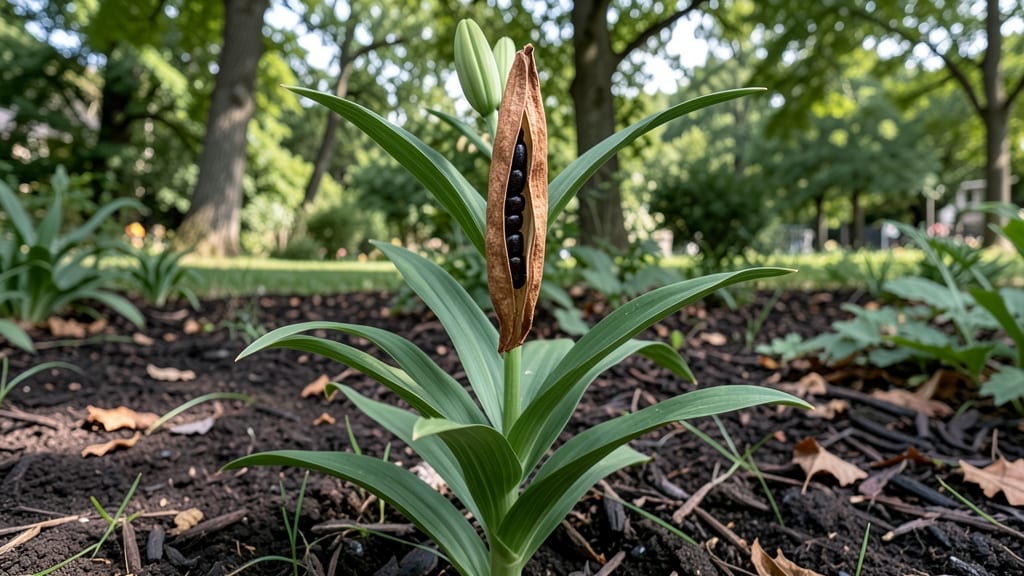
That dried, papery lily seed pod holds the secret to multiplying your garden for free. 🌱 I've turned handfuls of these into dozens of new lilies by mastering the cold-stratification trick that mimics nature's timing—no greenhouse needed.
The key moment arrives in late fall when pods turn brown and split open. Harvest them before they release seeds to the ground, then crack them open to reveal the plump, dark seeds inside.
Each one has the potential to grow into a plant with the same striking blooms you love. After a 3-month cold period in moist sand, those seeds wake up ready to sprout.
You'll see the first green shoots in early spring, and with proper care, they'll bloom in 3-5 years—patience rewarded with lilies that feel like your own. This method works for true lilies, fritillaries, and even some daylilies. The biggest challenge?
Waiting through the cold months, but the payoff makes it worth every day of anticipation.
📚 In This Guide
- What you need
- Instructions
- Tips and common mistakes
- Wrapping up and next steps
What you need
- ● Lily seed pods: Fresh or dried, collected from mature lilies (ensure they’re fully ripe and slightly wrinkled). Quantity: 5–10 pods for experimentation.
- ● Potting mix: Well-draining, sterile seed-starting mix (avoid garden soil). Specs: Lightweight, with perlite or vermiculite for aeration. Quantity: 2–3 cups.
- ● Small pots or seed trays: 3–4 inch pots or a shallow tray with drainage holes. Quantity: 1 per seed pod (or 2–3 pods per tray).
- ● Plastic bags or clear lids: For cold stratification (must be breathable but sealable). Size: Large enough to cover pots loosely.
- ● Refrigerator or cold frame: For stratification (40–50°F / 4–10°C).
- ● Spray bottle: With water for gentle misting (avoid soaking).
- ● Labeling tags: To track stratification dates and varieties.
- ● Sterilized scissors or knife: For carefully opening seed pods (if needed).
- ○ Heat mat (optional): For post-stratification warmth (70–75°F / 21–24°C).
- ○ Grow lights (optional): 12–16 hours of light daily after germination.
- ○ Humidity dome (optional): To retain moisture during early growth.
- ● Fertilizer (balanced, diluted): 10-10-10 or organic option (use sparingly after sprouts appear).
- ● Journal or app: To log germination progress and conditions!
Step-by-Step instructions for cold-stratifying lily seed pods
Cold stratification mimics nature's way—here's how to break dormancy and coax those stubborn lily seeds to life.
🌱 Step 1: Harvest and Prepare the Seed Pods
Collect mature lily seed pods when they turn brown and begin cracking open naturally. I like to work with them fresh, but they'll keep in a paper bag in the fridge for up to 2 weeks if needed. Cut open the pods with clean scissors and remove the seeds—each pod contains 10-20 seeds—but don't wash them yet.
Spread the seeds on a clean paper towel to air-dry for 24 hours in a warm, dry place. This prevents rot during stratification. You'll know they're ready when they feel slightly dry to the touch but don't crumble. Here's the thing—lily seeds have a tough outer coating, so don't rush this step. Proper drying ensures better germination later.
💧 Step 2: Moisten and Stratify in a Cold Environment
Place the dried seeds in a resealable plastic bag with a damp paper towel—just enough moisture so the towel feels damp but not soaking. Seal the bag and label it with the date and lily variety. I use a ziplock bag because it's airtight enough to maintain humidity while allowing some airflow.
Store the bag in your refrigerator's crisper drawer, where temperatures hover around 35-40°F. This cold, moist environment breaks the seed's dormancy, mimicking winter's natural process. Check on them weekly—if the towel dries out, mist it lightly with water. You'll see nothing dramatic yet, but this is where the magic happens: the seed's internal clock resets for spring.
⏰ Step 3: Monitor for Germination and Prepare for Planting
After 8-12 weeks, remove the bag from the fridge and inspect the seeds. You'll notice some may have sprouted tiny roots or cracked open—this is your signal to act. Place the bag in a warm spot (65-70°F) for 3-5 days to simulate spring warming. This final step jumpstarts germination.
Once sprouts appear (they'll look like tiny green nubs), plant them immediately in well-draining potting mix in small pots. Press the seeds ½ inch deep—they won't tolerate being buried too deeply. Keep the soil consistently moist but never soggy. Real talk: germination can take 4-8 weeks after planting, so patience is key here.
☀️ Step 4: Provide Light and Care for Young Seedlings
Move the pots to a bright, indirect light spot as soon as the first true leaves appear. I use a grow light on a 14-hour daily cycle to ensure strong growth. Avoid direct sunlight at first—it can scorch tender seedlings. You'll see the first leaves emerge as long, narrow shapes, followed by broader foliage in 2-3 weeks.
Water gently from the bottom to avoid disturbing the roots. Once seedlings reach 4-6 inches tall and have developed 3-4 true leaves, they're ready to transplant outdoors after the last frost. Harden them off gradually by exposing them to outdoor conditions for 1-2 hours daily over 10 days—this prevents shock and ensures they thrive in their permanent home.
Tips & tricks for perfect lily seed pod germination
These little-known tricks will help you maximize your success with cold-stratified lily seeds.
Timing Secret: In Step 1, when you're air-drying those seeds for 24 hours, resist the urge to rush. The tough outer coating needs this full time to toughen up—think of it like seed armor. I've seen seeds that dried for only 12 hours develop mold during stratification. Place them on a mesh screen or clean wire rack to ensure airflow on all sides, which speeds up drying while preventing clumping.
Cold Environment Strategy: The 35-40°F refrigerator temperature in Step 2 is crucial, but not all fridges are created equal. If your crisper drawer runs cooler (below 35°F), consider using a seed stratification box instead. These maintain consistent temps without freezing. Also, place a small thermometer in the bag to monitor—some seeds can become dormant again if temps drop below 32°F.
Germination Rescue: If you notice mold developing during the 8-12 week stratification, don't toss them! Open the bag, remove any moldy seeds, and sprinkle the remaining seeds with a tiny bit of cinnamon (natural antifungal) before resealing. I've saved batches this way—just make sure to air them out for 10 minutes before resealing to prevent moisture buildup.
Lighting Hack: For Step 4's seedlings, if you don't have a grow light, place pots near an east-facing window where they'll get gentle morning sun. Avoid south-facing windows—the intense afternoon sun can cause leaf scorch. I've also had success with LED desk lamps on a timer, keeping them 6 inches above the seedlings for 12 hours daily.
Pro Tips for Lily Seed Pod
- These little-known tricks will help you maximize your success with cold-stratified lily seeds.
- Timing Secret: In Step 1, when you're air-drying those seeds for 24 hours, resist the urge to rush. The tough outer c...
- Cold Environment Strategy: The 35-40°F refrigerator temperature in Step 2 is crucial, but not all fridges are created...
Frequently asked questions
Got questions about growing lily seed pods?
You’re not alone! Here are answers to the most common concerns—from timing to troubleshooting—to help you nurture those blooms with confidence.
How long does it take for lily seed pods to germinate?
Patience is key! Cold-stratified lily seeds typically take 4–12 weeks to sprout after planting. Some varieties may take longer, especially if moisture or temperature conditions aren’t ideal. Keep the soil consistently moist and maintain a cool environment (around 40–50°F) to encourage germination.
Why isn’t my lily seed pod germinating after cold stratification?
If your seeds aren’t sprouting after stratification, check these common culprits:
- Insufficient cold exposure: Ensure seeds stayed in the fridge for 6–8 weeks (or longer for stubborn varieties).
- Dampness issues: Overwatering can cause rot, while too-dry soil halts growth. Aim for consistently moist (not soggy) conditions.
- Old seeds: Lily seeds lose viability over time. If yours are over 1–2 years old, try fresh ones.
Can I grow lilies from seed pods without cold stratification?
Cold stratification mimics winter conditions and breaks seed dormancy, making it highly recommended for lilies. Without it, germination rates drop dramatically (often 0–20%). However, if you’re impatient, try soaking seeds in lukewarm water for 24 hours before planting—though success isn’t guaranteed. For best results, always stratify!
How do I know if my lily seedling is healthy?
A thriving lily seedling should have:
- Two small, smooth cotyledons (seed leaves) unfurling first.
- Vibrant green stems with no yellowing or wilting.
- Slow, steady growth (not stretching or leaning).
What’s the best location to plant lily seed pods outdoors?
Lilies thrive in full sun to partial shade (6+ hours of sunlight daily). Choose a spot with:
- Well-draining soil (they hate soggy roots!). Amend clay soil with compost or sand.
- Shelter from strong winds (young seedlings are delicate).
- A permanent home—lilies resent transplanting once established.
Wrapping up and next steps
Growing lily seed pods from cold-stratified seeds is a rewarding journey that unlocks vibrant blooms and lush foliage in your garden. 🌱 By following the right techniques—like proper stratification, moisture control, and patience—you’ll set the stage for healthy, thriving lilies.
Whether you’re a beginner or a seasoned gardener, this method ensures reliable germination and stunning results.
Ready to take the next step? Start with a small batch of seeds this season, experiment with your local climate, and soon you’ll be sharing your lily blooms with pride! 🌸 For even better success, document your progress and adjust as needed—your garden will thank you.