
Propagation
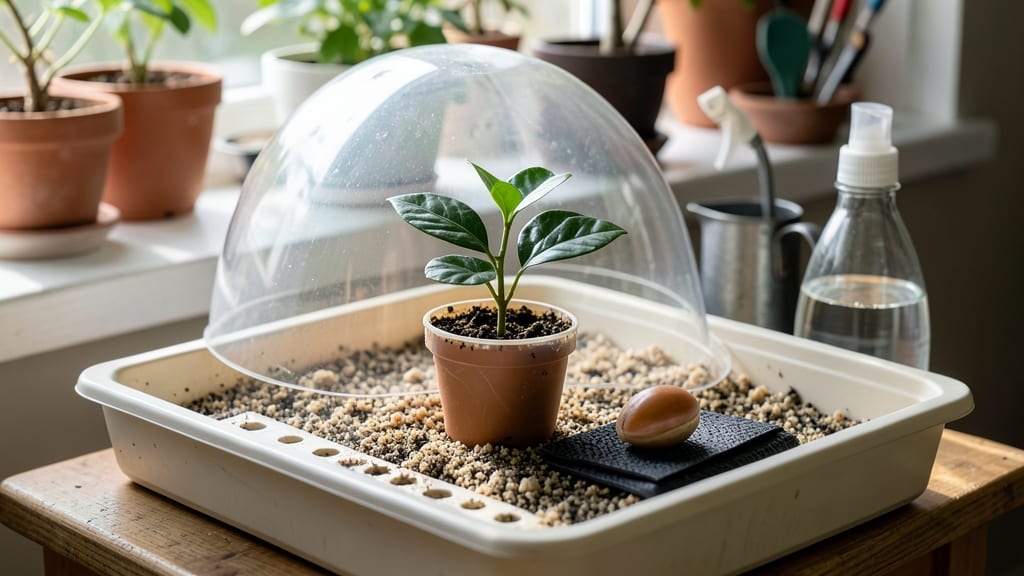
Orange seeds need patience and a little winter magic to break their dormancy. 🌱 I’ve wrestled with slow germination for years—until I discovered cold stratification turns those stubborn seeds into eager sprouts in just 60 days. No fancy equipment, no guesswork, just a freezer and a little time.
The trick starts with fresh seeds from a ripe orange—no store-bought hybrids, just organic or homegrown fruit. After a quick rinse to remove pulp, they get a 3-month cold treatment in a damp paper towel, mimicking nature’s winter chill.
This jumpstarts growth, skipping the frustrating "waiting forever" phase most beginners hit.
Once stratified, plant them ½ inch deep in moist potting mix under bright, indirect light. Keep the soil damp (not soggy) and expect tiny roots in 2-4 weeks. These won’t be fruit trees overnight—they’re slow growers, but with this method, you’ll avoid the common pitfall of moldy, rotting seeds.
Whether you’re dreaming of a citrus tree or just curious about propagation, this approach works for sweet or bitter oranges. The payoff? Healthy seedlings ready for transplanting by spring, with no wasted effort. Let’s get those seeds sprouting!
📚 In This Guide
- What you need
- Instructions
- Tips and common mistakes
- Wrapping up and next steps
What you need
- ● Orange seeds: 3–5 fresh, plump seeds (harvested from a ripe, organic orange—avoid hybrid varieties like clementines, as they may not grow true to type).
- ● Paper towels or damp paper: 2–3 sheets (or a seed-starting kit with germination trays).
- ● Plastic bag or airtight container: A resealable bag with a zipper or a small Tupperware to create humidity.
- ● Spray bottle: With water (for gentle misting—avoid soaking!).
- ○ Small pots or seedling trays: 2–3 (3–4" diameter) with drainage holes. Optional: Biodegradable pots for transplanting later.
- ○ Well-draining potting mix: 1–2 cups of a seed-starting blend (sterile, peat-based, or coco coir mix). Optional: Perlite or vermiculite (10–20%) for aeration.
- ● Plastic wrap or humidity dome: To retain moisture during early stages.
- ● Scissors or knife: For carefully removing seeds from the orange pulp.
- ● Fine-mist spray bottle: (If you don’t have one, a clean spray bottle with a fine nozzle works.)
- ● Refrigerator: For the cold-stratification phase (4–6 weeks at 35–45°F / 2–7°C).
- ● Warm, bright location: A sunny windowsill (south-facing) or a grow light (12–16 hours/day) for post-stratification growth.
- ○ Thermometer (optional): To monitor soil/water temps (ideal: 65–75°F / 18–24°C during germination).
- ● Patience & a notebook: Track seed progress and moisture levels!
Step-by-step instructions for germinating orange seeds
Cold-stratification unlocks the secret to breaking citrus seeds' dormancy—here's how to coax life from them reliably.
🌱 Step 1: Extract and Prepare the Seeds
Remove seeds from a fresh, organic orange—never store-bought, as they're often treated to prevent sprouting. Rinse seeds thoroughly under cool water to remove all fruit residue, which can rot. I like to soak them for 5 minutes in a 10% hydrogen peroxide solution (1 part peroxide to 9 parts water) to sterilize the outer coating without damaging the embryo.
After rinsing, place seeds on a paper towel and pat them dry. The goal is to remove moisture while keeping the seed coat intact. Store them in a sealed container lined with a damp paper towel in the refrigerator for 30-60 days. This cold-stratification mimics winter's natural dormancy period and signals the seed it's safe to grow.
❄️ Step 2: Cold-Stratify for Dormancy Break
Check seeds weekly during stratification—you'll see no visible changes, but internally, the seed is undergoing critical biochemical changes. The 40-50°F refrigerator temperature is crucial; warmer temps won't break dormancy, while colder temps risk freezing the seed.
After 60 days, remove seeds and let them sit at room temperature for 24 hours before planting. This gradual warming prevents shock to the embryo. I use a small plastic bag with a tiny air hole to maintain humidity during stratification—condensation inside the bag tells me the moisture level is perfect.
🪴 Step 3: Plant in Germination Medium
Fill small pots (3-4 inches deep) with a sterile germination mix—equal parts peat moss and perlite works best. Press the mix down lightly to create firm but not compacted soil. Plant seeds ½ inch deep, spacing them 1 inch apart in each pot. Cover with a thin layer of additional mix and mist gently until the surface looks damp but not wet.
Place pots in a clear plastic bag or under a humidity dome to create a greenhouse effect. This maintains 80-90% humidity and prevents the delicate seedling from drying out before it breaks through the soil. Position the pots in a warm spot—70-75°F is ideal—where they won't be disturbed.
☀️ Step 4: Provide Warmth and Light
Germination typically begins in 10-21 days, but patience is key—some seeds take longer. You'll see the first sign when the seed coat splits open slightly, followed by a tiny shoot pushing upward. Once sprouts appear, remove the humidity dome immediately to prevent fungal growth.
Move seedlings to a bright location with indirect light—direct sun at this stage can scorch tender leaves. A south-facing window with sheer curtains works well. Avoid using grow lights yet; citrus seedlings are sensitive to artificial light spectra at this early stage. Water gently from the bottom by placing pots in ½ inch of water for 10 minutes every 3-4 days.
🌿 Step 5: Transplant and Harden Off
When seedlings develop 4-6 true leaves (the second set after the initial cotyledons), they're ready to transplant into individual pots. Use a well-draining citrus potting mix and containers with drainage holes. Gently remove seedlings, keeping as much root structure intact as possible—citrus roots are fragile at this stage.
Harden off seedlings over 2 weeks by gradually increasing their time outdoors. Start with 1 hour in a shaded spot, then increase by 1 hour daily. Watch for signs of stress—wilting or yellowing leaves mean they're not ready for full sun yet. Once hardened off, they can tolerate morning sun and dappled afternoon shade.
Tips & tricks for perfect citrus seed germination
Citrus seeds are stubborn little things—here's how to give them the exact conditions they need to succeed.
Seed Preparation: The 5-minute hydrogen peroxide soak isn't just sterilization—it's about breaking down the natural oils on the seed coat that can prevent moisture absorption. Use a clean spray bottle for this step to avoid cross-contamination between seeds. After drying, handle them with clean hands or tweezers to prevent introducing bacteria that could interfere with the stratification process.
Temperature Matters: That 40-50°F range in your fridge is non-negotiable for breaking dormancy. If your fridge runs cooler (below 40°F), move seeds to a different shelf or use a small cooler with a temperature regulator. The goal is consistent warmth—not freezing. I've seen seeds fail completely when placed in freezer drawers by accident, so double-check placement!
Humidity Control: The condensation inside your plastic bag during stratification is your visual cue for perfect moisture levels. If you see water droplets forming on the inside of the bag, you're right on target. Too much condensation means the towel is too wet—let it dry slightly before resealing. This balance prevents both mold and desiccation during the critical 60-day period.
Light Sensitivity: Once those first sprouts appear, remove the humidity dome immediately to prevent fungal growth. Citrus seedlings are particularly susceptible to damping-off disease in humid conditions. After removing the dome, place pots under indirect light—direct sunlight at this stage can scorch the delicate cotyledons, which are the seedling's first true leaves.
Pro Tips for Orange Seed Germination
- Citrus seeds are stubborn little things—here's how to give them the exact conditions they need to succeed.
- Seed Preparation: The 5-minute hydrogen peroxide soak isn't just sterilization—it's about breaking down the natural o...
- Temperature Matters: That 40-50°F range in your fridge is non-negotiable for breaking dormancy. If your fridge runs c...
Frequently asked questions
Got questions about growing orange seeds?
Here are answers to the most common ones—so you can skip the guesswork and focus on sprouting success!
How long does it really take for orange seeds to germinate?
With cold stratification (chilling), orange seeds typically sprout in 4–8 weeks. Without it, germination can take months or fail entirely. Patience pays off—just keep the soil moist and warm (70–80°F) after stratification!
Do I have to cold-stratify orange seeds?
Yes! Orange seeds have a hard outer coat that needs cold treatment (stratification) to break dormancy. Skip it, and you’ll likely wait forever (or never) for sprouts. Pro tip: 30–60 days in the fridge works best!
Can I grow orange seeds from store-bought oranges?
Just wash the seeds thoroughly to remove pulp residue, then dry them before stratifying. Navel oranges (seedless) are tricky—opt for bitter or sweet oranges (like Valencia) for reliable seeds. Bonus: Try multiple seeds!
Why aren’t my orange seeds sprouting after stratification?
Check these fixes:
- Moisture: Soil should stay damp (not soggy). Use a spray bottle if needed.
- Warmth: Move pots to a sunny windowsill or use a heat mat (70–80°F).
- Depth: Plant seeds ½-inch deep—too shallow = drying out.
- Patience: Some seeds take up to 3 months to crack open!
What’s the best soil mix for germinating orange seeds?
Use a light, well-draining mix like:
- 50% peat moss or coconut coir
- 30% perlite or vermiculite
- 20% sand or compost
Wrapping up and next steps
Germinating orange seeds with cold stratification is a rewarding journey that unlocks vibrant, healthy sprouts in just 60 days—no fuss, no twisting!
By following the right steps—soaking, chilling, and patient care—you’ve mastered a simple yet powerful technique for growing citrus from scratch. 🌱 Whether you’re a gardening newbie or a seasoned green thumb, this method proves that even the tiniest seeds hold big potential.
Now that you’re armed with knowledge, take the next step: grab those seeds, set up your tray, and watch your little sprouts transform into lush seedlings. Share your progress or tag us—we’d love to see your citrus adventure bloom! 🌟