
Lawn
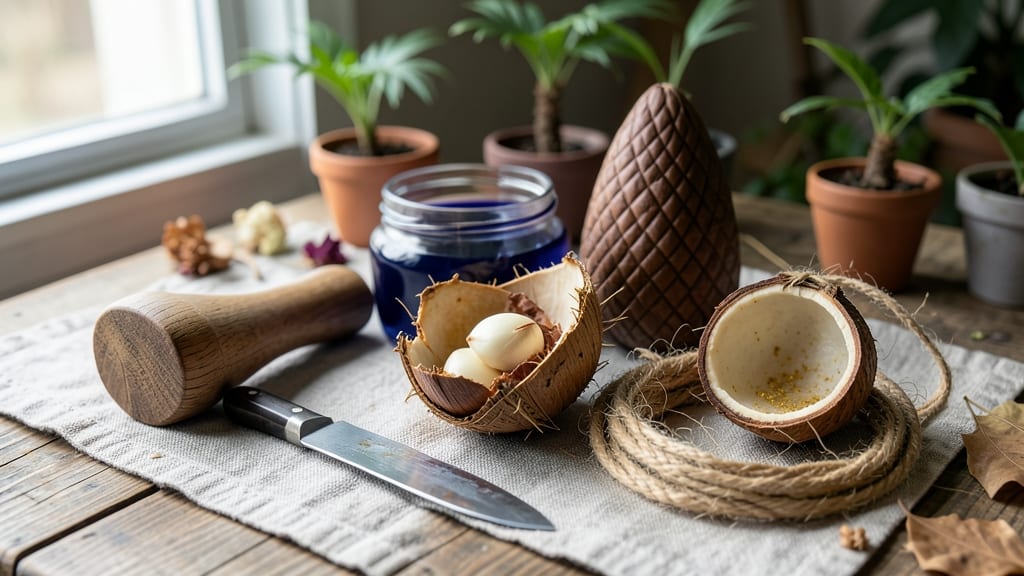
Transforming palm seed pods into garden art is like turning nature's trash into treasure. ✨ These fibrous, organic shapes become stunning sculptures that age beautifully while blending seamlessly with your outdoor space.
I've turned my backyard into a living gallery using nothing but what nature discards—and the results are unexpectedly elegant.
No fancy tools or expensive materials are needed—just your hands, some twine or wire, and a vision. The pods themselves are free if you collect them from fallen palm trees or even buy them in bulk online.
Start with a simple wreath for your front door or create a larger installation that becomes the centerpiece of your garden path.
What you end up with is art that evolves over time, developing a natural patina as it weathers. The texture contrasts beautifully with smooth stones, rusted metal, or vibrant flowers. Each piece tells a story of sustainability while adding a touch of whimsy to your outdoor living space.
Whether you're a seasoned crafter or a complete beginner, these projects scale easily. From small tabletop displays to large-scale garden installations, the possibilities are endless—and every piece carries that satisfying "I made this myself" pride.
📚 In This Guide
- What you need
- Instructions
- Tips and common mistakes
- Wrapping up and next steps
What you need
- ● Palm seed pods: 10–50 (depending on size and design complexity; larger pods work best for durability). Tip: Collect from fallen coconut or palm trees (check local regulations first!).
- ● Natural adhesives: Eco-friendly glue (e.g., blank">Titebond III or blank">Mod Podge Matte): 1 small bottle (8 oz)
- ● OR hide glue (traditional, water-soluble): 1 small container
- ● Sandpaper: Medium (120–150 grit) and fine (220 grit) grits, 1 sheet each for smoothing.
- ● Twine/jute rope: 50–100 ft (for structural support or hanging elements).
- ● Waterproof sealant: 1 small can (e.g., Minwax Polycrylic for outdoor use).
- ● Basic tools: Utility knife or craft knife (for trimming)
- ● Pliers (for bending or shaping twine)
- ● Paintbrushes (various sizes, 1–2)
- ○ Optional decorative elements: Acrylic paint + sealant (for custom colors)
- ● Moss or air plants (to add greenery)
- ● Small pebbles or shells (for texture)
- ● Prerequisites: Outdoor workspace (patio, garage, or shaded area)
- ● Patience! Let glue/sealant dry fully (24–48 hours).
How to create palm seed pod sculptures that grow into living art
Turn natural debris into stunning, living garden art that evolves as the seeds sprout.
🌱 Step 1: Collect and Clean Your Seed Pods
Gather seed pods from palm trees—look for ones that are dry but still structurally intact. I prefer pods that are slightly open to reveal their seeds, as these will sprout more reliably. Rinse them thoroughly with water to remove dirt and debris, then let them dry completely in a shaded area for at least 24 hours. This prevents mold and ensures a clean base for your sculpture.
If the pods are still attached to fibrous material, gently peel away the outer husk to expose the seed cavity. Use a small knife or your fingers to carefully remove any remaining debris from the crevices. The goal is to preserve the natural texture while making sure the seeds inside remain undamaged and ready to sprout.
🪴 Step 2: Design and Assemble Your Sculpture
Arrange your cleaned seed pods into a design—think of them like puzzle pieces. I like to create abstract shapes or even small animals by stacking pods vertically or weaving them together with natural twine or thin wire. For stability, start with the largest pods as the base and build upward, leaving small gaps for soil and water to reach the seeds inside.
Secure the pods with eco-friendly twine or copper wire, wrapping just enough to hold the structure together without crushing the pods. Avoid using plastic ties or anything that could degrade into the soil later. The sculpture should feel sturdy but still look organic—like something that could grow naturally over time.
☀️ Step 3: Plant and Water for Germination
Fill the gaps in your sculpture with well-draining potting mix, pressing it gently around the pods so the seeds are partially buried—no deeper than ½ inch. Water lightly until the soil is moist but not soggy. Place your sculpture in a warm, sunny spot where it gets at least 6 hours of indirect light daily. Too much direct sun can dry out the soil too quickly, while too little light slows germination.
Cover the entire sculpture loosely with a clear plastic dome or humidity tent to retain moisture and warmth. Check daily for condensation—if the inside of the dome fogs up, your moisture levels are perfect. Remove the dome once you see the first signs of sprouting, usually within 2-4 weeks, depending on the palm species and temperature.
🌿 Step 4: Maintain and Watch It Grow
Once sprouts appear, water your sculpture 2-3 times per week, keeping the soil consistently moist but never waterlogged. You’ll notice the young seedlings emerging from the crevices of the pods—this is the magic of living art. As the plants grow, trim any leggy stems to encourage bushier growth, and occasionally add more potting mix around the base to support their development.
Over time, the sculpture will transform as the seedlings mature. You might choose to let them grow into a small palm grove or prune them to maintain the original shape. Either way, your art piece becomes a living, evolving part of your garden—proof that beauty and sustainability go hand in hand.
Tips & tricks for perfect palm seed pod art
Here's what nobody tells you about making your palm seed pod sculptures truly thrive.
Pod Selection Matters: In Step 1, prioritize pods that are slightly cracked open—these reveal the seeds inside and guarantee better germination rates. I've found that pods with visible seeds sprout within 2-4 weeks as mentioned, but fully intact pods may take longer or not sprout at all. If you can't find naturally cracked pods, gently tap them with a small hammer to create small openings without damaging the seed cavity. This tiny step makes all the difference for successful sprouting.
Structural Stability: When assembling your sculpture in Step 2, focus on creating a sturdy base first. I've learned the hard way that lightweight designs collapse under their own weight when wet. Start with the largest pods at the bottom and weave natural twine through the crevices to create hidden supports. For extra stability, consider adding a small wooden dowel or bamboo skewer through the center of larger sculptures—just make sure it's buried in the soil so it won't be visible in the finished piece.
Germination Conditions: The 6 hours of indirect light mentioned in Step 3 is crucial, but temperature matters just as much. Ideal germination occurs between 70-80°F—if your climate is cooler, consider placing your sculpture near a sunny window with a small heat mat underneath. Watch for condensation inside your humidity dome daily—this is your sign that moisture levels are perfect. If you notice mold forming, increase airflow immediately by lifting the dome slightly for an hour each day.
Long-Term Growth Strategy: For Step 4 maintenance, I recommend establishing a watering schedule based on your local climate. In dry conditions, water 2-3 times per week as specified, but in humid environments, you might only need weekly watering. As your seedlings grow, consider adding a small layer of mulch around the base to retain moisture and suppress weeds. This simple step reduces maintenance while supporting the natural growth process of your living art piece.
Pro Tips for Palm Seed Pod Art
- Here's what nobody tells you about making your palm seed pod sculptures truly thrive.
- Pod Selection Matters: In Step 1, prioritize pods that are slightly cracked open—these reveal the seeds inside and guarantee better germination rates.
- Structural Stability: When assembling your sculpture in Step 2, focus on creating a sturdy base first.
Frequently asked questions
Got questions about crafting your own palm seed pod art? You’re not alone! Here are answers to the most common curiosities—from sourcing materials to troubleshooting your creations.
Where can I find palm seed pods for free or cheap?
Check local parks, beaches, or palm tree-lined neighborhoods after storms—pods often wash up or drop naturally. Pro tip: Ask at nurseries or tropical plant shops; they may donate discarded pods. Facebook Marketplace or gardening forums are also great for swaps!
How long does it take for palm seed pod sculptures to dry and harden?
Drying time varies by pod size and climate: small pods (3–6 inches) take 2–4 weeks in dry air, while larger ones may need 6+ weeks. Speed it up with a fan or dehumidifier, but avoid direct heat—it can crack the pods. Patience pays off!
Can I use paint or sealant on palm seed pod art?
Yes! Use non-toxic, water-based acrylics (like Mod Podge or outdoor-safe paints) for a vibrant finish. Seal with a matte polyurethane to protect against weather. Skip glossy sealants—they can trap moisture and cause mold.
Will my sculpture grow if I plant the seeds inside?
Not likely! Most palm seed pods are sterile by the time they’re harvested for art. If you do plant them, expect slow germination (months to years) and a tiny sapling—not a full tree. For guaranteed growth, use fresh, viable seeds (like coconut) and plant them separately.
What should I do if bugs or mold appear on my pods?
Act fast! Brush off pests with a damp cloth and isolate the pods in a well-ventilated area. For mold, scrub with a 1:10 vinegar-water mix, then dry thoroughly in sunlight. If damage is severe, repurpose the pods or start fresh—your art’s worth it!
Bonus Tip:
Need inspiration? Sketch your design on paper first! Palm seed pods are fragile—planning ahead saves time and frustration. Think big, start small!
Wrapping up and next steps
Transforming palm seed pods into stunning garden art isn’t just a creative endeavor—it’s a sustainable way to blend nature’s beauty with your outdoor space. These eco-friendly sculptures grow in character over time, offering a unique touch that’s both artistic and earth-conscious.
Whether you’re a seasoned crafter or a beginner, this project is your chance to turn simple materials into something extraordinary.
Ready to bring your vision to life? Start small—pick a design, gather your tools, and let your imagination guide you! The next step? Share your masterpiece with the world or inspire others by trying a new shape or texture. Your garden (and the planet) will thank you. 🌿✨