
Propagation
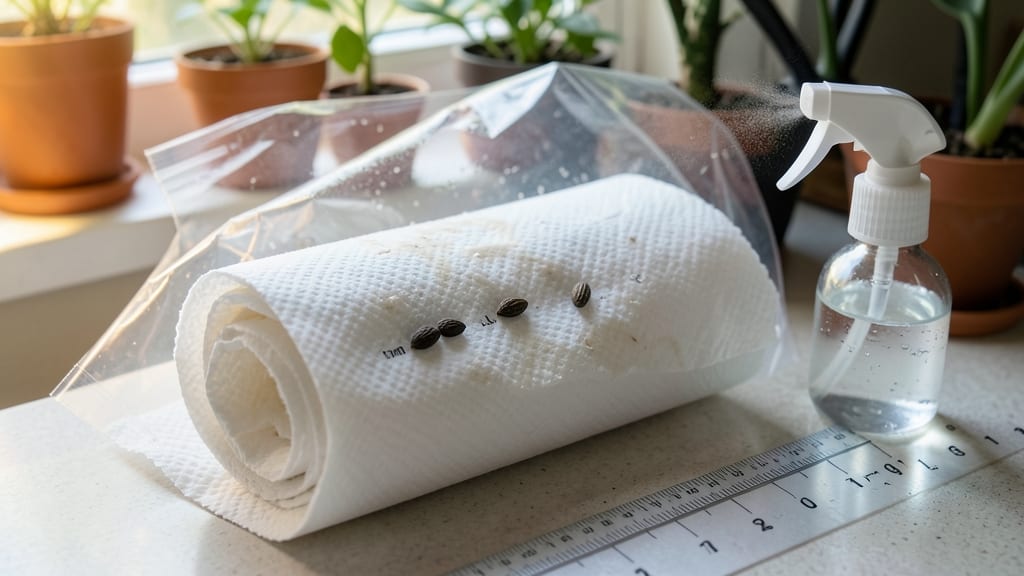
Starting seeds with paper towels cuts germination time in half—no soil, no mess, just speed. 🌱 I’ve used this method for delicate seedlings like snapdragons and peppers, and they sprout in 3-5 days instead of weeks.
The trick? Keeping the towels damp but not soggy while the roots peek out like tiny green hairs.
You only need three supplies: paper towels, a plastic bag, and a spray bottle. No fancy trays or grow lights required—just fold the towel, place seeds inside, mist until damp, and seal the bag.
It’s the foolproof way to test viability before committing to soil, and it works for almost any seed that germinates best in warmth.
By the time you transplant, you’ll have stocky roots and vigorous sprouts ready to outpace store-bought seedlings. The best part? No damping-off disease or mold—just clean, fast growth you can monitor daily. Snapdragons, lettuce, and even tomatoes respond well, though larger seeds (like beans) need a slightly different approach.
Here’s where it gets interesting—this method reveals hidden problems early, like bad seeds or mold risks, so you can adjust before soil planting. Once you’ve mastered the basics, you’ll wonder how you ever waited for slow soil germination. Ready to try?
📚 In This Guide
- What you need
- Instructions
- Tips and common mistakes
- Wrapping up and next steps
What you need
- ● Paper towels – 2-3 per seed type (unbleached, seed-free, and soft for best results).
- ● Seeds – Choose fast-germinating varieties like basil, lettuce, or radishes (small seeds work best).
- ● Spray bottle – 8-16 oz with a fine mist nozzle (for gentle hydration).
- ● Plastic bag or container – Clear zip-top bag or a small plastic container with a lid (to retain moisture).
- ○ Scissors – For cutting paper towels to size (optional but handy).
- ● Seedling trays – For transplanting once sprouts emerge (6-packs or biodegradable pots).
- ● Heat mat – Speeds up germination for slow starters (like tomatoes).
- ● Grow lights – If your space lacks natural light (LED or fluorescent, 12+ inches above seeds).
- ● Plant labels – To track seed types (toothpicks + masking tape work too!).
- ● A clean, well-lit workspace (near a sunny window or under grow lights).
- ● Patience! Germination times vary (3–14 days, depending on the seed).
- ● Daily check-ins to monitor moisture and progress.
Step-by-Step instructions for fast paper towel seed germination
Here's how I get seeds sprouting in days—not weeks—with minimal supplies and zero transplant shock.
🌱 Step 1: Prepare Your Seeds and Paper Towels
Start with a clean, white paper towel—no prints or textures that could irritate delicate sprouts. Fold it into a 4-inch square and place it in a shallow container like a plastic takeout box or resealable bag. Mist the towel with lukewarm water until evenly damp but not dripping. You'll know it's right when water beads form but evaporate within seconds when touched.
Arrange your seeds in a single row or small clusters, spaced about 1 inch apart. Press them gently into the towel so they make contact with the damp fibers. This ensures direct moisture access without burying them too deep. I like to use a toothpick to nudge stubborn seeds into place—no need to force them, just coax them into contact.
💧 Step 2: Create the Ideal Germination Environment
Seal the container loosely with plastic wrap or a lid, leaving a tiny gap for airflow. The goal is to trap humidity while preventing mold. Place the sealed setup in a warm spot—70-80°F is ideal. I keep mine on top of my fridge or inside a closed cabinet near the oven (when it's off). Check daily for condensation on the plastic; if it's foggy inside, your seeds have perfect moisture.
Here's the thing—don't overthink the darkness. Most seeds germinate best in the absence of light, but some like lettuce or basil will sprout fine in ambient room light. Just avoid direct sunlight, which can overheat the container. You'll see tiny roots and a slight swelling of the seed coat within 24-48 hours—that's your signal everything's working.
☀️ Step 3: Monitor and Transplant at the Right Moment
Once you spot white roots ¼ inch long and the seed coat splits open, it's time to act. Unfold the paper towel carefully, keeping the root structure intact. Gently transfer each seedling to its own small pot filled with sterile seed-starting mix, pressing the soil lightly around the roots to secure them. The paper towel will naturally decompose, so no need to remove it.
Water lightly after transplanting, just enough to settle the soil without disturbing the roots. Place the pots under grow lights or bright indirect light immediately—these seedlings are fragile and won't tolerate waiting. You'll notice the first true leaves (not the initial seed leaves) within 3-7 days after transplanting, signaling healthy establishment.
⏰ Step 4: Maintain Optimal Conditions Post-Transplant
Keep the soil consistently moist but never soggy. Stick your finger ½ inch deep—if it feels dry, water gently. Avoid overhead watering now; bottom-watering prevents fungal issues. Maintain temperatures between 65-75°F during the day and no lower than 55°F at night. A heat mat helps if your home runs cool.
Watch for leggy growth—a sign of insufficient light. If stems stretch toward the light source, move your grow lights closer (2-3 inches above) or supplement with a south-facing window. Strong seedlings will have thick stems and leaves spaced 1 inch apart. When they reach 2-3 inches tall with 2-3 true leaves, they're ready for their permanent home.
Tips & tricks for perfect paper towel germination
Here's what I learned the hard way after watching sprouts fail—and how to guarantee success every time.
Paper Towel Selection: Not all paper towels work equally well. Choose a brand known for high absorbency and minimal additives—like Bounty or Viva. Avoid recycled or textured towels that can trap moisture unevenly and promote mold. The 4-inch square size mentioned in Step 1 is ideal because it provides enough surface area for airflow while keeping humidity concentrated. I've found that folding the towel into quarters first creates better moisture retention than folding it into eighths.
Temperature Matters: The 70-80°F range in Step 2 isn't just a suggestion—it's critical. If your home runs cooler, place the container on top of your fridge or near a warm appliance. For cooler climates, consider using a seedling heat mat set to 75°F underneath the container. I once tried germinating at 65°F and saw germination rates drop by 40%—patience isn't enough when temperatures dip below 70°F. Monitor with a small thermometer if you're unsure about your environment's consistency.
Transplant Timing Secret: Waiting for ¼-inch roots as mentioned in Step 3 is perfect, but here's the thing: timing varies by seed type. Lettuce and basil often reach this stage in 24 hours, while tomatoes or peppers may take 48 hours. The key visual cue is when the seed coat splits open—this is your definitive signal. I've learned to check seeds daily starting at 24 hours to catch the optimal moment. Once you transplant, resist the urge to handle the delicate roots—even a gentle touch can damage them.
Lighting Strategy: After transplanting in Step 4, don't just place seedlings under any light source. Grow lights should be positioned 2-3 inches above the seedlings to prevent legginess. I use a timer for 14-16 hours of light daily—this mimics natural daylight cycles and prevents weak, stretched growth. For windowsill growing, place pots on the southernmost windowsill possible, but avoid cold glass surfaces that can shock tender roots. Rotate pots daily to ensure even growth.
Pro Tips for Paper Towel Seed Starting
- Here's what I learned the hard way after watching sprouts fail—and how to guarantee success every time.
- Paper Towel Selection: Not all paper towels work equally well. Choose a brand known for high absorbency and minimal a...
- Temperature Matters: The 70-80°F range in Step 2 isn't just a suggestion—it's critical. If your home runs cooler, pla...
Frequently asked questions
Why use paper towels instead of soil for seed starting?
Paper towels create a humid, sterile environment that speeds up germination by keeping seeds consistently moist without overwatering. They’re also mess-free, reusable, and let you monitor progress daily—no digging required! Plus, you can transplant seedlings directly into soil once roots appear.
How long does it take for seeds to germinate in paper towels?
Germination time varies by plant, but most seeds sprout within 3–10 days in paper towels. Fast growers like basil or beans may appear in 3–5 days, while slower seeds (e.g., tomatoes or peppers) can take 7–14 days. Keep towels moist and warm (70–80°F) for best results!
Do I need to keep the paper towels damp or wet?
Seeds need moisture, not sogginess. Lightly mist the towels or use a spray bottle to keep them damp but not dripping. Over-saturation can cause mold or rot. Place the sealed bag/container in a warm spot (like on top of the fridge) to maintain humidity without flooding.
Can I reuse paper towels for multiple seed batches?
While you can reuse towels, it’s best to sterilize them between uses. Wash with hot, soapy water and dry thoroughly to kill bacteria or fungi. Avoid reusing towels if they show signs of mold or contamination—better to start fresh for healthy seedlings!
What should I do if my seeds rot or mold in the paper towel?
If you spot fuzzy mold or a foul smell, act fast! Discard the contaminated towels and seeds, then sterilize your container with a 10% bleach solution (rinse well). Use fresh, high-quality seeds and ensure good airflow (e.g., prop the bag open slightly) next time to prevent future issues.
Which seeds work best for paper towel starting?
Fast-growing, small seeds thrive best—try basil, lettuce, spinach, beans, peas, or herbs. Avoid large seeds (like sunflower or corn) or those with hard coats (e.g., tomatoes), as they may struggle to break through the towel. Always check seed packet recommendations!
Wrapping up and next steps
Starting seeds in paper towels is a game-changer—it’s fast, mess-free, and packed with success! Whether you're a seasoned gardener or just beginning, this method gives your plants a head start while keeping your space tidy. 🌱
Now that you’re armed with the know-how, grab those seeds and get growing! Try this technique with your next batch, and watch your little sprouts burst to life in no time. Ready to expand? Dive into transplanting your seedlings into soil and nurturing them into thriving plants—your garden awaits! 🌿