
Lawn
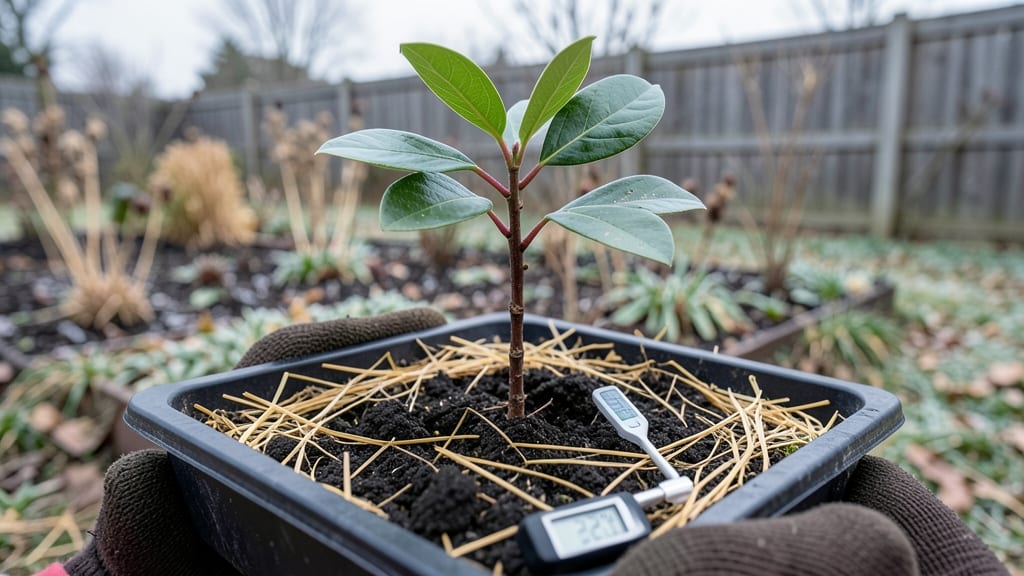
Your persimmon seeds need winter's chill to break dormancy and bloom next spring—this is how to do it right. 🌱 I've learned the hard way that skipping stratification means months of waiting for nothing, or worse, seeds that never sprout.
The key is mimicking nature's slow, cold process in your own space, whether you have a fridge or a buried pot.
Grab a container with drainage, fill it with damp sand or peat moss, and plant your cleaned seeds about an inch deep.
Place it in a sealed bag or container, then refrigerate for 6-8 weeks at 35-40°F. This cold treatment tricks the seeds into thinking winter has passed, so they'll burst into life when spring arrives. No fancy equipment needed—just patience and a consistent chill.
By late winter, you'll see tiny sprouts pushing through the soil, ready to transplant. These seedlings grow surprisingly fast once they break dormancy, so keep them in bright light and warm conditions.
Within a year, you could have a persimmon tree that actually produces fruit—not the decades-long wait some sources claim.
Works for both American and Asian persimmons, though timing varies slightly by variety. If you live in Zone 6 or colder, you might even plant stratified seeds directly outside in early spring for even better survival rates. The secret? Cold, consistency, and a little advance planning.
📚 In This Guide
- What you need
- Instructions
- Tips and common mistakes
- Wrapping up and next steps
What you need
- ● Persimmon seeds: 10–20 fresh, viable seeds (harvested from fully ripe, unblemished fruit). Pro tip: Rinse seeds gently to remove fruit residue before drying!
- ● Well-draining potting mix: 1–2 gallons of a peat-free blend (e.g., 50% coconut coir + 50% perlite/pumice). Why? Prevents rot during stratification.
- ● Small pots or containers: 2–4 (4–6" diameter) with drainage holes. Options: Plastic nursery pots, yogurt cups with holes, or seed-starting trays.
- ● Plastic wrap or humidity dome: To maintain moisture without soggy soil.
- ● Refrigerator or cold stratification setup: A consistent 35–45°F (2–7°C) space (e.g., fridge crisper drawer, unheated garage, or cold frame).
- ● Spray bottle: For light, even watering (avoid over-saturating!).
- ● Labeling tags & marker: To track seed varieties and planting dates.
- ● Grow lights: For post-stratification sprouting (if natural light is weak).
- ● Heating mat: Speeds up germination after cold treatment (set to 70–75°F/21–24°C).
- ● Fungicide (e.g., hydrogen peroxide 3%): 1 tsp per cup of water to dip seeds in before planting (prevents mold).
- ● Journal/notebook: To log moisture levels, temps, and sprouting progress.
- ● Heat gun or hairdryer: For lightly scarifying seeds (nick the outer shell) if germination is slow.
How to cold stratify persimmon seeds for spring planting
Cold stratification mimics nature’s winter cycle—here’s how to trick persimmon seeds into breaking dormancy reliably.
🌱 Step 1: Extract and Clean the Seeds
Open ripe persimmon fruits and scoop out the seeds, removing any remaining fruit pulp. Rinse them under cool water to remove residue—this prevents mold later. Let them air-dry completely for 24 hours on a paper towel. You’ll know they’re ready when the outer seed coat feels slightly leathery but not damp.
I like to soak them for 10 minutes in a 1% bleach solution (1 part bleach to 9 parts water) to sterilize. This step isn’t mandatory but cuts down on rot risks. After soaking, rinse again and let them dry overnight. Store them in a sealed container until stratification begins.
💧 Step 2: Prep the Stratification Mix
Fill a 6-inch deep container with a moistened mix of 50% perlite and 50% peat moss—this lightweight blend drains well while retaining enough moisture. The mix should feel like a damp sponge when squeezed; if water drips out, it’s too wet. I use a spray bottle to moisten evenly without oversaturating.
Place the container in a ziplock bag and seal it loosely (leave a small gap for airflow). This traps humidity while allowing airflow—critical for preventing mold. Store the bag in a refrigerator set to 35-40°F, where seeds will experience the cold, moist conditions they need to break dormancy.
⏰ Step 3: Stratify for 90 Days
Check the seeds every 2 weeks—they should remain moist but not soggy. If the mix dries out, mist it lightly and reseal. After 90 days, remove the container from the fridge and let it sit at room temperature (65-70°F) for 7-10 days to acclimate. This gradual warming mimics spring thaw.
Here’s the thing—patience is key. Some seeds may sprout within 2 weeks of warming, while others take 4-6 weeks. Don’t rush it. If you see mold, discard the affected seeds immediately and restart with fresh ones.
🌿 Step 4: Plant Stratified Seeds
Fill 4-inch pots with well-draining potting mix (avoid garden soil—it’s too dense). Plant seeds ½ inch deep, spacing them 2 inches apart. Water gently until the soil is evenly moist but not waterlogged. Place the pots in a warm, bright spot (70-75°F) with indirect light—direct sun can scorch tender seedlings.
Cover the pots with clear plastic wrap to retain humidity, but remove it daily for 10 minutes to prevent fungal growth. Germination can be slow, so keep the soil consistently moist. Once seedlings emerge, thin to the strongest one per pot to avoid competition.
☀️ Step 5: Transition to Outdoor Light
After 4-6 weeks, when seedlings have 2-3 true leaves, move them to a shaded outdoor spot for 2-3 hours daily. Gradually increase exposure over 10 days to harden them off. Persimmons love sun but need time to adjust—sudden full sun burns their leaves.
By late spring, when nighttime temperatures stay above 50°F, transplant seedlings into the ground or 1-gallon containers. Choose a location with full sun and well-draining soil. Mulch around the base to retain moisture and regulate soil temperature—this mimics their natural woodland habitat.
Tips & tricks for perfect persimmon seed stratification
These little-known tricks will help you maximize your chances of breaking dormancy and growing strong persimmon seedlings next year.
Seed Selection: Choose seeds from fully ripe persimmons—they'll be plump and slightly soft when squeezed. The riper the fruit, the more likely the seeds are to germinate. If you have access to multiple varieties, try them all—some persimmon types respond better to stratification than others. I've found that Asian persimmon seeds often germinate more reliably than American varieties.
Moisture Balance: The 50/50 perlite and peat moss mix is key—it needs to stay damp like a wrung-out sponge, not soggy. Test it by squeezing: water should lightly bead on your fingers, not drip. If your refrigerator feels particularly dry, place a small dish of water near the container to maintain humidity. Too much moisture causes mold; too little prevents germination. The 2-week check-ins are your chance to adjust before problems start.
Temperature Consistency: That 35-40°F range in your refrigerator is critical—it mimics natural winter conditions. If your fridge runs cooler, move the container to a slightly warmer spot. If it's warmer than 40°F, consider using a seedling heat mat set to low under the container. Consistency matters more than exact degrees. I've seen seeds fail when moved between fridges with different temperature zones.
Light Exposure: During the 7-10 day acclimation period, place your container near a bright window but avoid direct sunlight. The gradual warming should trigger sprouting, but too much light too soon can stress the seeds. Once you see tiny green sprouts, move the pots to indirect light immediately. This transition period is where most failures happen—don't rush it.
Pro Tips for Persimmon Seed Winter
- These little-known tricks will help you maximize your chances of breaking dormancy and growing strong persimmon seedl...
- Seed Selection: Choose seeds from fully ripe persimmons—they'll be plump and slightly soft when squeezed. The riper t...
- Moisture Balance: The 50/50 perlite and peat moss mix is key—it needs to stay damp like a wrung-out sponge, not soggy...
Frequently asked questions
Got questions about cold stratifying persimmon seeds for winter? You’re not alone!
Here are some of the most common queries—and their answers—to help you grow confident blooms next season.
Why do persimmon seeds need cold stratification?
Cold stratification mimics winter’s natural chilling process, breaking seed dormancy. Persimmon seeds (Diospyros spp.) won’t sprout reliably without it—this step tricks them into thinking they’ve survived a cold season, priming them to germinate in spring. Skip it, and you might wait years for germination (or never see it!).
How long should I cold-stratify persimmon seeds?
For most persimmon varieties, 60–90 days in the fridge (or buried outdoors in a protected spot) works best. Place them in a moist paper towel or peat moss, then store in a sealed container. Check them monthly—if they’re moldy or dried out, restart the process. Pro tip: Label your containers with the date to track progress!
What’s the ideal temperature for cold stratification?
Aim for 35–45°F (2–7°C), like a standard refrigerator’s crisper drawer. Too warm (above 50°F/10°C), and stratification fails; too cold (below 30°F/-1°C), and seeds may freeze. Use a thermometer if your fridge runs hot/cold. Bonus: Some gardeners bury seeds outdoors in insulated containers for a hands-off approach!
Can I stratify persimmon seeds in the ground instead?
If you live in a cold climate (Zone 5 or colder), plant seeds 6–8 weeks before your first frost in a protected spot—like a raised bed or under mulch. Mark the location to avoid disturbing them. In milder zones, dig a trench in a shady area and cover seeds with 2–3 inches of soil. Warning: Pests (like squirrels) may dig them up, so use wire mesh if needed.
My seeds sprouted too early—what went wrong?
Early sprouting usually means warmth or moisture imbalance. Check these fixes:
- Temperature: Move seeds back to the fridge if your home is too warm.
- Moisture: If the paper towel/damp medium dried out, rewet it slightly (don’t soak!).
- Light: Seeds need darkness to stratify—keep them in an opaque container.
Wrapping up and next steps
Cold stratifying persimmon seeds this winter is your secret weapon for reliable blooms and thriving trees next year! 🌱 By mimicking nature’s timing, you’re giving those seeds the best shot at breaking dormancy and sprouting strong.
Whether you’re a patient gardener or a curious beginner, this process is well within reach—just gather your supplies, follow the steps, and let winter work its magic.
Ready to take the next step? Plant those prepped seeds in well-draining soil come spring, keep them moist, and watch your garden transform into a future full of vibrant persimmons. Happy growing—your future orchard starts now! 🌿✨