
Lawn
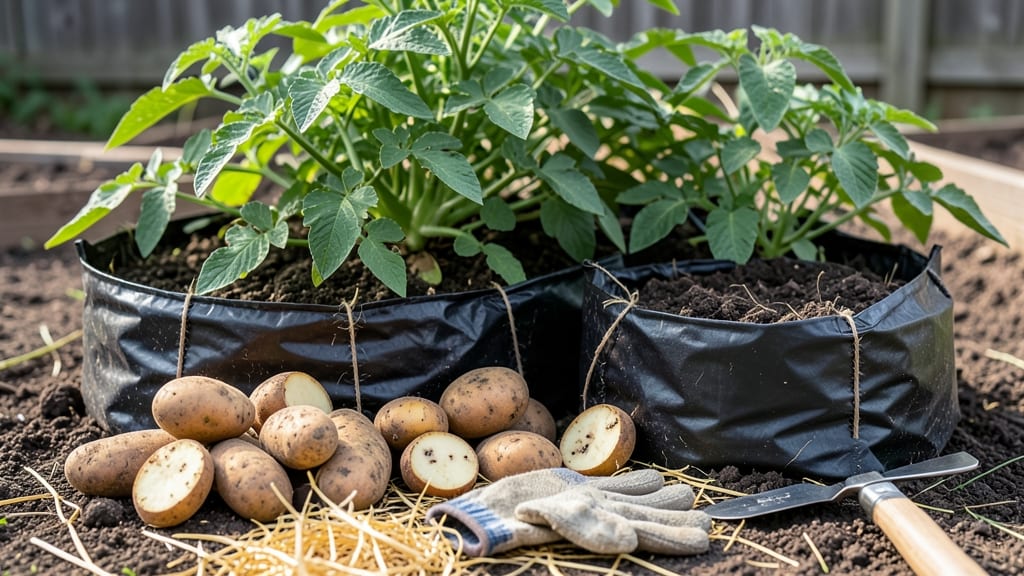
Planting seed potatoes in a bag turns a corner of your patio into a potato patch without needing a yard. 🌱 I’ve grown enough for my family’s meals in just 12 weeks using this method—no digging, no mess, and zero backyard space required.
The secret lies in the right bag, soil, and a few simple tricks that keep tubers happy until harvest. You’ll need one 5-gallon bucket or grow bag, high-quality potting mix (no garden soil), and your seed potatoes—cut into chunks with at least two eyes each.
The beauty of this setup is how it mimics in-ground growing while keeping everything contained. No weeds, no pests, and no backbreaking work when it’s time to harvest. By week 12, you’ll be pulling out 5-10 pounds of potatoes from a single bag, depending on the variety.
The first harvests are always the smallest, but they’re perfect for roasting or mashing right away. Store the remaining potatoes in a cool, dark place, and they’ll keep for months. This method works for any climate—just adjust watering for rain or drought.
Even if you’ve never grown potatoes before, this foolproof approach delivers results. Let’s get those bags planted!
📚 In This Guide
- What you need
- Instructions
- Tips and common mistakes
- Wrapping up and next steps
What you need
- ● Seed potatoes: 3–5 medium-sized, certified disease-free seed potatoes (e.g., Yukon Gold, Red Pontiac, or Fingerlings). Pro tip: Choose organic or untreated for best results! 🌱
- ○ Grow bag: A 5-gallon fabric or mesh potato bag (or a sturdy 10–12" deep container with drainage holes). Optional: Add a zip-top bag inside for easier harvesting!
- ● Potting soil: 2–3 bags of lightweight, well-draining potting mix (avoid garden soil—it compacts!). Look for labels like "all-purpose" or "vegetable garden mix."
- ● Watering can or hose: With a gentle spray nozzle to avoid displacing soil.
- ○ Fertilizer (optional but helpful): Balanced 10-10-10 or 5-5-5 fertilizer (1 tbsp per bag at planting).
- ● Compost or worm castings (½ cup mixed into soil for organic nutrition).
- ○ Chitting (optional but recommended): Place seed potatoes in a bright, cool spot (50–60°F) for 2–4 weeks to sprout "chits" (eyes). Why? Faster germination and stronger plants! 🌱
- ● Sunny spot: Choose a location with 6+ hours of direct sunlight daily (a balcony, patio, or sunny windowsill works!).
- ● Drainage: Ensure your bag/container has holes or elevate it slightly to prevent waterlogging.
Step-by-step instructions for planting seed potatoes in a bag
Here's how I grow a full harvest of potatoes in just 12 weeks using minimal space and no digging.
🪴 Step 1: Choose and Prepare Your Growing Bags
Use a sturdy, breathable bag like a 5-gallon fabric grow bag with drainage holes. I like bags with 2-3 feet of depth—this gives roots room to grow downward while keeping the setup compact. Fill each bag halfway with a mix of 50% potting soil and 50% compost, breaking up any clumps by hand. The goal is loose, airy soil that won't compact as the potatoes grow.
Moisten the mix until it feels like a damp sponge—not soggy, but holding together when squeezed. A bag this size will yield about 4-6 pounds of potatoes at harvest, perfect for a small family. I always label the bag with the planting date so I remember when to harvest.
🌱 Step 2: Cut and Chit Your Seed Potatoes
Cut certified seed potatoes (not grocery store potatoes—they’re treated to prevent sprouting) into 1.5-inch chunks, ensuring each piece has at least 2-3 eyes (the little dimples where sprouts emerge). Let the cut pieces dry for 24 hours to prevent rot. This is called "chitting," and it speeds up growth by 2-3 weeks. Place the pieces in a bright, cool spot (50-60°F) and watch for 1-inch sprouts in about 2 weeks.
Real talk: If you skip chitting, your harvest will still happen, but it’ll take longer. I’ve done both, and the difference is noticeable—chitted potatoes start growing faster and produce more tubers. Just don’t let the sprouts get too long before planting; aim for 1-2 inches max so they don’t break when you handle them.
💧 Step 3: Plant the Chitted Potatoes
Arrange the chitted potatoes 12 inches apart in the bag, placing them 4 inches deep in the soil with the sprouts facing up. Cover lightly with 1-2 inches of soil, leaving the sprouts exposed. This is called "hilling," and it encourages more tubers to form as the plant grows. Water gently but thoroughly until moisture seeps out the drainage holes—this ensures the roots get a strong start.
Here’s the thing—don’t overwater now. You want the soil moist but not waterlogged. A good test is to stick your finger 1 inch deep; if it feels dry, water again. If it’s damp, wait another day. Overwatering at this stage can cause the potatoes to rot before they even sprout.
☀️ Step 4: Provide Sun and Hill as They Grow
Place the bag in a spot with full sun (6-8 hours daily). Potatoes are heavy feeders, so after 4-6 weeks, when the plants reach 6 inches tall, add a 2-inch layer of compost or well-rotted manure around the base. Then, pile soil up the sides of the bag to cover the lower stems—this is called "earthing up," and it triggers the plant to produce more tubers. Repeat this every 2-3 weeks until the bag is nearly full.
You’ll know it’s time to hill when the foliage looks dense and bushy. The key is to keep the soil 1-2 inches below the top of the bag—this prevents the potatoes from baking in the sun and turning green (which makes them bitter). If you see green skin on the tubers at harvest, they’ve been exposed to too much light.
⏰ Step 5: Harvest When Foliage Dies Back
When the top leaves turn yellow and die back, it’s time to harvest—usually 10-12 weeks after planting. Carefully empty the bag and sift through the soil to find the potatoes. Let them cure in a dark, dry place for 1-2 weeks to toughen their skins. This is non-negotiable; curing prevents bruising and extends storage life.
Don’t rush this step. If you harvest too early, the potatoes will be small and waxy. If you wait too long, they’ll start sprouting again. A good rule of thumb is to harvest when most of the foliage has died, but before the soil dries out completely. Store the cured potatoes in a cool, dark place (40-50°F) for up to 6 months.
Tips & tricks for perfect seed potato growing in bags
Took me a while to figure these out, so here's how I guarantee a bountiful harvest every time.
Soil Mix Matters: The 50% potting soil and 50% compost blend is key—it balances drainage with nutrients. If you're short on compost, add a handful of worm castings to boost microbial activity. I've found that pre-moistening the mix to "damp sponge" consistency prevents clumping and ensures even moisture distribution throughout the growing process.
Chitting Shortcut: For faster results, place your seed potato chunks on a tray lined with damp paper towels in a bright spot (like a sunny windowsill) instead of a dark cool area. This speeds up sprouting to about 10 days instead of 2 weeks—just keep the towels damp. The goal is 1-inch sprouts, not 2-inch monsters that'll snap when planting.
Hilling Timing: After the 4-6 week mark when plants hit 6 inches tall, I hill every 2 weeks until the bag is nearly full. This creates more tuber formation zones. The trick is to hill in the morning so any disturbed soil has time to settle before evening watering—prevents soil from sliding back down and exposing potatoes to light.
Harvesting Cues: The 10-12 week timeline is flexible based on your climate. In cooler areas, you might need the full 12 weeks, while warmer zones could harvest at 10. Watch for these signs: foliage yellowing, stems drying but not yet brittle, and soil pulling away from the bag edges. These are better indicators than just counting weeks.
Pro Tips for Planting Seed Potatoes In A Bag
- Took me a while to figure these out, so here's how I guarantee a bountiful harvest every time.
- Soil Mix Matters: The 50% potting soil and 50% compost blend is key—it balances drainage with nutrients.
- Chitting Shortcut: For faster results, place your seed potato chunks on a tray lined with damp paper towels in a bright spot (like a sunny windowsill) instead of a dark cool area.
Frequently asked questions
Got questions about growing seed potatoes in bags? You’re not alone! Here are some of the most common queries—and their straightforward answers—to help you succeed with this space-saving method.
Can I use regular grocery-store potatoes for planting?
Nope! Grocery potatoes are treated to prevent sprouting and may carry diseases. Always use certified seed potatoes (available online or at garden centers). They’re disease-free and pre-sprouted for faster growth. If you’re in a pinch, organic potatoes from the store might work, but they’re riskier.
How long does it take for potatoes to grow in a bag?
With the right conditions, you can harvest baby potatoes in as little as 8–10 weeks, but full-sized spuds take about 12–14 weeks. Keep an eye on the bag—once the tops die back, dig gently to check for harvest-ready potatoes!
What’s the ideal temperature for growing potatoes in bags?
Seed potatoes thrive in 45–75°F (7–24°C) soil temperatures. If nights dip below 50°F (10°C), cover the bag with a light blanket or move it to a sheltered spot. Too hot? Provide afternoon shade to prevent stress. Pro tip: A sunny windowsill or greenhouse extends the growing season!
What can I do if my potatoes sprout but don’t grow?
Slow growth usually means lack of light, water, or nutrients. Check these first:
- Light: Move the bag to a sunnier spot (6+ hours/day).
- Water: Keep soil moist but not soggy—drainage holes are key!
- Nutrients: Add a balanced fertilizer (like 10-10-10) when sprouts are 4–6 inches tall.
Are there alternatives to fabric grow bags for seed potatoes?
Try these space-saving options:
- 5-gallon buckets: Drill drainage holes and use a mix of soil and compost.
- Plastic bins: Line with landscape fabric to prevent root circling.
- Straw bales: Soak a bale, plant potatoes, and top with soil as they grow!
Wrapping up and next steps
Planting seed potatoes in a bag is a game-changer for small spaces—no garden? No problem! 🌱 With just a few supplies and a little patience, you’ll enjoy a bountiful harvest in just 12 weeks.
Whether you’re a beginner or a seasoned gardener, this method proves that growing your own potatoes is easier (and more rewarding) than you think.
Now that you’re ready to dig in, why not take the next step? Try experimenting with different potato varieties or even grow them indoors for year-round fun. Happy planting—your future harvest is waiting! 🥔✨