
Vegetables
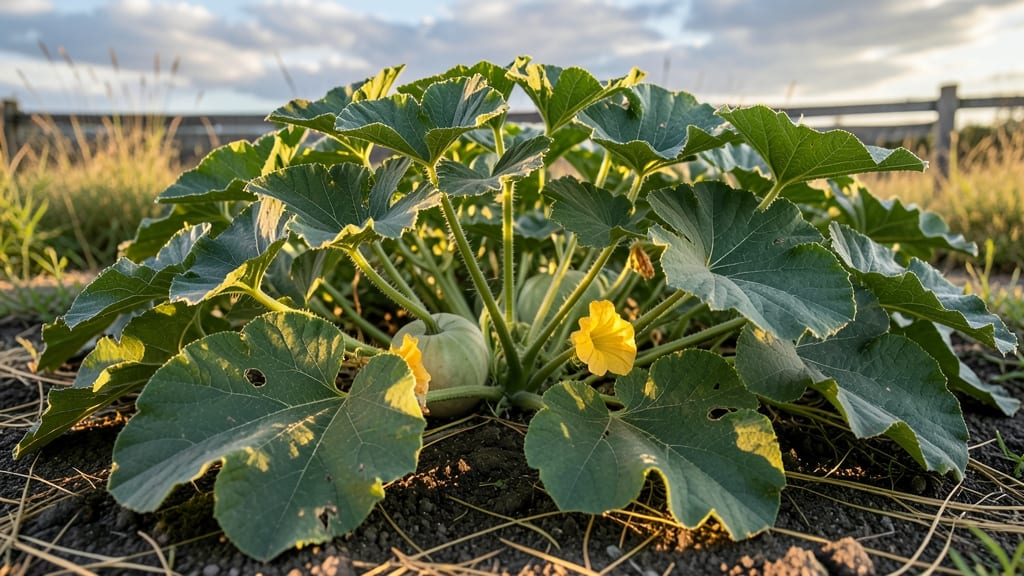
Those pumpkin seed leaves aren’t just green—they’re the powerhouse behind your future harvest. 🌱 Healthy leaves mean bigger vines, more flowers, and the plump pumpkins you’ll eventually slice open for seeds. The secret? Understanding their role in plant health and how to keep them thriving from seedling to harvest.
Yellowing leaves or holes from pests signal trouble, but proper care—like pruning strategically, feeding with nitrogen-rich fertilizer, and watching for powdery mildew—keeps them vibrant. When leaves stay strong, your seeds develop properly, ensuring the best chance for next year’s planting. Let’s get those vines growing right.
📚 In This Guide
- What you need
- Instructions
- Tips and common mistakes
- Wrapping up and next steps
What you need
- ● Pumpkin seeds: 10–20 viable, organic pumpkin seeds (ensure they’re from a fresh, unprocessed pumpkin—save seeds from store-bought pumpkins if possible!)
- ● Growing containers: 2–3 small pots (4–6 inches in diameter) or
- ● A seed-starting tray with individual cells (for better seedling management)
- ● Potting mix: 3–4 cups of well-draining, seed-starting mix (avoid garden soil—it can compact and suffocate seeds!)
- ● Watering can or spray bottle: With a fine mist nozzle for gentle hydration.
- ● Plastic wrap or humidity dome: To create a mini greenhouse effect for germination.
- ● Grow lights or sunny windowsill: A south-facing window (6+ hours of sunlight daily) or a LED grow light (12–16 hours/day).
- ○ Fertilizer (optional but helpful): A balanced liquid fertilizer (5-5-5 or 10-10-10) or
- ● Compost tea for organic nourishment.
- ● Seedling heat mat (if your home is chilly—speeds up germination!).
- ● Twine or small stakes (to support vines as they grow).
- ● Pruning shears (for harvesting leaves without damaging the plant).
- ● Food processor or mortar & pestle (to clean and dry seeds for replanting later!).
Step-by-Step guide to growing pumpkin seed leaves for viable seed harvest
Here’s how to nurture pumpkin plants so their leaves stay healthy—key to harvesting plump, viable seeds later.
🌱 Step 1: Select and Plant Healthy Pumpkin Seedlings
Start with disease-free seedlings or seeds from a reputable source. Pumpkins thrive in full sun (6-8 hours daily) and well-draining soil with a pH of 6.0-7.0. Plant seeds 1 inch deep in mounds or hills, spacing them 3-4 feet apart to allow room for sprawling vines.
Water immediately after planting to settle the soil around the roots. Keep the soil consistently moist but not soggy—pumpkin seedlings wilt quickly if underwatered. Mulch around the base with 2-3 inches of straw to retain moisture and suppress weeds, which compete for nutrients.
☀️ Step 2: Monitor and Maintain Optimal Growing Conditions
Pumpkin leaves need warmth (70-90°F) and bright light to stay lush and disease-free. If your climate runs cooler, use black plastic mulch to warm the soil and speed up vine growth. Watch for powdery mildew on leaves—this fungus thrives in humid conditions and can stunt growth.
Prune leaves only when necessary (e.g., removing yellowed or diseased ones). Over-pruning reduces photosynthesis, which weakens the plant and lowers seed viability. Instead, focus on airflow by spacing plants properly and avoiding overhead watering, which spreads fungal spores.
💧 Step 3: Fertilize for Strong Leaf and Seed Development
Feed pumpkins with a balanced fertilizer (10-10-10) at planting and again when vines start spreading. Switch to a low-nitrogen, high-phosphorus (5-10-10) fertilizer when flowers appear to encourage fruit and seed development. Over-fertilizing with nitrogen produces leafy growth at the expense of seeds.
Water deeply once a week, aiming for 1-2 inches of water per week. Increase frequency during fruit set—stressed plants drop flowers or produce small, seedy pumpkins. Use a soaker hose to deliver water at the base and avoid wetting leaves, which promotes mildew.
⏰ Step 4: Harvest Leaves at Peak Health for Seed Viability
Healthy leaves are your best indicator of seed quality. Harvest pumpkins when their rinds harden and can’t be pierced with a fingernail—usually 75-100 days after pollination. Cut the stem with 2-3 inches of vine attached to prevent rot and disease entry.
Cure harvested pumpkins in a dry, shaded area (80-85°F) for 10 days. This process draws moisture from the seeds, increasing shelf life and viability. Once cured, scoop out seeds, rinse them, and dry on a screen for 3-5 days before storing in a cool, dark place.
🌿 Step 5: Preserve Leaves for Future Reference
Save a few leaves from disease-free plants to compare against future growth. Press them between heavy books or hang them in a dry, dark place to preserve their shape and color. This helps you spot early signs of pests or diseases next season.
Label saved leaves with the variety and harvest date—this reference library ensures you replicate successful growing conditions. For example, if your favorite seed variety always produced vibrant leaves in loamy soil with compost, note those details for next year’s planting.
Tips & tricks for perfect pumpkin seed leaf cultivation
These essential insights will help you grow pumpkin plants with vibrant leaves that lead to the healthiest, most viable seeds.
Soil Preparation: Before planting, amend your soil with compost to improve drainage and nutrient content. Pumpkins love loose, airy soil that prevents root rot. I mix in 2-3 inches of compost into the top 6-8 inches of soil—this mimics the loamy conditions mentioned in Step 5 and gives your plants the best start. The right soil texture prevents waterlogging, which can cause leaf yellowing and reduce seed quality.
Leaf Health Monitoring: In Step 2, you'll want to watch for early signs of powdery mildew—those white, powdery spots on leaves. I've found that a quick spray of neem oil solution (1 tablespoon per quart of water) applied in the evening prevents outbreaks. This organic treatment works best when applied preventatively, especially in humid conditions where mildew thrives. The key is to catch it early before it spreads to other plants.
Fertilizer Timing: The switch from 10-10-10 to 5-10-10 fertilizer at flowering is crucial for seed development. I recommend applying the 5-10-10 fertilizer when you see the first male flowers appear—this signals the plant is ready to focus on fruit production. Too much nitrogen too late will give you beautiful leaves but poor seed development, which defeats the whole purpose of growing pumpkins for seeds.
Harvesting Cues: When checking if pumpkins are ready to harvest in Step 4, look for that hard rind that can't be pierced with your fingernail. I also check the stem—it should be dry and papery where it attaches to the pumpkin. This dry stem is a reliable indicator that the seeds inside are fully developed and ready for curing. Harvesting too early means seeds won't be fully viable for next season's planting.
Pro Tips for Pumpkin Seed Leaves
- These essential insights will help you grow pumpkin plants with vibrant leaves that lead to the healthiest, most viab...
- Soil Preparation: Before planting, amend your soil with compost to improve drainage and nutrient content. Pumpkins lo...
- Leaf Health Monitoring: In Step 2, you'll want to watch for early signs of powdery mildew—those white, powdery spots ...
Frequently asked questions
Got questions about growing pumpkin seed leaves or harvesting seeds? You’re not alone! Here are some common queries—and straightforward answers—to help you navigate the process like a pro.
Can I eat pumpkin seed leaves?
Yes! Pumpkin seed leaves (also called pumpkin vine leaves) are edible and packed with nutrients like iron, vitamin A, and fiber. They’re often used in soups, stir-fries, or as a cooked green. Just ensure they’re pesticide-free and properly washed before use.
When is the best time to harvest pumpkin seed leaves?
Harvest leaves when they’re young and tender—typically 4–6 weeks after planting—to avoid bitterness. Pick individual leaves or snip entire stems, leaving at least 2–3 leaves per vine to encourage regrowth. Morning harvests yield the freshest leaves!
How do I know if pumpkin seed leaves are ready for seed harvest?
For seed production, wait until the pumpkin’s skin hardens and turns a deep orange or yellow. Slice open the fruit to check for plump, fully developed seeds. If they’re still soft or shriveled, give them another 1–2 weeks.
What if my pumpkin seed leaves turn yellow or wilt?
Yellowing or wilting leaves often signal overwatering, underwatering, or pests (like aphids or squash bugs). Check soil moisture—keep it consistently damp but not soggy—and inspect leaves for holes or sticky residue. Neem oil or insecticidal soap can help combat pests.
Can I grow pumpkin seed leaves indoors?
While pumpkins thrive outdoors, you can grow smaller varieties (like bush pumpkins) indoors with plenty of sunlight (6+ hours daily) and a sturdy trellis. Use a large container with well-draining soil, but expect slower growth and fewer leaves compared to outdoor plants.
What’s the difference between pumpkin seed leaves and regular pumpkin leaves?
All pumpkin plants produce edible leaves, but the seed leaves (cotyledons) are the first to emerge and are often more tender. As the plant matures, larger leaves develop, which can be tougher but still usable. Focus on younger growth for the best texture!
Wrapping up and next steps
Growing pumpkin seed leaves—and successfully harvesting viable seeds—is a rewarding journey that connects you to nature’s bounty. Whether you’re aiming for nutrient-rich greens or saving seeds for next season, every step you take strengthens your gardening skills.
Now that you’re armed with the right tools and knowledge, why not try growing your own this fall? Start small—plant a few seeds, experiment with techniques, and watch your garden thrive!
Next steps:
- 🌱 Pick a sunny spot and plant those pumpkin seeds!
- 📝 Keep a gardening journal to track growth and seed viability.
- 🤝 Share your harvest with fellow gardeners—every expert was once a beginner!