
Lawn
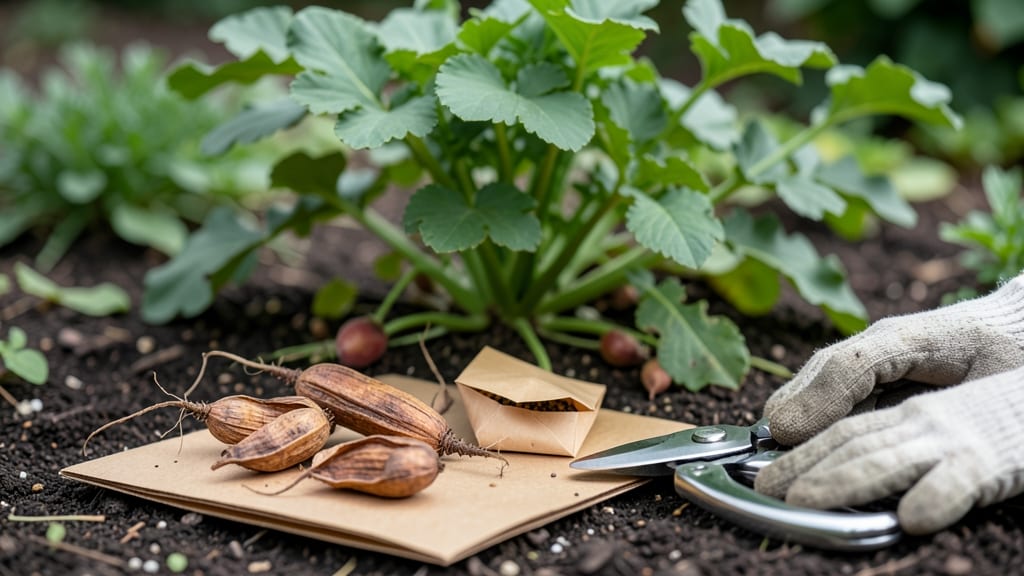
Saving radish seeds turns your harvest into next year's planting powerhouse—no store-bought packets needed. 🌱 The trick is letting a few plants bolt naturally, then harvesting those twist-free pods before they crack open.
I've saved seeds from my favorite varieties for three seasons now, and the payoff is fresh, true-to-type radishes that outperform anything I can buy.
Start by selecting disease-resistant varieties like 'French Breakfast' or 'Cherry Belle' and plant them 10-12 inches apart—this gives them room to bolt without crowding. Let the healthiest plants flower and form seed pods, then watch for the pods to turn from green to brown while still staying firm.
Harvest them before they split open, or you'll lose those precious seeds to the wind.
Once you've collected the pods, spread them on a tray in a dry, dark place for 2-3 weeks to fully dry. Then, crack them open and store the seeds in airtight containers in your freezer for long-term viability.
These seeds will keep for 3-5 years if stored properly, giving you a zero-waste cycle of homegrown radishes year after year.
Isolation is key—plant only one variety at a time to avoid cross-pollination, and keep them away from other radish types. If you're growing in a small space, consider using row covers or planting at different times to maintain purity.
The first year might be a learning curve, but once you master it, you'll never buy radish seeds again.
📚 In This Guide
- What you need
- Instructions
- Tips and common mistakes
- Wrapping up and next steps
What you need
- ● Mature radish plants – Choose open-pollinated varieties (e.g., 'French Breakfast,' 'Cherry Belle') for reliable seeds. Let them bolt and flower naturally.
- ● Seed pods – Harvest fully dried, brown pods (they’ll twist open on their own—no snipping needed!). Aim for 10–20 pods per variety for a good seed yield.
- ● Paper bags or envelopes – Use breathable kraft paper (acid-free) to store pods while drying. Label each with the radish variety and date.
- ● Scissors or pruners – For cleanly snipping pods from the plant (if they don’t detach easily). Sterilize with rubbing alcohol.
- ● Seed-saving journal – Track varieties, germination rates, and growing conditions for future reference.
- ● Glass jars or airtight containers – For long-term seed storage (e.g., mason jars with silica gel packets or mylar bags with oxygen absorbers).
- ● Fine-mesh sieve or colander – To separate seeds from dried pod debris.
- ● Desiccant packs – For extra moisture control in storage containers.
- ● Magnifying glass – To inspect seeds for pests or imperfections before storing.
- ● Humidity monitor – Ideal storage conditions: 35–40% humidity and 32–41°F (0–5°C).
- ● Seed catalog or app – To research varieties and cross-pollination risks (e.g., avoid planting radishes near wild radishes or other brassicas).
Step-by-Step guide to radish seed saving
Here's how to save radish seeds without the frustrating twist—no more struggling with stubborn pods or wasted harvests.
🌱 Step 1: Grow a Dedicated Seed Crop
Start by planting a small patch of radishes specifically for seed saving, using varieties known for their seed-saving qualities like 'French Breakfast' or 'Cherry Belle'. These types produce sturdy pods that won't snap under pressure. Sow seeds 4-6 weeks before your first frost in well-draining soil with a pH between 6.0 and 7.0. Space plants 2-3 inches apart in rows 12 inches apart to allow room for growth and easy access.
Thin seedlings to the strongest ones, leaving 3-4 inches between plants. This spacing prevents overcrowding, which can lead to weak stems and poor pod development. Water deeply once a week to encourage strong root systems, but avoid wetting the leaves to prevent disease. You'll know you're on track when plants develop 4-6 inches of lush green foliage before flowering begins.
🌿 Step 2: Allow Plants to Flower and Set Pods
Let the radishes bolt naturally—don't harvest the roots. Once flowers appear, you're in the critical stage. Radishes are biennial, meaning they produce leaves the first year and flowers the second. For seed saving, you want to encourage this second-year growth by allowing the plants to mature fully. Flowers will appear 4-6 weeks after planting, depending on your climate.
Hand-pollinate flowers if needed, especially in windless conditions. Use a soft paintbrush to transfer pollen from one flower to another in the morning when flowers are fully open. You'll see tiny green pods forming 2-3 weeks after flowering. These pods will grow and mature into the seed pods you'll harvest. Watch for pods that turn from green to brown—this signals they're ready for collection.
✂️ Step 3: Harvest and Dry the Seed Pods
Harvest pods when they're fully brown and dry but before they split open on the plant. Twist pods gently to remove them—if they resist, they're not ready. Lay pods on a clean, dry surface in a warm, dry location with good airflow, like a mesh screen or paper towel. Avoid direct sunlight, which can cause pods to overheat and crack.
Drying takes 1-2 weeks, depending on humidity. You'll know pods are fully dry when they rattle when shaken and the seeds inside are loose. Once dry, rub the pods between your palms to release the seeds. Store seeds in a cool, dark place in a sealed container for up to 3 years. Properly dried seeds should feel light and crunchy to the touch.
🪴 Step 4: Test and Store Your Saved Seeds
Before storing, conduct a simple germination test to ensure viability. Place 10 seeds between damp paper towels in a sealed plastic bag. Keep them in a warm spot (70-75°F) and check daily. Seeds should sprout within 5-7 days. If 80% or more sprout, your seeds are viable and ready for storage.
Label your seed packets with the variety name and harvest date. Store in an airtight container in a cool, dark place. Check seeds annually for pests or moisture. If stored properly, your radish seeds will remain viable for 2-3 years, allowing you to grow fresh radishes year after year without buying new seeds.
Tips & tricks for perfect radish seed saving
Here's what nobody tells you about saving radish seeds—these tricks will turn your seed-saving game from frustrating to foolproof.
Variety Selection Matters: Stick with varieties like 'French Breakfast' or 'Cherry Belle' specifically bred for seed saving—their sturdy pods resist twisting and snap-free harvesting. I learned this the hard way after struggling with delicate heirloom varieties that crumbled at the slightest touch. These tougher types produce pods that stay intact until they're ready for collection, making the whole process smoother.
Timing is Everything: The 4-6 week window before your first frost is critical for Step 1—this gives plants enough time to develop strong roots before winter sets in. If you're in a warm climate, extend this to 8 weeks to account for longer growing seasons. Remember, radishes need that initial growth spurt to establish before they can properly bolt and flower. In Step 2, those 2-3 weeks after flowering are when pods develop fastest—don't miss this window!
Pollination Strategy: For reliable seed production, especially in windless conditions, hand-pollinate in the morning when flowers are fully open. Use a soft paintbrush to transfer pollen between flowers—this mimics natural cross-pollination while ensuring better seed set. I've found that focusing on 3-4 plants per variety gives you enough pods without overwhelming your garden space. The key is consistency: do this for 3 consecutive mornings to maximize pod development.
Drying Technique: When drying pods in Step 3, spread them on a mesh screen in a warm (around 70-75°F), dry location with good airflow. Avoid direct sunlight—it can cause pods to overheat and crack prematurely. The 1-2 week drying time depends on humidity: in damp climates, you might need to extend this to 3 weeks. Test for dryness by gently squeezing a pod—if seeds rattle inside, they're ready. This careful drying preserves seed viability for years.
Pro Tips for Radish Seed Saving
- Here's what nobody tells you about saving radish seeds—these tricks will turn your seed-saving game from frustrating to foolproof.
- Variety Selection Matters: Stick with varieties like 'French Breakfast' or 'Cherry Belle' specifically bred for seed saving—their sturdy pods resist twisting and snap-free harvesting.
- Timing is Everything: The 4-6 week window before your first frost is critical for Step 1—this gives plants enough time to develop strong roots before winter sets in.
Frequently asked questions
Got questions about saving radish seeds? You’re not alone! Here are some of the most common concerns—and straightforward answers—to help you master twist-free pod harvesting like a pro.
Can I save seeds from any radish variety?
Not all radishes are created equal! Only open-pollinated varieties (like 'Cherry Belle' or 'French Breakfast') produce true-to-type seeds. Hybrid radishes (e.g., 'Ruby' or 'Black Spanish') may yield unpredictable offspring. Always check seed packets for "OP" labels or ask seed companies for heirloom options.
When is the best time to harvest radish pods for seeds?
Wait until pods turn brown and papery—not green or swollen. Harvest them when they’re dry but before they shatter (usually 8–10 weeks after flowering). Morning harvests work best, as dew helps loosen seeds from pods. Pro tip: Use a small mesh bag to collect pods to avoid seed loss!
What if my radish pods twist or split before seeds mature?
Twisting pods are a sign of heat stress or overcrowding. To prevent this:
- Thin seedlings early (leave 2–3" between plants).
- Water consistently to avoid soil moisture swings.
- Choose heat-tolerant varieties like 'French Breakfast' or 'White Icicle.'
Do I need to ferment radish seeds before storing?
Fermentation isn’t required for radishes like it is for tomatoes or peppers, but a quick 3–5 day drying period in a warm, dry spot (like a mesh bag in sunlight) ensures viability. Store seeds in a cool, dark place (e.g., a sealed jar with silica gel) for up to 3–5 years.
What if my saved seeds don’t grow true next season?
This usually means:
- Cross-pollination (radishes are self-pollinating, but nearby varieties can mix).
- Improper drying/storage (moisture = mold = dead seeds).
- Old seeds (test germination by planting a few—if <50% sprout, toss ‘em!).
Wrapping up and next steps
Saving radish seeds is a rewarding way to embrace zero-waste gardening while enjoying fresh, homegrown produce year after year!
By following these simple steps—selecting the best pods, drying them properly, and storing them correctly—you’ll create a sustainable cycle that benefits both your garden and the planet. Now that you’re equipped with the knowledge, why not start your own seed-saving journey today? 🌱
Your next step? Plant those saved seeds in your garden or share them with fellow green thumbs! Every twist-free pod you preserve is a step toward a more self-sufficient, eco-friendly harvest. Happy gardening!