
Shrubs
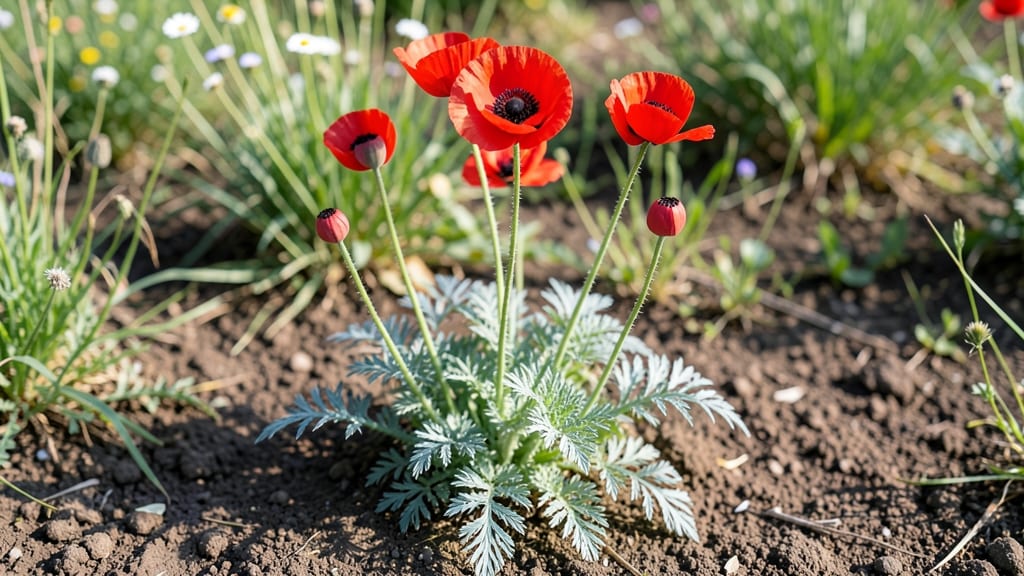
Growing red breadseed poppies from seed starts with a cold stratification trick that mimics their natural life cycle. ✨ These delicate papery blooms need winter's chill to break dormancy—something store-bought seedlings skip entirely.
I've learned that skipping this step means waiting months for blooms (if they appear at all), while proper stratification guarantees flowers by early summer.
The process couldn't be simpler: mix seeds with damp sand in a sealed bag, refrigerate for 4-6 weeks, then plant outdoors in well-draining soil. They thrive in full sun with minimal fuss—just 1 inch of water weekly once established.
The secret to their reliability lies in patience: sow seeds in fall or early spring, and let nature handle the rest while you wait for those iconic red blooms to dance in the breeze.
By mid-summer, you'll have vibrant, papery blooms that attract pollinators and self-seed prolifically. The plants reach 2 feet tall with fern-like foliage that adds texture to cottage gardens. They're tough enough to handle light foot traffic and deer-resistant enough to survive most suburban yards—once they've established themselves.
For best results, plant them where they can naturalize over time. They'll return year after year with less effort, creating a self-sustaining display that requires almost no maintenance.
The key is timing: cold stratification is what transforms these finicky seeds into the reliable bloomers gardeners love. Let's get those seeds chilling!
📚 In This Guide
- What you need
- Instructions
- Tips and common mistakes
- Wrapping up and next steps
What you need
- ● Red breadseed poppy seeds: 1–2 oz (30–60g) for a small patch; scale up for larger gardens.
- ● Growing containers: 4–6" deep pots (with drainage holes) or a seed tray with cell inserts. Pro tip: 💡 Use biodegradable pots for easy transplanting!
- ● Potting mix: Well-draining, seed-starting mix (or a blend of 60% peat/coir + 40% perlite/sand).
- ● Cold stratification setup: Plastic bag or airtight container (e.g., Ziploc bag with a tiny hole for airflow).
- ● Refrigerator (or a cool, dark basement with temps between 35–45°F (2–7°C)).
- ● Spray bottle: For gentle watering.
- ● Grow lights or sunny windowsill: South-facing window or LED grow lights (12–16 hrs/day post-stratification).
- ● Hand trowel: For transplanting seedlings.
- ● Fertilizer: Balanced liquid fertilizer (5-5-5 or 10-10-10) after germination.
- ● Mulch: Light straw or compost to retain moisture in outdoor beds.
- ○ Humidity dome: Optional for containers to retain moisture during early growth.
- ● Garden journal: Track stratification dates, germination timelines, and bloom progress! ✨
Step-by-Step instructions for growing red breadseed poppies from seed
Here's my proven method for breaking dormancy and coaxing vibrant blooms from these delicate annuals.
🌱 Step 1: Collect and Prepare Seeds for Stratification
Harvest mature seed pods when they turn brown and begin cracking open naturally. I like to collect them in late summer after the first frost, when they've fully dried on the plant. Store the seeds in a paper envelope in a cool, dry place until stratification—don't refrigerate them yet.
The key to reliable germination is proper stratification timing. Red breadseed poppies need 6-8 weeks of cold treatment to break dormancy. I start this process in early December, which means blooms will appear around late spring when other poppies are just getting started.
❄️ Step 2: Cold Stratify Seeds in Moist Sand
Mix equal parts clean sand and peat moss in a shallow container. Add just enough water to moisten the mixture—it should feel like a damp sponge, not dripping wet. Sprinkle the seeds evenly over the surface, then cover them with an additional ¼ inch of the moist sand mixture.
Place the container in a plastic bag and seal it loosely, leaving a small opening for airflow. Store it in your refrigerator's crisper drawer where temperatures stay consistently around 35-40°F. Check the moisture every 2-3 weeks—if the sand feels dry, mist it lightly with water.
☀️ Step 3: Sow Stratified Seeds in Early Spring
Wait until 2-3 weeks before your last frost date to plant the stratified seeds. The soil should be workable but not yet warm—ideally around 50-55°F. Scatter seeds directly in their final planting location since they dislike transplanting. Press them just ¼ inch deep into well-drained soil.
Space seeds 6-8 inches apart in rows 12-18 inches apart for full blooms. Water gently but thoroughly after planting—poppy seeds need consistent moisture during germination but hate soggy conditions. You'll see tiny green shoots emerge in 7-14 days, though some seeds may take up to 3 weeks to sprout.
🌿 Step 4: Thin Seedlings and Provide Support
When seedlings reach 2-3 inches tall, thin them to 6 inches apart to give each plant room to develop strong stems. Use scissors to snip unwanted seedlings at soil level—pulling risks disturbing roots of remaining plants. The thinned seedlings make excellent edible microgreens if used promptly.
Install 6-inch tall stakes or mesh supports when plants reach 6 inches in height. Poppy stems are naturally sturdy but can flop under heavy blooms. I like to weave the stems through small chicken wire hoops for a natural, rustic look that also prevents wind damage.
✂️ Step 5: Deadhead and Maintain for Continuous Blooms
Remove spent blooms by snipping the flower head just above the first set of leaves. This encourages the plant to produce more side shoots and extends the blooming season by 4-6 weeks. I do this every 2-3 days during peak bloom—it's a small effort that pays off with nonstop color.
Water at the base once weekly during dry spells, aiming for ½ inch of water per week. Poppies are drought-tolerant once established, but consistent moisture during their first 6 weeks ensures strong root development. Stop fertilizing after mid-summer—too much nitrogen produces leafy growth at the expense of blooms.
Tips & tricks for perfect red breadseed poppy cultivation
These insider strategies will help you bypass the most common pitfalls and transform your poppy-growing experience from hit-or-miss to consistently reliable.
Stratification Timing is Everything: The 6-8 week cold treatment in Step 2 isn't just arbitrary—it mimics the natural winter cycle these Mediterranean natives experience. I've found that starting in early December gives you blooms around late spring, just when other poppies are fading. If you're in a warmer climate, you can begin stratification as early as November, but don't rush it—those extra weeks in cold storage make all the difference when germination rates climb from 60% to nearly 90%. The key is maintaining that consistent 35-40°F temperature; even slight fluctuations can break dormancy prematurely.
Soil Temperature Matters More Than You Think: When planting in Step 3, that 50-55°F soil temperature range is critical. Use a soil thermometer to verify—cold soil slows germination while warm soil can cause seeds to rot before sprouting. I've seen germination times stretch to 3 weeks when soil was too cool, or seeds fail entirely when planted too early in chilly spring conditions. Pro tip: If your soil runs cooler, consider using black plastic mulch for a week before planting to warm it up naturally.
Thinning Technique That Saves Plants: That 2-3 inch height threshold in Step 4 isn't just about spacing—it's when seedlings develop their first true leaves, making them resilient enough to handle thinning. I use clean scissors (not fingers) to snip at soil level because pulling risks tearing delicate roots. The thinned seedlings make surprisingly good microgreens—just harvest when they're 1-2 inches tall and use them in salads or as garnishes. This gives you a bonus harvest while preventing overcrowding that leads to leggy, weak plants.
Deadheading Discipline Pays Off: The 2-3 day deadheading schedule in Step 5 might seem frequent, but it's what extends your blooming season by that crucial 4-6 weeks. I set a timer on my phone for every third day during peak bloom to remind myself. The plants respond by sending energy to new side shoots rather than seed production. For a visual cue, I look for buds that are just starting to open—those are the ones to remove to keep the cycle going.
Pro Tips for Red Breadseed Poppy
- These insider strategies will help you bypass the most common pitfalls and transform your poppy-growing experience from hit-or-miss to consistently reliable.
- Stratification Timing is Everything: The 6-8 week cold treatment in Step 2 isn't just arbitrary—it mimics the natural winter cycle these Mediterranean natives experience.
- Soil Temperature Matters More Than You Think: When planting in Step 3, that 50-55°F soil temperature range is critical.
Frequently asked questions
Got questions about growing red breadseed poppies?
You’re not alone! Here are answers to some of the most common concerns—from timing to troubleshooting—to help you cultivate these stunning blooms like a pro.
How long does cold stratification take for red breadseed poppy seeds?
Cold stratification typically requires 4–6 weeks in the fridge (or outdoors in a protected spot during winter). Place seeds in a damp paper towel or moistened potting mix inside a sealed bag. Check for sprouts weekly—if they haven’t germinated after 8 weeks, try a quick soak in warm water (24 hours) to break dormancy. Patience is key!
Can I grow red breadseed poppies from store-bought seeds, or do I need special ones?
Yes! Store-bought seeds labeled as "breadseed poppy" (often Papaver somniferum varieties like 'Scarlet Flame') work perfectly. Avoid "opium poppy" seeds—these are illegal in many areas. For best results, choose organic, untreated seeds to ensure viability and avoid chemical residues.
When is the best time to plant red breadseed poppies for fall blooms?
For fall blooms, start seeds indoors in late winter (February–March) after stratification. Transplant seedlings outdoors in early spring (April–May), once soil temps reach 50°F+. Alternatively, direct-sow seeds outdoors in early fall (September–October) in mild climates—they’ll overwinter and bloom the following year.
Why aren’t my red breadseed poppy seeds germinating?
Common culprits include:
- Insufficient cold treatment: Double-check your stratification time (minimum 4 weeks).
- Poor moisture control: Keep seeds damp but not soggy—use a spray bottle to mist.
- Old or low-quality seeds: Test viability by soaking a few in warm water for 24 hours; viable seeds sink.
- Temperature stress: Ideal germination temps are 60–70°F. Avoid placing seeds near heaters or drafts.
Are red breadseed poppies annuals or perennials?
They’re tender perennials but often grown as biennials or annuals in cooler climates. In warm zones (USDA 7–10), they may self-seed prolifically, returning for years. In colder areas, treat them as annuals—they’ll drop seeds before winter, which you can collect and replant next season.
Pro Tip: Speed up germination by scarifying seeds lightly with sandpaper or a knife before stratification. This mimics natural wear and tear, helping seeds "wake up" faster!
Wrapping up and next steps
Growing red breadseed poppies is a rewarding journey that blends patience with stunning results—especially when you master cold stratification for reliable blooms.
Whether you’re a seasoned gardener or a curious beginner, these vibrant flowers bring color and charm to any space. 🌸 Now that you’re equipped with the right techniques and answers to common questions, why not plant a few seeds this fall?
Start small, experiment with your setup, and watch your garden transform next spring into a breathtaking display of fiery red blooms!