
Propagation
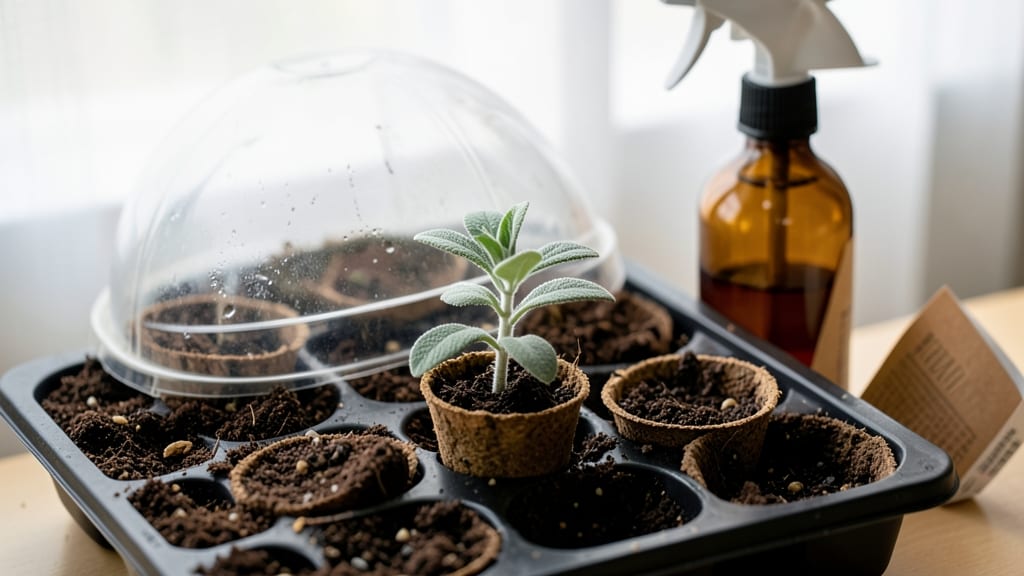
Sage seed germination starts with the right prep—skipping this step means waiting weeks longer for those first green shoots to appear. 🌱 I’ve learned that soaking seeds overnight in warm water cuts germination time nearly in half, giving you a head start on that 20-day timeline.
The key is patience paired with the right conditions: consistent moisture, warmth, and just enough light to encourage growth without drying them out. You’ll need a shallow tray, some damp paper towels, and a plastic bag to create the perfect humidity cocoon.
Most people overlook temperature control—sage seeds thrive at 70-75°F, so a seedling heat mat or sunny windowsill works best. I’ve seen seeds sprout in as few as 10 days when conditions are ideal, but don’t be discouraged if it takes the full three weeks.
Once those first leaves unfurl, you’ll want to transplant them into individual pots with well-draining soil. The seedlings are delicate at first, so handle them gently to avoid shock. By the time they’re a few inches tall, you’ll have sturdy little plants ready to move outdoors or into larger containers.
Here’s the secret: keep the soil consistently moist but never soggy, and provide bright, indirect light until they’re hardened off. With these steps, you’ll go from seed to thriving sage plant in no time—no more waiting for store-bought starts that never quite take!
📚 In This Guide
- What you need
- Instructions
- Tips and common mistakes
- Wrapping up and next steps
What you need
- ● Sage seeds: Fresh, high-quality seeds (aim for Salvia officinalis or your preferred variety). 💡 Pro tip: Store-bought seeds should be labeled for the current year for best viability.
- ● Seed-starting mix: A lightweight, sterile seedling mix (avoid garden soil—it’s too dense!). Use about 2–3 cups for a small tray or 5–6 cups for a deeper container.
- ● Containers: Small seed trays with drainage holes (6–8" wide) or
- ● Biodegradable peat pots (2–3 inches deep) for easy transplanting.
- ● Spray bottle: A 16–20 oz fine-mist bottle for gentle watering (avoid over-saturating seeds!).
- ● Clear plastic dome or plastic wrap: To create a mini greenhouse effect and retain humidity.
- ● Grow lights or sunny windowsill: A LED grow light (12–16 hours/day) or a south-facing window (6+ hours of sunlight).
- ○ Heat mat (optional but helpful): A 70–75°F (21–24°C) mat to speed up germination (especially in cooler climates).
- ● Humidity tray: A shallow tray filled with water and pebbles to boost moisture levels.
- ● Seedling heat mat: For faster germination in cold environments.
- ● Fertilizer: A balanced liquid fertilizer (5-5-5 or 10-10-10) diluted to half-strength for post-germination care.
- ● Labeling tags: To track seed varieties and planting dates.
- ● Tweezers: For delicate seed placement (especially if seeds are tiny).
Instructions for sage seed germination
Here's how to coax those stubborn sage seeds into sprouts without the guesswork.
🌱 Step 1: Prep Seeds and Soil for Best Results
Sage seeds have tough outer shells that need a little help breaking down. Soak them in warm water for 24 hours—this softens the coating and speeds up germination. I like to use a small bowl with just enough water to cover the seeds completely. After soaking, drain them and let them sit on a paper towel for another 12 hours to dry slightly. This prevents mold while keeping them primed.
While your seeds soak, fill your seed-starting containers with light, well-draining potting mix. Sage hates soggy soil, so avoid garden soil or heavy mixes. Press the soil down gently until it's firm but not compacted. The goal is a loose surface that lets moisture penetrate evenly. You'll want the soil to feel like a damp sponge—not dripping wet, not bone dry.
💧 Step 2: Plant Seeds at the Right Depth and Moisture Level
Sage seeds are tiny, so I use a toothpick to create small holes—just ¼ inch deep. Place 2-3 seeds per hole (you'll thin later) and cover them with a thin layer of the same potting mix. Don't bury them deeper than ⅛ inch, or they'll struggle to push through. Gently pat the soil around them to ensure good contact.
Water lightly with a spray bottle until the surface looks evenly moist. You'll know it's right when the soil darkens slightly but doesn't glisten. Too much water now causes rot before germination even starts. Place the containers in a warm spot (70-75°F)—a seedling heat mat works wonders if you have one. Cover the pots loosely with plastic wrap to retain humidity, but leave a tiny gap for airflow.
☀️ Step 3: Provide Warmth and Indirect Light
Sage seeds need consistent warmth to germinate. If your home runs cooler, place the pots on a heating pad set to low or nestle them in a warm spot like on top of the fridge. You'll see tiny sprouts in 14-21 days, but some stubborn seeds may take up to 30 days. Don't give up—patience is key here.
Once sprouts appear, remove the plastic wrap immediately. Sage seedlings are delicate and can develop mold if kept too damp. Place them under bright, indirect light—a south-facing window works well. If your light is weak, supplement with a grow light 4-6 inches away for 12-14 hours daily. Watch for leggy growth (long, weak stems)—this means they're stretching for light. If you see this, move the light closer or rotate the pots daily.
🌿 Step 4: Thin Seedlings and Strengthen Stems
When seedlings reach 1-2 inches tall and have 2-3 true leaves, it's time to thin. Use small scissors to snip the weakest seedling at soil level, leaving the strongest one per pot. Don't pull—this disturbs the roots of the remaining plant. Sage seedlings are sensitive, so handle them gently. After thinning, water lightly at the base to avoid wetting the leaves.
Once seedlings are 3-4 inches tall, it's time to harden them off. Start by moving them outside for 1-2 hours daily in a shaded spot. Gradually increase their time outdoors over 7-10 days, ending with full sun exposure. Sage loves sun but can get sunburned if introduced too quickly. You'll know they're ready for the garden when they're 4-6 inches tall and have a sturdy, woody stem.
Tips & tricks for stress-free sage seed sprouting
These little tricks will help you turn those stubborn sage seeds into thriving plants without the frustration.
Soaking Secret: For the 24-hour soak, use room-temperature water—not hot. Hot water can damage the delicate seed coatings and actually slow down germination. I like to add a drop of mild dish soap to the water to reduce surface tension, which helps the water penetrate those tough outer shells more effectively. After draining, pat the seeds dry on a paper towel for the full 12 hours—this prevents mold while keeping them hydrated enough to germinate quickly.
Planting Precision: When creating those ¼-inch holes in Step 2, use a toothpick or small skewer to make them just wide enough to fit 2-3 seeds comfortably. Press the seeds in gently but firmly—they need solid soil contact to start germinating. The key is covering them with just a whisper of soil (⅛ inch max)—any deeper and they'll suffocate. I find using a fine mist spray bottle helps distribute the soil evenly without compacting it too much.
Warmth Watch: Maintaining that 70-75°F range is crucial during germination. If your home runs cooler, place the pots on top of your refrigerator (not inside) or use a seedling heat mat set to low. Pro tip: Check the temperature with a thermometer—many homes have hot spots near vents or cold spots near windows that can throw off your germination window. The 14-21 day estimate assumes consistent warmth; cooler temps can double that time.
Light Transition: When you remove the plastic wrap after sprouts appear, place the pots under bright indirect light immediately. I've seen beginners leave them in direct sun too soon, which causes the seedlings to scorch. For grow lights, position them 4-6 inches away and keep them on for 12-14 hours daily—this mimics natural daylight cycles. Watch for leggy growth (tall, thin stems) and adjust by moving the light closer or rotating the pots every few days for even growth.
Pro Tips for Sage Seed Germination
- These little tricks will help you turn those stubborn sage seeds into thriving plants without the frustration.
- Soaking Secret: For the 24-hour soak, use room-temperature water—not hot. Hot water can damage the delicate seed coat...
- Planting Precision: When creating those ¼-inch holes in Step 2, use a toothpick or small skewer to make them just wid...
Frequently asked questions
Got questions about germinating sage seeds? You’re not alone!
Here are answers to the most common concerns—so you can confidently grow your own fragrant sage plants without stress.
How long does it take for sage seeds to germinate?
Sage seeds typically take 14–21 days to sprout, depending on temperature and moisture. Keep the soil consistently moist (not soggy) and maintain warmth (around 70–75°F). Patience is key—some seeds may take longer, especially if they’re older or stored improperly.
Do sage seeds need light to germinate?
No! Sage seeds do not need light to sprout—they germinate best in darkness under the soil. Once they’ve sprouted (usually 2–3 weeks), you can move them to a sunny spot. Until then, keep the tray covered or in a dim location to encourage strong root development.
What if my sage seeds aren’t germinating after 3 weeks?
If no sprouts appear after 21 days, try these fixes:
- Check moisture: Dry soil is the #1 killer—keep it damp like a wrung-out sponge.
- Test viability: Soak a few seeds in water overnight. If they sink, they’re likely viable.
- Adjust temperature: Use a heat mat (75–80°F) if your home is cooler.
- Scarify seeds: Lightly nick the seed coat with sandpaper to help water penetrate.
Can I grow sage from seeds indoors, or should I plant them outside?
Start indoors for better control! Use seed trays with well-draining soil, and once seedlings have 2–3 true leaves (not just cotyledons), transplant them outdoors after the last frost. Sage thrives in full sun, so choose a sunny window or grow light for early stages.
What’s the best way to speed up sage seed germination?
For faster sprouts, try these pro tips:
- Pre-soak seeds: Soak in warm water for 12–24 hours before planting.
- Use a humidity dome: Cover the tray with plastic wrap or a lid to retain moisture.
- Warmth boost: Place the tray on a seedling heat mat or near a warm spot (like on top of the fridge).
- Stratification (optional): Sage seeds don’t always need it, but chilling them for 1–2 weeks in the fridge can help if your climate is hot.
Why are my sage seedlings turning yellow or leggy?
Yellow leaves often mean overwatering or poor drainage. Leggy (tall, weak) seedlings usually need more light. Fix it by:
- Letting the top inch of soil dry slightly between waterings.
- Moving seedlings to a sunny window or under grow lights (12–16 hours/day).
- Thinning crowded seedlings to give them space to grow.
Wrapping up and next steps
Growing sage from seed is a rewarding journey that unlocks fresh, fragrant herbs straight from your garden—no stress, just satisfaction! 🌱 With the right prep, patience, and care, you’ll see those first sprouts in just 20 days.
Whether you’re a seasoned gardener or a curious beginner, this method makes it simple to cultivate your own aromatic plants.
Now that you’re armed with the know-how, roll up your sleeves and start sowing! Grab your supplies, follow the steps, and soon you’ll be harvesting homegrown sage for cooking, healing, or sharing with friends. Happy gardening! 🌿✨