
Lawn
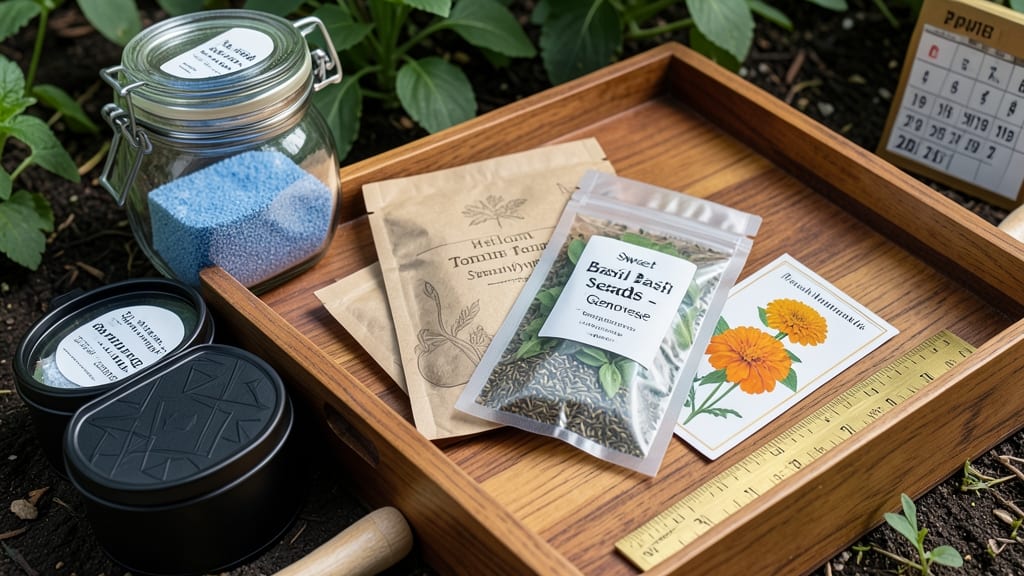
Proper seed pack storage means the difference between a thriving garden and wasted money. ✨ After years of losing viability from damp basements and forgotten seed drawers, I finally cracked the code with humidity-proof containers that keep seeds fresh for 5+ years—even for delicate varieties like lettuce and parsley.
The secret lies in blocking moisture, light, and temperature swings. Start with airtight containers (mason jars or vacuum-sealed bags work best), add a moisture absorber like silica gel packets, and store them in a cool, dark place—think refrigerator crisper drawer or basement closet.
Label everything with the variety name and purchase date so you never guess when seeds might be past their prime.
You'll notice seeds stay plump and vibrant, with germination rates that rival fresh-packaged seeds. The best part? No more last-minute store runs when your favorite heirloom tomato variety sells out. Even finicky seeds like basil and cilantro maintain their vigor for multiple seasons with this method.
For long-term storage, check seeds every 1-2 years and test germination by planting a few—if they struggle, it's time to refresh your supply. Short-term storage (under a year) can use simple paper envelopes, but anything beyond that needs the extra protection.
Here's how to set it up right the first time.
📚 In This Guide
- What you need
- Instructions
- Tips and common mistakes
- Wrapping up and next steps
What you need
- ● Air-tight containers: 3–5 (e.g., Mylar bags with zip locks, glass jars with rubber seals, or food-grade buckets with gaskets). Aim for 1–2 oz containers per 100 seeds.
- ● Desiccant packets: 2–4 (silica gel or uncooked rice in breathable pouches). 1 packet per container is ideal.
- ● Oxygen absorbers: 1–2 (for long-term storage; activate per package instructions).
- ● Permanent markers: 1–2 (for labeling seed types, dates, and varieties).
- ● Labeling tape: 1 roll (to secure markers and prevent smudging).
- ○ Digital scale (optional): For precise seed measurements (0.1 oz increments).
- ○ Heat sealer (optional): For extra security on Mylar bags.
- ○ Vacuum sealer (optional): To remove excess air before sealing.
- ○ Storage box or crate (optional): To organize containers in a cool, dark space.
- ● A cool, dark space (ideal temp: 32–41°F; avoid basements with dampness).
- ● Dry seeds: Let seeds air-dry for 24–48 hours before storage.
- ● Clean workspace: Dust-free area to prevent contamination.
How to store seed packets for maximum year-round viability
Proper seed storage isn't just about saving money—it's about preserving genetic integrity and germination rates. Here's my foolproof method for keeping seeds ready to plant whenever you need them.
🪴 Step 1: Choose the Right Containers for Humidity Control
Start with airtight, moisture-proof containers—mason jars with rubber gaskets or vacuum-sealed bags work best. I avoid plastic bags because they trap too much moisture over time. For each seed packet, use a small 1-ounce mason jar or a quart-sized vacuum bag to prevent condensation buildup.
Label each container immediately with the seed variety, purchase date, and germination test date (usually 2-3 years from now). I use a fine-tip permanent marker for jars and adhesive labels for bags. The key here is to eliminate any air gaps—even small ones let humidity creep in and degrade seed quality.
🌱 Step 2: Dry Seeds Completely Before Sealing
Before storage, spread seeds on a paper towel in a single layer and let them dry for 24-48 hours in a cool, dark place. You'll know they're ready when the paper towel feels dry to the touch and seeds look matte instead of slightly damp. This step is critical—moisture inside sealed containers causes mold and reduces viability.
I place a small silica gel packet (the kind that comes with electronics) in each container to absorb any lingering moisture. Don't skip this—even a tiny amount of humidity can cut germination rates by 30-50% over a year.
⏰ Step 3: Store in a Stable, Cool Environment
Find the coolest, darkest spot in your home—ideally between 32-41°F. A refrigerator crisper drawer works perfectly, but avoid the freezer (temperature fluctuations damage seeds). I keep mine in the bottom shelf of my fridge, where humidity levels stay consistent.
Check containers every 6 months for signs of moisture condensation on the sides. If you find any, remove the seeds immediately, dry them again, and reseal with fresh silica gel. The goal is to maintain 30-50% relative humidity—any higher and seeds lose viability faster.
☀️ Step 4: Test Germination Before Planting Season
Three months before your target planting date, perform a germination test. Place 10 seeds between damp paper towels in a sealed plastic bag. Keep them in a warm (70-75°F), bright location and check daily. Count how many sprout within 7-14 days—that's your germination percentage.
If fewer than 70% sprout, consider buying fresh seeds. I've found that even properly stored seeds lose 10% viability annually, so this test prevents wasted effort. Label each batch with its germination rate to track performance over time.
💧 Step 5: Handle Specialty Seeds with Extra Care
Some seeds—like those from tropical plants or certain herbs—require special handling. For example, chili pepper seeds need 50% higher humidity to stay viable long-term, so I store them with an extra silica packet. Meanwhile, tomato seeds should be fermented and dried completely before storage to prevent mold.
I keep a separate log for these specialty seeds, noting their unique storage requirements. This prevents cross-contamination and ensures each type gets the exact conditions it needs to stay plantable for years.
Tips & tricks for perfect seed pack storage
Here's what nobody tells you about maximizing your seed storage—these are the secrets that'll keep your seeds viable for years.
Container Selection: While mason jars and vacuum bags work perfectly, I've found that 1-ounce mason jars are ideal for small seed batches because they're easier to label and check individually. For larger quantities, quart-sized vacuum bags save space but require more frequent humidity checks—every 3 months instead of 6 months. The key is eliminating all air gaps, so don't stack containers tightly together in your storage area.
Drying Protocol: The 24-48 hour drying period in Step 2 is non-negotiable, but here's the pro move: place your paper towel with seeds on a wire cooling rack instead of a flat surface. This allows air to circulate on all sides, ensuring even drying. I've seen seeds that were only partially dry develop mold within weeks—don't skip this crucial step, even if your seeds look dry initially.
Temperature Stability: While the 32-41°F range is ideal, I've found that most standard refrigerators maintain 38-40°F consistently. If you don't have fridge space, a root cellar or basement closet with good insulation works almost as well. The critical factor is avoiding temperature swings—even a 10°F fluctuation can reduce viability by 15% over time. I recommend using a small digital thermometer to monitor your storage spot.
Specialty Seed Strategy: For seeds like chili peppers that need 50% higher humidity, I create a custom storage solution: I place two silica gel packets in a 2-ounce jar and add a small amount of water to one packet to increase humidity slightly. This creates the perfect microclimate without risking mold. Always test these specialty seeds first—their storage requirements can vary dramatically between varieties.
Pro Tips for Seed Pack Storage
- Here's what nobody tells you about maximizing your seed storage—these are the secrets that'll keep your seeds viable ...
- Container Selection: While mason jars and vacuum bags work perfectly, I've found that 1-ounce mason jars are ideal fo...
- Drying Protocol: The 24-48 hour drying period in Step 2 is non-negotiable, but here's the pro move: place your paper ...
Frequently asked questions
How long can seeds stay viable in humidity-proof containers?
Most seeds retain viability for 1–5 years in airtight, moisture-free containers—though some (like lettuce or onions) last only 6–12 months. Store in a cool, dark place (ideally 32–41°F) to maximize longevity. Always check seed packets for expiration dates and test germination before planting!
Can I store seed packs in the freezer for extra protection?
Yes! Freezing (0°F or below) slows moisture loss and pests, extending viability for decades (e.g., wheat seeds have germinated after 3,000+ years!). Use ziplock bags + desiccant packs, label with dates, and thaw seeds overnight before planting to avoid condensation damage.
What’s the best alternative if I don’t have humidity-proof containers?
DIY solutions work! Try:
- Mason jars + silica gel packets (seal tightly with tape).
- Vacuum-sealed bags (remove air first).
- Glass jars with rice (rice absorbs moisture naturally).
My seeds smell musty or look moldy—what now?
Discard them immediately! Musty smells or black/discolored seeds signal fungus or bacterial growth, which ruins viability. To prevent this, never store seeds in damp areas (like basements) and repack seeds into fresh containers every 1–2 years, even if they seem fine.
Should I store seeds by planting season or alphabetically?
Organize by planting season (spring, summer, fall) for convenience, but label clearly with seed type, variety, and date. Pro tip: Use small index cards taped to containers—they’re easier to read than scribbled jar lids!
Wrapping up and next steps
Proper seed pack storage is the secret to unlocking year-round gardening success—no more wasted seeds or missed planting windows! 🌱 By investing in humidity-proof containers and following best practices, you’ll keep your seeds fresh, viable, and ready to grow whenever inspiration (or spring) strikes. Now’s the perfect time to organize your stash—your future garden will thank you!
🚀 Your Next Step:
- Audit your current seed collection and transfer any vulnerable packs into airtight, moisture-resistant containers today.
- Label everything clearly—because nothing’s worse than digging through a bin of mystery seeds!
- Set a reminder to check humidity levels seasonally (especially before winter storage).