
Lawn
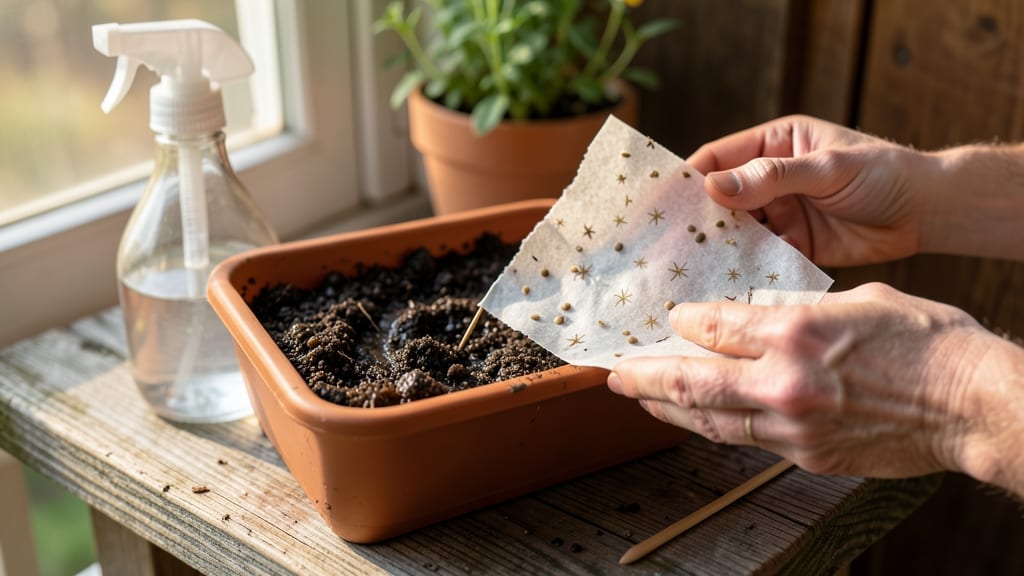
Seed paper planting instructions let you grow flowers anywhere—no soil, no mess, just press and wait. 🌱 I’ve turned this eco-friendly method into a year-round project, harvesting viable seeds from my own blooms to plant again. The best part? You don’t need a green thumb—just patience and a little water. Start with a flat tray or shallow container filled with damp potting mix. Lay the seed paper on top, seeds-side down, and gently press it into the soil until it sticks. Keep it moist (not soggy) under indirect light until sprouts appear in 7-14 days, depending on the plant. My zinnias and marigolds always germinate faster than I expect—proof that nature handles the rest. Once seedlings hit 2-3 inches, transplant them into the ground or pots. The paper breaks down naturally, so no peeling required. For creative uses, try gifting seed paper as wedding favors or planting it in hanging baskets for instant greenery. Troubleshooting is simple: if germination stalls, try misting the paper daily. Uneven sprouts? It’s normal—just thin the weakest ones. This method works for sunflowers, cosmos, and even herbs, making it perfect for beginners and eco-conscious gardeners alike.
📚 In This Guide
- What you need
- Instructions
- Tips and common mistakes
- Wrapping up and next steps
What you need
- ● Seed paper – Choose high-quality, eco-friendly seed paper (e.g., wildflower, herb, or vegetable blends). A standard sheet (~4" x 6") covers ~100 sq. ft. of soil.
- ● Water – A spray bottle or small watering can (avoid over-saturating the paper).
- ○ Garden soil or potting mix – Well-draining, organic soil (avoid clay-heavy mixes). Optional: Mix in compost for nutrient boost.
- ● Sunlight access – A sunny spot (6+ hours/day for most seeds) or a grow light for indoor setups.
- ● Patience – Germination times vary (3–21 days, depending on seed type).
- ● Gloves – Protect your hands from soil or prickly seeds (e.g., sunflower).
- ● Twine or biodegradable mesh – Lightly weigh down the paper with small rocks or a mesh sheet to keep it flat while moist.
- ● Plant markers – Label seeds if testing different varieties (e.g., basil vs. marigold).
- ● Mulch or straw – Retains moisture for delicate seedlings (especially in dry climates).
- ● Seedling trays – For pre-sprouting indoors before transplanting outdoors.
Step-by-Step instructions for creating seed paper
Here's how I craft seed paper that blooms into wildflowers—no soil, no pots, just pure creativity.
🌱 Step 1: Mix the Base Materials
Start by blending 2 cups of wildflower seeds with 1 cup of unbleached paper pulp in a large bowl. I like to use a fork to break up any clumps in the pulp first—this ensures an even distribution of seeds later. Add 1 tablespoon of psyllium husk powder to bind everything together. The psyllium acts like a natural glue, holding the mix cohesive enough to form sheets.
Slowly pour in 1 cup of water while stirring continuously. You want the consistency of thick oatmeal—sticky but still workable. If it feels too dry, add a splash more water. Too wet? Sprinkle in a bit more psyllium. This is your test run: once you get the texture right, the rest will flow smoothly.
💧 Step 2: Spread and Mold the Mixture
Lay a large silicone baking mat or parchment paper on your work surface. Using a rolling pin or your hands, spread the mixture evenly into a ¼-inch thick layer across the mat. Press firmly but gently—you're not trying to flatten it into paper yet, just creating an even base. I find that using the back of a spoon helps smooth out any lumps without tearing the fibers.
Cover the spread mixture with another silicone mat or parchment, then place a heavy book or rolling pin on top. Apply moderate pressure for 5-10 minutes to compress the layers. You'll know it's ready when the edges start to firm up and the center feels springy but not mushy. This step is crucial—too little pressure and your paper won't hold together when wet.
☀️ Step 3: Dry and Cut the Sheets
Remove the top layer carefully and let the sheet air-dry for 24-48 hours in a warm, dry place away from direct sunlight. I prop mine up against a wall in my kitchen where airflow circulates naturally. Avoid using a hairdryer or heat source—it can cook the seeds and reduce germination rates. When fully dry, the sheet should peel away cleanly from the mat.
Once dry, use a sharp craft knife or scissors to cut the sheet into 4x6-inch rectangles (or your preferred size). Store the finished seed paper in a cool, dry place until ready to plant. The seeds remain viable for up to 2 years when stored properly—just keep them away from moisture and sunlight.
🌿 Step 4: Plant and Germinate
When you're ready to plant, simply place the seed paper directly onto pre-moistened soil in your garden bed or container. Press it gently into the surface so it makes full contact with the earth. Mist the area lightly with water to ensure the bottom layer stays damp. Within 7-14 days, you'll see the first sprouts pushing through the paper—it dissolves naturally as the roots grow.
Here's the thing—don't overwater after planting. The paper will break down quickly, and too much moisture can cause the seeds to rot before they sprout. Instead, keep the soil consistently moist but not soggy. You'll know you're doing it right when the paper starts to disintegrate within 2-3 weeks, leaving only healthy seedlings behind.
Tips & tricks for perfect seed paper crafting
Common pitfalls—and how to sidestep every one—when creating seed paper that blooms beautifully.
Texture is Everything: In Step 1, achieving the right consistency is non-negotiable. I learned this the hard way after ruining three batches with either too-dry or too-wet mixtures. For that perfect thick oatmeal texture, add water gradually while stirring—you can always adjust with more psyllium husk powder if needed. The goal is a mix that holds together but isn't gluey, ensuring even seed distribution and proper binding. Remember, this is your test run, so take your time getting it right.
Pressure Control in Step 2: The 5-10 minutes of compression might seem like a short window, but it's where the magic happens. Too little pressure and your seed paper will crumble when wet; too much and you'll end up with a dense board rather than flexible sheets. I use a heavy book for even pressure—place it directly on top of the parchment-covered mixture and check periodically. You'll know it's perfect when the edges firm up but the center still has a slight springiness, like a well-made mat.
Drying Wisdom: The 24-48 hour drying time is crucial for structural integrity. I've found that placing the sheets vertically against a wall creates optimal airflow without direct sunlight exposure. Avoid using heat sources—they can cook the seeds and reduce germination rates. If you're in a humid climate, consider adding a small fan on low to speed up drying while maintaining even moisture loss. The sheet should peel away cleanly from the mat when fully dry, indicating proper binding.
Planting Precision: When it's time to plant in Step 4, the key is gentle pressure. Press the seed paper firmly but evenly into the pre-moistened soil to ensure full contact with the earth. I like to use the back of a spoon to smooth it out without damaging the fragile paper. After planting, resist the urge to overwater—consistent moisture is key. The paper should begin dissolving within 2-3 weeks, leaving healthy seedlings behind. This gradual breakdown is what makes seed paper so effective.
Pro Tips for Seed Paper Planting Instructions
- Common pitfalls—and how to sidestep every one—when creating seed paper that blooms beautifully.
- Texture is Everything: In Step 1, achieving the right consistency is non-negotiable.
- Pressure Control in Step 2: The 5-10 minutes of compression might seem like a short window, but it's where the magic happens.
Frequently asked questions
Got questions about seed paper? Here are answers to the most common ones to help you grow with confidence!
How long does seed paper last before planting?
Seed paper stays viable for 1–2 years if stored in a cool, dry place (like a sealed container or envelope). After that, germination rates may drop. For best results, plant within 6–12 months. Avoid humidity or direct sunlight to prevent mold or premature sprouting.
How soon will seeds sprout in seed paper?
Germination time varies by plant type (e.g., 7–14 days for fast growers like basil or marigolds, up to 3–4 weeks for slower seeds like lavender). Keep the paper moist but not soggy—lightly mist 1–2 times daily. A humidity dome (plastic wrap) can speed up early growth.
Do I need to remove the paper after planting?
Nope! Seed paper is 100% biodegradable and breaks down naturally as roots grow. Simply press it into soil (or water it down for aquatic plants) and let nature do the work. The paper acts as a temporary mulch, retaining moisture until seeds sprout.
Can I plant seed paper in water?
Yes! For hydroponic or aquatic gardens, place the paper in a shallow tray of water (¼–½ inch deep). Change the water every 2–3 days to prevent algae. Use this method for herbs like mint or water-loving flowers like watercress. Just ensure the paper stays submerged until roots form.
What if my seed paper isn’t germinating?
Try these fixes:
- Check moisture: Overwatering can suffocate seeds; underwatering may dry them out. Aim for consistently damp (not drenched) soil.
- Test temperature: Most seeds need 60–75°F. Use a heat mat if your space is too cold.
- Verify seed viability: Some papers contain mixed seeds—research individual needs (e.g., some need light to germinate).
- Patience: Slow starters (like poppies) may take weeks. If nothing sprouts after 4–6 weeks, the seeds may be old.
Are there alternatives to seed paper?
Try:
- Biodegradable seed tape: Pre-spaced seeds on compostable strips for easier planting.
- DIY seed bombs: Mix clay, soil, and seeds into balls for guerrilla gardening.
- Traditional seed packets: Still reliable, but seed paper offers zero waste and creative flair.
Wrapping up and next steps
Seed paper is a simple yet powerful way to turn waste into wildflowers—no green thumb required! 🌱 Whether you’re a gardening newbie or a seasoned pro, this eco-friendly method lets you grow vibrant blooms while reducing plastic waste. The key? Patience, moisture, and a little sunlight.
Now that you’re armed with the know-how, why not plant your first sheet today? Grab a handful of seed paper, pick a sunny spot, and watch your garden grow—one tiny seed at a time. Happy planting! 🌸