
Lawn
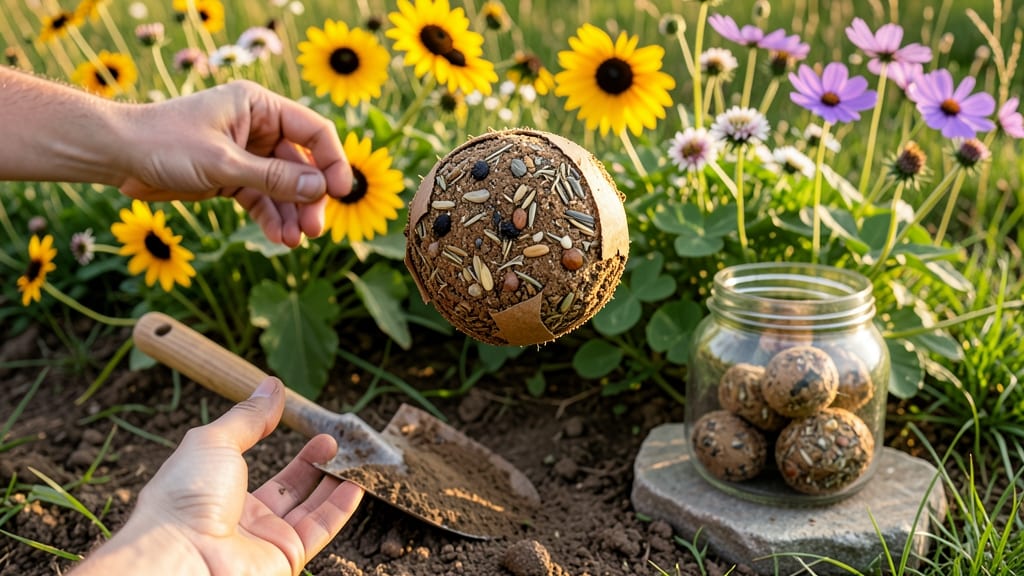
Transforming bare soil into a wildflower meadow takes just 30 minutes with paper seed bombs—no digging, no waiting, just toss and grow. 🌱 These eco-friendly, compostable bundles pack wildflower seeds into recycled paper, designed to dissolve when rain hits, releasing vibrant blooms that attract pollinators and soften urban spaces.
The magic lies in their simplicity: mix clay, compost, and seeds, shape into balls, and let them dry. No special tools, no messy prep—just a way to turn neglected patches into colorful ecosystems.
I’ve used them to revive a cracked sidewalk, brighten a dull corner of the yard, and even surprise neighbors with unexpected bursts of color. By summer, you’ll have a zero-waste wildflower lawn that thrives on neglect, requires no mowing, and supports local bees and butterflies.
The best part? They’re perfect for guerrilla gardening—drop them in public spaces (where allowed) or use them to fill gaps in your own garden beds. They’re ideal for urban gardeners, community projects, or anyone tired of sterile lawns. Let’s make some!
📚 In This Guide
- What you need
- Instructions
- Tips and common mistakes
- Wrapping up and next steps
What you need
- ● 1 cup wildflower seeds (native, organic, and untreated—see tips below for recommendations).
- ● 2 cups clay (air-drying, non-toxic—like Terracotta clay).
- ○ 1 cup compost or worm castings (for nutrients—optional but helpful!).
- ● A large mixing bowl (stainless steel or ceramic).
- ● A spoon or spatula (wooden or silicone for easy cleanup).
- ● Water (just enough to moisten—think damp sand, not soup!).
- ● Newspaper, egg cartons, or small paper cups (for molds—recycled paper works best!).
- ● Plastic wrap or a damp towel (to keep your mix from drying out while you work).
- ● Dried flowers or herbs (like lavender or chamomile—for color and scent).
- ● A small scale (to measure seeds precisely if you’re picky!).
- ● Biodegradable glitter (for a whimsical touch—use sparingly!).
How to make paper seed bombs for a wildflower meadow
Here's my favorite zero-waste method for transforming bare spots into vibrant wildflower patches—no digging required.
🌱 Step 1: Gather and Mix Your Seed Bomb Ingredients
Start with 1 cup wildflower seeds (native species work best) and 2 cups clay soil—the kind with high clay content that holds shape when wet. Add 1 cup compost for nutrients and ½ cup diatomaceous earth as a natural pest deterrent.
Mix everything in a bowl until you get a thick, moldable paste. The clay acts as the binder, while the compost ensures seeds have food to sprout. If the mixture feels too dry, add a few drops of water; if too sticky, sprinkle in more clay. This blend should hold together when squeezed into balls.
💧 Step 2: Form and Dry the Seed Bombs
Roll the mixture into 1.5-inch diameter balls—about the size of a golf ball—for even distribution. Place them on a tray lined with parchment paper to prevent sticking. Let them dry completely in a warm, shaded spot for 24-48 hours.
You'll know they're ready when they feel firm and light enough to toss. If any crack or crumble during drying, remix the loose pieces with a little water and reshape. The key is patience—rushing this step means seed bombs won't hold together when thrown.
☀️ Step 3: Prepare Your Planting Site
Choose a sunny area with 6+ hours of direct sunlight daily. Remove any existing grass or weeds by smothering with cardboard or a thick layer of newspaper, then water it until soggy. This creates the perfect seedbed for your wildflowers to establish without competition.
Wait 3-5 days until the cardboard decomposes slightly and the soil is damp but not wet. The ideal planting window is just before the first spring rains or in early fall when soil temperatures are cool. This timing ensures consistent moisture for germination.
🪴 Step 4: Launch and Maintain Your Seed Bombs
Toss your seed bombs from 1-2 feet above the ground to break them apart naturally. Space them 6-12 inches apart for a dense meadow effect. Lightly press the soil around each bomb to ensure good seed-to-soil contact.
Water gently after planting to settle the soil, but avoid overwatering—wildflowers thrive on natural rainfall once established. You'll see the first sprouts in 2-4 weeks, though some varieties may take up to 6 weeks. Mulch lightly with straw to retain moisture and suppress weeds during this critical period.
⏰ Step 5: Monitor and Enjoy Your Wildflower Patch
After 4-6 weeks, when seedlings reach 2-3 inches tall, thin them if overcrowded by gently pulling excess plants. This ensures stronger, healthier blooms. Avoid fertilizing—wildflowers prefer lean soil and will reward you with vibrant colors and pollinator visits.
By late summer, your patch will burst into color. To maintain it, simply deadhead spent blooms in early fall and let the seeds reseed naturally. Each year, your meadow will grow denser and more resilient, requiring minimal care beyond occasional watering during dry spells.
Tips & tricks for perfect paper seed bombs
Transforming bare spots into vibrant wildflower meadows starts with these game-changing insights that'll help you avoid common pitfalls and maximize success.
Clay Soil Selection: Not all clay soil works equally well—look for the kind labeled "high clay content" at garden centers, which binds better and holds shape during drying. I've found that air-dry clay soil, often used for pottery, creates the most durable seed bombs. If your mixture feels too sandy, add an extra tablespoon of clay soil to each batch for better cohesion. The goal is a texture that holds together when squeezed but still feels moldable.
Drying Strategy: The 24-48 hour drying period is critical, but don't leave them in direct sunlight—this can cause cracking. I place my seed bombs on a wire cooling rack inside my garage or on a covered porch where they get indirect light. A fan on low speed helps speed up drying while preventing surface drying that creates cracks. Rotate the tray halfway through to ensure even drying on all sides.
Site Preparation Secret: The cardboard smothering technique in Step 3 works best when you really soak it first. I like to use corrugated cardboard (the kind from shipping boxes) because it breaks down faster than smooth cardboard. After laying it down, I pour a gallon of water over it to ensure complete saturation. This creates the perfect weed-blocking barrier while adding organic matter to the soil as it decomposes.
Planting Timing: While the instructions mention spring or early fall, I've found that planting just before the first hard frost in late fall can actually work better in many climates. The cold helps break down the cardboard faster, and the seeds get an early start when temperatures warm in spring. Just make sure to cover the area with a thick layer of straw mulch to protect the seeds from winter elements.
Pro Tips for Paper Seed Bombs
- Transforming bare spots into vibrant wildflower meadows starts with these game-changing insights that'll help you avoid common pitfalls and maximize success.
- Clay Soil Selection: Not all clay soil works equally well—look for the kind labeled "high clay content" at garden centers, which binds better and holds shape during drying.
- Drying Strategy: The 24-48 hour drying period is critical, but don't leave them in direct sunlight—this can cause cracking.
Frequently asked questions
Got questions about paper seed bombs?
You’re not alone! Here are answers to the most common ones—so you can start transforming your lawn (or any patch of dirt) into a thriving wildflower meadow with confidence.
What’s the best time of year to plant paper seed bombs?
For optimal germination, plant seed bombs in early spring or fall when soil temps are between 60–75°F. Avoid summer heat (seeds may dry out) or winter frost (they won’t sprout). If you’re in a mild climate, late winter or early spring works too—just keep them moist until blooms appear!
How often should I water seed bombs after planting?
Water lightly but daily for the first 2 weeks to keep the paper moist (not soggy!). After that, water deeply 2–3 times per week—wildflowers are drought-tolerant once established. Overwatering can cause mold, so let the top inch of soil dry between waterings. Pro tip: Morning watering reduces evaporation.
Will seed bombs attract bees or pests?
Wildflowers are bee magnets—great for pollinators! If you’re worried about pests, choose native, non-invasive seeds (like clover or milkweed). Avoid planting in vegetable gardens, but seed bombs thrive in sunny, open areas. Pests like aphids are rare; most wildflowers are pest-resistant. Bonus: Birds love the seeds too!
Can I make seed bombs without paper? What’s a good alternative?
Swap paper for:
- Coffee grounds (adds nutrients + holds shape)
- Compost or coconut coir (biodegradable, great for moisture)
- Clay or mud (traditional method, dries hard)
My seed bombs aren’t sprouting—what went wrong?
Don’t panic! Common fixes:
Too dry? Soak the bombs for 10 mins before planting.
Not enough sun? Wildflowers need 6+ hours of sunlight daily.
Old seeds? Check expiration dates—most last 1–2 years.
Compacted soil? Loosen the dirt before planting.
If still no luck, try planting a fresh batch in a small pot first to test germination.Wrapping up and next steps
Creating a zero-waste wildflower lawn with paper seed bombs is a rewarding way to boost biodiversity, reduce waste, and enjoy nature’s beauty—all in just 30 minutes! 🌱 Whether you’re a gardening newbie or a seasoned eco-warrior, these easy-to-make seed bombs transform empty spaces into vibrant, pollinator-friendly havens. Why stop here? Grab your supplies, get crafty, and watch your garden flourish—one seed bomb at a time!
Next steps:
- 🌿 Test a small patch first to see what thrives in your space.
- 📸 Share your progress (tag us!) for inspiration and tips.
- 🔄 Repurpose more paper waste—turn old maps, junk mail, or newspaper into seed bombs!