
Lawn
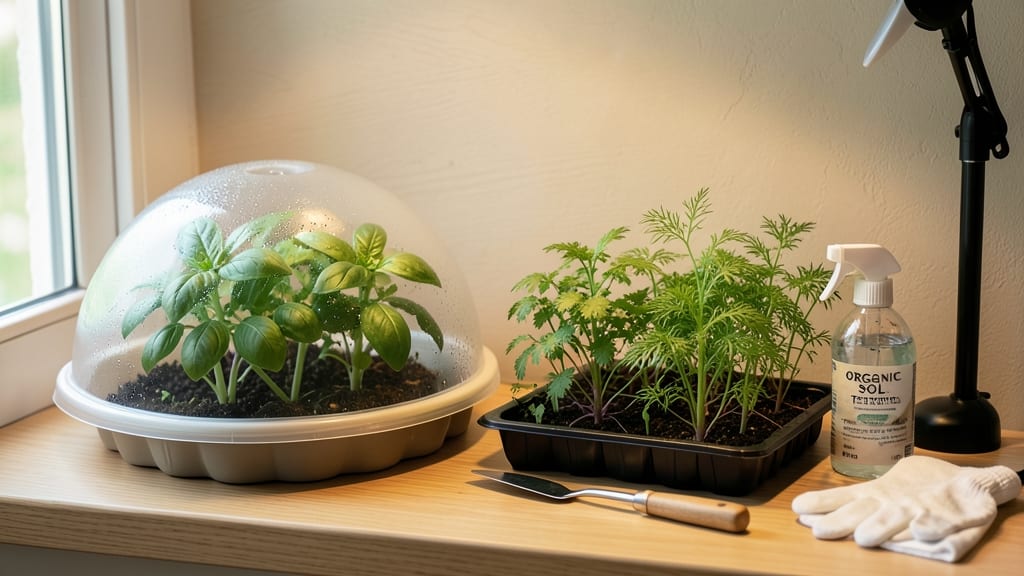
Seed starter kits turn your kitchen counter into a greenhouse—no fancy equipment needed. 🌱 I used mine last spring to grow petunias that bloomed in just 6 weeks, beating the store-bought plants by a month. The secret?
Controlled warmth, consistent moisture, and protection from drafts that mimic a real greenhouse. These kits come with everything: seed-starting mix, trays, domes, and often lights or heat mats. My favorite includes a humidity dome that keeps seeds from drying out, plus clear labels so I don’t mix up varieties.
Beginners love them because they eliminate the guesswork of timing, temperature, and light. You’ll see tiny sprouts in days, not weeks, and sturdy seedlings ready for transplanting. The key is keeping the soil moist (not soggy) and moving trays to brighter light as they grow.
My first batch of herbs was so strong, I gave away plants to neighbors. Perfect for herbs, flowers, or vegetables—just pick a kit designed for your plants. Here’s how to get the most out of yours without the common mistakes.
📚 In This Guide
- What you need
- Instructions
- Tips and common mistakes
- Wrapping up and next steps
What you need
- ● Seed starter kit (includes seed trays, grow domes, and planting cells—typically 50–100 cells per kit).
- ● High-quality seed starting mix (sterilized, peat-free, and well-draining—about 1–2 cubic feet per kit).
- ● Seeds (fast-growing varieties like marigolds, basil, or sunflowers—check the kit’s recommended seed list!).
- ● Watering can or spray bottle (with a fine mist nozzle for gentle hydration).
- ● Grow lights or sunny windowsill (6–8 hours of light daily; LED grow lights are ideal for consistent results).
- ○ Heat mat (optional but helpful) (70–75°F for faster germination, especially for cool-season seeds).
- ● Humidity dome or plastic wrap (to retain moisture during germination).
- ● Small hand trowel or spoon (for planting seeds without crushing cells).
- ● pH testing kit (to ensure your soil mix is between 6.0–7.0 for optimal seed growth).
- ● Seedling labels (to track varieties—try toothpicks or plant markers!).
- ● Fertilizer (low-dose) (like fish emulsion or a balanced 5-5-5 mix, diluted to half-strength).
- ● Thermometer (to monitor soil temperature, especially if using a heat mat).
- ● Tweezers (for delicate seeds like petunias or snapdragons).
Step-by-Step instructions for using seed starter kits
Here's how to get vibrant seedlings in record time—no guesswork, just reliable results.
🌱 Step 1: Prepare the Kit and Fill Trays
Start by laying out all components of your seed starter kit. Most kits include a tray with removable cells, a humidity dome, and pre-moistened seed-starting mix. If your mix isn't pre-moistened, gently water it until it feels damp like a wrung-out sponge—it should hold together when squeezed but not drip.
Fill each cell of the tray with the seed-starting mix, pressing lightly to eliminate air pockets. Leave about ½ inch of space below the rim of each cell to accommodate watering without spillage. Tap the tray gently on the table to settle the mix evenly. This ensures roots have room to grow without crowding.
🌱 Step 2: Plant Seeds at the Correct Depth
Check the seed packet for planting depth—most tiny seeds only need to be pressed ⅛ inch below the surface, while larger seeds go ¼ inch deep. Use the included planting tool or your finger to create a small dimple in the mix, then drop in 1-2 seeds per cell (just in case one doesn't germinate).
Cover the seeds lightly with additional mix, then mist the surface with water until it looks uniformly damp. Avoid overwatering here—you'll see condensation on the dome later, so start with just enough moisture to settle the seeds. Press the mix down gently around the seeds to ensure good soil contact.
💧 Step 3: Cover and Provide Warmth
Place the humidity dome or plastic wrap over the tray to create a greenhouse effect. Seeds germinate fastest in warmth, ideally between 70-80°F. If your home runs cooler, set the tray on a seedling heat mat or place it in a warm spot like the top of your fridge (not inside—just on top).
Check for condensation daily but avoid lifting the dome unless necessary. You'll see tiny sprouts in 5-14 days, depending on the seed type. Once 50% of seeds have sprouted, remove the dome immediately to prevent damping-off—a fungal disease that collapses seedlings overnight.
☀️ Step 4: Move to Bright Light Immediately
The moment seedlings break through the soil, they need 14-16 hours of light daily. Most starter kits don't include lights, so place the tray under a grow light or within 4 inches of a south-facing window. You'll know your light is sufficient if seedlings grow compact and dark green, not leggy and pale.
Rotate the tray ¼ turn daily so plants grow straight toward the light, not lopsided. If you notice seedlings stretching toward one side, your light source isn't strong enough—move it closer or switch to a higher-wattage bulb. Leggy seedlings rarely recover proper strength, so act fast.
⏰ Step 5: Thin and Harden Off Seedlings
When seedlings develop 2-3 true leaves (the second set after the initial cotyledons), thin to the strongest plant per cell. Use scissors to snip weak seedlings at soil level—pulling risks disturbing roots. Water the tray 24 hours before transplanting to firm up the soil and make removal easier.
Start hardening off by placing the tray outside in a sheltered, shaded spot for 1-2 hours the first day. Gradually increase outdoor time by 1 hour daily over 7-10 days, introducing more sun and wind. Seedlings are ready for the garden when they tolerate a full day outside without wilting—transplant on an overcast afternoon to reduce shock.
Tips & tricks for perfect seed starter kits
These simple strategies will help you skip the common pitfalls and get those seedlings popping up faster than you can say "sunny windowsill."
Soil Moisture Secret: In Step 1, when you're filling your trays, press the seed-starting mix firmly enough that it holds together when squeezed but doesn't crumble. The right moisture level is like a wrung-out sponge—if it drips, you've overdone it. Too dry? Spritz with water until it feels consistently damp throughout. This moisture balance is what keeps those seeds happy and ready to sprout within that 5-14 day window.
Light Source Strategy: For Step 4, if you're relying on natural light, place your tray within 4 inches of a south-facing window—closer if your glass is clear, farther back if it's tinted. I've seen seedlings stretch like they're reaching for the moon when they don't get enough light. Pro tip: Rotate your tray ¼ turn daily so all seedlings grow straight and sturdy, not lopsided. This simple rotation prevents that "leggy" look that means your light source wasn't strong enough.
Warmth Hack: In Step 3, if your home runs cooler than the ideal 70-80°F range, try this trick: Place your seed tray on top of your refrigerator (not inside!) for that extra warmth boost. I've had great success with this method during chilly spring nights. Just monitor for condensation—you want a greenhouse effect, not a swampy environment. The warmth speeds up germination without any extra equipment.
Thinning Technique: When you're ready to thin in Step 5, use clean scissors to snip seedlings at soil level rather than pulling them. This prevents disturbing the roots of your keepers. I've learned the hard way that tugging seedlings can uproot the ones you want to keep too. Water the tray 24 hours before transplanting—this firms up the soil and makes removal much easier without creating a root mess.
Pro Tips for Seed Starter Kits
- These simple strategies will help you skip the common pitfalls and get those seedlings popping up faster than you can say "sunny windowsill."
- Soil Moisture Secret: In Step 1, when you're filling your trays, press the seed-starting mix firmly enough that it holds together when squeezed but doesn't crumble.
- Light Source Strategy: For Step 4, if you're relying on natural light, place your tray within 4 inches of a south-facing window—closer if your glass is clear, farther back if it's tinted.
Frequently asked questions
Got questions about seed starter kits? You’re not alone—let’s clear up the most common ones to help you grow with confidence!
What’s the best time of year to start seeds with a kit?
Timing depends on your climate and plant type! For cool-season crops (like lettuce or spinach), start indoors 6–8 weeks before the last frost. Warm-season plants (tomatoes, peppers) can wait until 2–3 weeks before the last frost or after it, depending on your zone. Check your kit’s instructions—most include a handy planting calendar!
Do I need special equipment beyond the kit?
Not usually! Most starter kits include everything you need (trays, soil, seeds, and sometimes lights). You might want to add a spray bottle for gentle watering or a grow light if your space lacks sunlight. A small fan (optional) can boost airflow for healthier seedlings.
What if my seeds aren’t germinating?
Don’t panic—try these fixes:
- Check moisture: Soil should stay damp (not soggy). Use a spray bottle to avoid disturbing seeds.
- Warmth matters: Place trays in a warm spot (70–85°F is ideal) or use a seedling heat mat.
- Light exposure: Seeds need light after sprouting. Keep them under a grow light or in bright, indirect sunlight.
- Fresh seeds: Old seeds (over 1 year) may fail—test a few in a separate tray.
Can I reuse the trays or soil from a starter kit?
Reusing trays is fine—just clean them with soapy water and rinse well to prevent mold. Soil is trickier: Discard used soil (it may harbor diseases or pests) unless you sterilize it in the oven (200°F for 30 minutes). Fresh soil gives seedlings the best start!
Are seed starter kits worth it for beginners?
Kits simplify the process by providing pre-measured soil, seeds, and trays—perfect for avoiding common mistakes like overwatering or poor drainage. They’re also great for small spaces or renters who want to garden without long-term commitments. Plus, the satisfaction of watching tiny sprouts grow is unbeatable!
Still stuck? Drop your question in the comments—we’ve got you covered!
Wrapping up and next steps
Starting your garden with a seed starter kit is more than just a convenience—it’s a game-changer for growing fast, healthy blooms without the guesswork. Whether you’re a green thumb or a curious beginner, these kits simplify the process, ensuring your seeds germinate quickly and reliably.
Now that you’re armed with the right tools and tips, there’s no better time to plant your first seeds!
Ready to dive in? Pick your favorite kit, gather your supplies, and let your garden dreams take root! 🌱✨