
Lawn
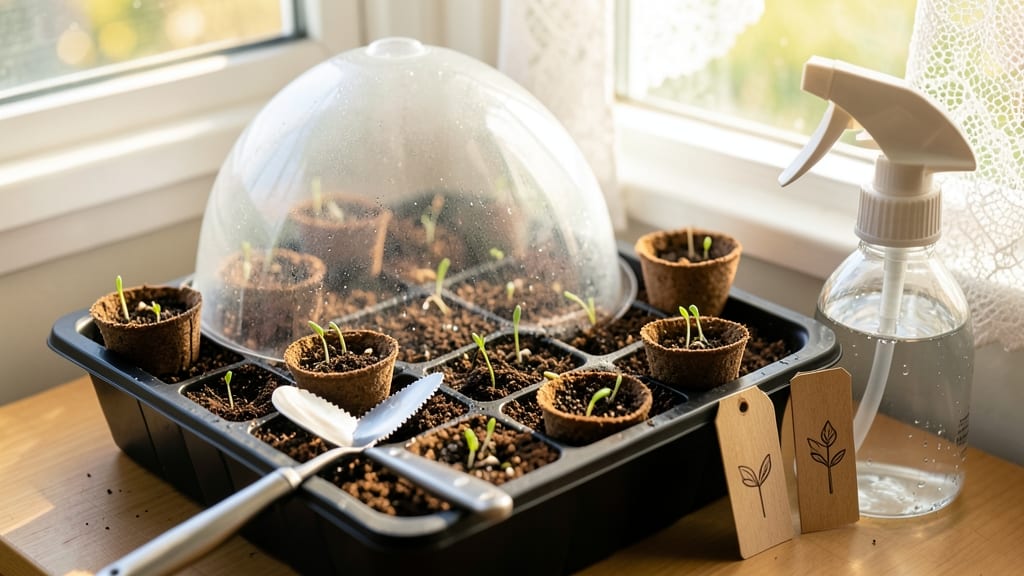
Your seedlings start with the right soil—or they don’t. 🌱 Seed starter potting soil isn’t just dirt; it’s a lightweight, fluffy mix designed to give tiny roots the perfect head start, with drainage so good that water doesn’t drown seeds and nutrients that encourage fast germination.
I’ve seen the difference between store-bought starter soil and garden soil—one gives you seedlings in 10 days, the other takes twice as long (or fails entirely).
The magic is in the texture: it should crumble easily between your fingers, hold moisture without staying soggy, and be free of weeds or disease. Commercial blends often include perlite or vermiculite for aeration, while homemade mixes use coconut coir and compost.
Both work, but starter soil skips the heavy minerals of regular potting mix—those slow down those critical first roots. You’ll notice the difference immediately: seeds pop up faster, stems stay sturdy, and you avoid the dreaded "damping off" (that fuzzy mold that wipes out seedlings overnight).
For veggies like tomatoes or herbs like basil, use a sterilized blend—those plants are especially sensitive to hidden pathogens. Once you’ve mastered the basics, you can tweak blends for specific plants. Leafy greens like lettuce prefer finer textures, while peppers and tomatoes thrive in slightly coarser mixes.
The key is keeping it loose and moist, not wet—think of it as a sponge, not a swamp.
📚 In This Guide
- What you need
- Instructions
- Tips and common mistakes
- Wrapping up and next steps
What you need
- ● Seed starter potting soil: 1–2 gallons (or enough to fill your seed trays). Look for a lightweight, sterile mix labeled for seed starting (e.g., Pro-Mix HP or FoxFarm Seedling Mix). Avoid garden soil—it’s too dense!
- ● Seed trays or containers: 1–2 shallow trays (4–6 inches deep) with drainage holes, or small pots (2–3 inches in diameter). Clear plastic trays are great for monitoring progress!
- ○ Perlite or vermiculite: ½ cup (optional but recommended for aeration). Helps prevent compaction and improves drainage.
- ● Peat moss or coco coir: ½ cup (if your potting mix lacks organic matter). Boosts moisture retention and nutrient availability.
- ● Seeds: Your chosen variety (follow packet instructions for depth and spacing!).
- ● Water: Room-temperature, dechlorinated water (let tap water sit out for 24 hours or use filtered water).
- ● Spray bottle: For gentle watering—avoids disturbing seeds.
- ● Gloves: Protect your hands from soil and sharp edges.
- ● Small hand trowel: For scooping and leveling soil.
- ● Plastic wrap or humidity dome: Creates a mini greenhouse effect to speed up germination.
- ● Grow lights or sunny windowsill: Seeds need 12–16 hours of light daily. A LED grow light is ideal for indoor setups.
- ● Label markers & tags: Avoid mix-ups with different seed varieties!
- ● Fertilizer (low-dose): A balanced, water-soluble fertilizer (e.g., 5-5-5 or 10-10-10) diluted to half-strength. Use only after seeds sprout!
Step-by-Step guide to mixing seed starter potting soil
Here's how I blend a fast-draining, nutrient-rich mix that speeds up germination and keeps roots happy.
🌱 Step 1: Combine Base Materials for Airy Texture
Start by mixing 50% peat moss with 30% perlite—this gives you that light, fluffy texture seeds love. I use my hands to gently fold them together until evenly distributed. The peat holds moisture while the perlite prevents compaction, which is key for those delicate new roots.
Add 20% vermiculite next—this helps retain moisture without suffocating the seeds. You'll know it's mixed right when the blend looks like crumbly, damp sand. Avoid over-mixing; just combine until you see no streaks of any single material. This ensures air pockets for oxygen flow, which seeds need to wake up.
💧 Step 2: Add Nutrients for Strong Starts
Sprinkle in 1 tablespoon of balanced fertilizer (5-5-5 or 10-10-10) per 4 quarts of mix. I like to distribute it evenly first, then fold it in gently. Too much fertilizer now can burn tender seedlings, so a light dose is perfect for early growth.
For extra boost, add ½ cup of compost or worm castings. This gives beneficial microbes and slow-release nutrients. Mix until the compost breaks down into the blend—you should see tiny dark specks throughout. This step is optional but makes a noticeable difference in seedling vigor.
☀️ Step 3: Moisten Without Drowning
Gradually add warm water while mixing, about ¼ cup per quart of blend. The goal is dampness—not sogginess. You'll know it's right when a handful squeezes together but doesn't drip. Overwatering now can cause seeds to rot before they even sprout.
Let the mix sit for 10 minutes, then check again. If it feels too dry, add a splash more water. If it's still damp, leave it—it'll settle slightly. This resting period lets moisture distribute evenly. I always do this step in a clean bucket to avoid contamination.
✂️ Step 4: Sterilize and Store Properly
For extra protection, lightly steam the mix by covering it and placing it in a 200°F oven for 30 minutes. This kills any lurking pathogens. Let it cool completely before use—you don't want to shock those seeds with heat.
Store the mix in a sealed container at room temperature. It stays fresh for 3-4 months this way. Before each use, give it a quick stir to redistribute any settled materials. This keeps your starter mix ready for fast germination whenever you're ready to plant.
Tips & tricks for perfect seed starter potting soil
Took me a while to figure these out, so here's how I make sure my seed starter mix is always ready for action.
Texture Tip: When mixing the 50% peat moss and 30% perlite in Step 1, I like to use a clean, large plastic bin for better visibility. The key is to keep it light and airy—think of it like fluffy snow. If it feels dense or clumps together, add a little more perlite. This prevents "compacted soil syndrome," where roots can't breathe and seedlings suffocate.
Nutrient Balance: In Step 2, I've found that the 1 tablespoon of fertilizer per 4 quarts is perfect for most seeds, but for heavy feeders like tomatoes, I add an extra ½ teaspoon. The compost step is where many gardeners get creative—I've seen people add crushed eggshells or wood ash for extra calcium, but stick to the worm castings if you're new to this. Too much compost can make the mix too rich and cause damping off.
Moisture Mastery: The 10-minute rest in Step 3 is non-negotiable. I've ruined batches by skipping this step and ended up with uneven moisture. Use a spray bottle to add water gradually if needed—this gives you more control than pouring. The mix should feel like a damp sponge: squeeze it gently, and just a few drops should come out. If it's dry, add a little more; if it's dripping, let it sit uncovered for 5 minutes to evaporate excess moisture.
Sterilization Shortcut: The 200°F oven sterilization in Step 4 works great, but if you don't have oven space, you can microwave the mix in 1-minute bursts (covered) until steaming. Just be careful—microwaves heat unevenly. For extra safety, I always let the mix cool completely before using, even if it takes an hour. Warm soil can shock seeds and delay germination.
Pro Tips for Seed Starter Potting Soil
- Took me a while to figure these out, so here's how I make sure my seed starter mix is always ready for action.
- Texture Tip: When mixing the 50% peat moss and 30% perlite in Step 1, I like to use a clean, large plastic bin for better visibility.
- Nutrient Balance: In Step 2, I've found that the 1 tablespoon of fertilizer per 4 quarts is perfect for most seeds, but for heavy feeders like tomatoes, I add an extra ½ teaspoon.
Frequently asked questions
Got questions about seed starter potting soil? You’re not alone! Here are answers to the most common queries to help you grow with confidence.
What’s the difference between seed starter soil and regular potting soil?
Seed starter potting soil is lighter and more sterile than regular potting mix, designed to promote fast germination and delicate root growth. It has higher organic matter, better aeration, and fewer nutrients (since seedlings don’t need much at first). Regular potting soil is denser and nutrient-rich for mature plants.
How long can I store unused seed starter potting soil?
Store it in a cool, dry place (like a sealed container or bag) for 6–12 months. Over time, moisture and microbes can degrade its quality. If it smells musty or clumps tightly, compost it and buy fresh. Pro tip: Add a desiccant packet to keep it dry longer!
Can I reuse old seed starter soil for new seeds?
Reusing soil is risky—it may harbor fungal diseases or pests from previous seedlings. If you must reuse it, sterilize it first by baking at 200°F (93°C) for 30 minutes or microwaving in 30-second bursts (stirring between each). Fresh soil is always best for germination rates!
What’s a good alternative if I don’t have seed starter soil?
Mix your own! Combine 50% peat moss or coconut coir (for moisture retention), 30% perlite or vermiculite (for aeration), and 20% compost or worm castings (for nutrients). Avoid garden soil—it’s too dense and may contain weeds or pathogens. For emergencies, paper towels or damp paper coffee filters work for tiny seeds like herbs!
Why are my seeds rotting in the seed starter soil?
Overwatering or poor drainage are the top culprits. Ensure your containers have drainage holes and water only when the top inch feels dry. If the soil stays soggy, mix in sand or perlite (10–20%) to improve airflow. Also, avoid cold soil—keep trays in a warm spot (70–75°F or 21–24°C) for optimal germination.
Does seed starter soil need fertilizer?
No! Seed starter soil is low in nutrients to prevent burning tender seedlings. Once your plants sprout their second set of true leaves, switch to a balanced liquid fertilizer (like 5-5-5) or transplant them into regular potting soil with fertilizer. Over-fertilizing now can harm growth!
Wrapping up and next steps
Choosing the right seed starter potting soil is the secret to unlocking strong, healthy seedlings that thrive from day one! Lightweight loam blends with perfect drainage and nutrient balance give your tiny sprouts the best shot at fast germination and robust root growth.
Whether you're a seasoned gardener or just starting out, the right soil sets the stage for success—so don’t overlook this foundational step.
Ready to get growing? Grab your seed starter mix, follow your planting guide, and watch those seeds transform into vibrant plants! 🌱✨