
Propagation
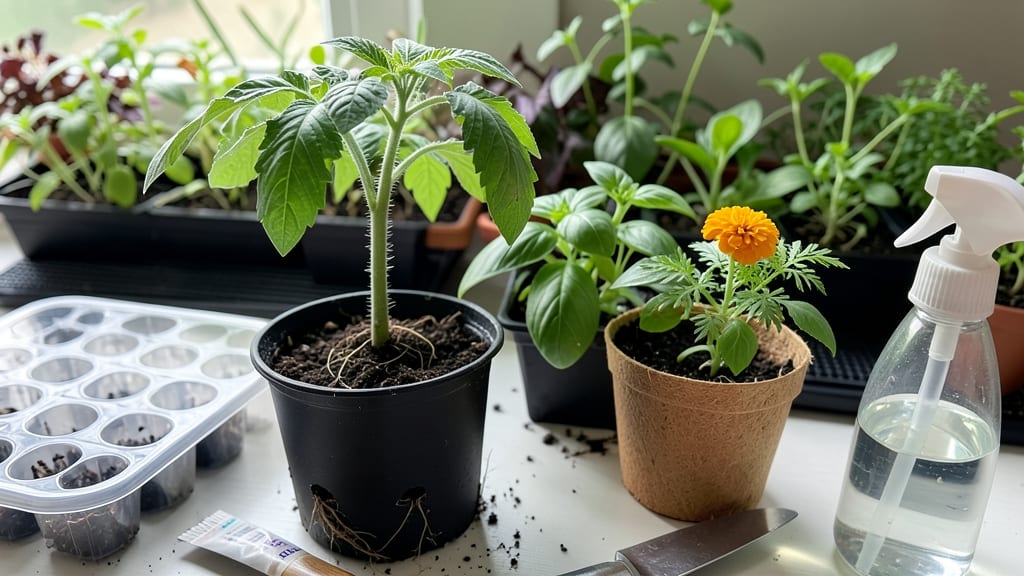
Starting seeds indoors with seed starting for beginners gives you a head start on the growing season—fast germination means stronger plants and bigger harvests by summer. 🌱 I’ve watched my seedlings go from tiny specks to transplant-ready in just two weeks using this simple method, and you can too, even if you’ve never tried it before.
The secret isn’t complicated: sterile soil, the right containers, and consistent warmth. Most beginners overthink it—you don’t need fancy equipment, just a few basic supplies and a sunny spot. I’ll walk you through each step, from picking the best seeds to avoiding the dreaded damping-off fungus that wipes out seedlings.
By the time you’re ready to transplant, your seedlings will be sturdy, well-spaced, and ready to thrive in the garden. No more wilting store-bought plants—just healthy starts that grow like weeds once they hit the soil.
This method works for tomatoes, peppers, herbs, and more, whether you’re growing on a windowsill or under grow lights. Let’s get those seeds sprouting!
📚 In This Guide
- What you need
- Instructions
- Tips and common mistakes
- Wrapping up and next steps
What you need
- ● Seeds: Choose high-quality, fresh seeds (check the packet for germination rates—aim for 80%+!). Start with easy varieties like basil, marigolds, or cherry tomatoes for confidence boosts.
- ○ Seed-starting trays or containers: 1–2 1020-cell trays (or 72-cell trays for larger seeds) with clear domes (optional but helpful).
- ● OR biodegradable pots (4–6 inches deep) or recycled containers (yogurt cups, egg cartons) with drainage holes.
- ● Seed-starting mix: 1–2 bags (1–2 cubic feet) of sterilized, lightweight mix (avoid garden soil—it’s too dense!). Look for labels like "seed-starting mix" or "peat-based."
- ● Drainage layer: Perlite, vermiculite, or coarse sand (1–2 cups) to add to the bottom of trays/containers for aeration.
- ● Watering can or spray bottle: A gentle sprayer (like a 16-oz mister) keeps seeds moist without displacing them.
- ● Grow lights or sunny windowsill: Grow lights: 1–2 LED or fluorescent bulbs (12–16 watts per tray) on a timer (14–16 hours/day).
- ● OR a south-facing window (6+ hours of direct sunlight daily).
- ○ Heat mat (optional but helpful): A seedling heat mat (10x20 inches) warms soil to 70–75°F for faster germination (great for slow starters like peppers or tomatoes).
- ● Labels & markers: Waterproof labels or popsicle sticks + a permanent marker to track varieties.
- ● Humidity dome: Clear plastic wrap or a DIY dome to retain moisture during germination.
- ● Fan: A small oscillating fan (on low) strengthens seedlings by mimicking wind.
- ● Fertilizer: A balanced liquid fertilizer (5-5-5 or 10-10-10) diluted to half-strength for first feeding (after true leaves appear).
- ● Thermometer/hygrometer: To monitor soil temp (ideal: 65–75°F) and humidity (40–60%).
Step-by-step instructions for seed starting for beginners
Here's my go-to method for fast, reliable germination with zero fancy equipment.
🌱 Step 1: Gather Essential Supplies
You only need four things: seed-starting trays with drainage, sterile seed-starting mix, seeds, and a spray bottle. I like clear plastic trays because you can watch roots develop—it's oddly satisfying. Fill each cell with the seed-starting mix until it's just below the rim. Tap the tray gently to settle the soil without compacting it too much.
Don't use garden soil or compost—it's too dense and may contain pathogens that kill seedlings before they even sprout. The mix should feel light and fluffy, like a damp sponge. If it sticks together when squeezed, add a little more perlite or vermiculite to improve drainage.
💧 Step 2: Plant Seeds at the Right Depth
Check the seed packet for depth recommendations, but a good rule is to plant seeds at a depth twice their diameter. Tiny seeds like lettuce go in just 1/8 inch deep, while larger seeds like beans need 1 inch. Use your finger to make a small hole, drop in 1-2 seeds, then cover lightly with more mix.
Mist the surface with your spray bottle until the soil looks evenly damp but not soaked. Overwatering here causes seeds to rot before they sprout. I label each tray with the seed type and date—after a week, identical green sprouts can get confusing fast.
☀️ Step 3: Create Ideal Germination Conditions
Seeds need warmth and humidity to germinate quickly. Place your trays on a seedling heat mat set to 75-85°F—this speeds up germination by 30-50%. Cover the trays with plastic wrap or a humidity dome to trap moisture. Check daily for condensation; if it's heavy, remove the cover for 10 minutes to prevent fungal growth.
Most seeds sprout in 5-14 days, depending on the variety. Watch for the first tiny leaves to appear—these are your cotyledons, not true leaves. Once you see them, remove the cover immediately to prevent damping-off, a fungal disease that collapses seedlings overnight.
⏰ Step 4: Provide Light and Prevent Leggy Growth
The moment seedlings emerge, move them under grow lights or to a south-facing window. Seedlings need 12-16 hours of light daily to grow strong. I use a simple LED grow light on a timer—set it for 14 hours a day. Keep the light 2-4 inches above the plants and raise it as they grow.
Leggy seedlings (long, weak stems) mean your light is too far away. You'll see them stretching toward the light with leaves spaced far apart. Strong seedlings have short, thick stems and dark green leaves. Rotate the tray daily so plants grow straight, not leaning toward the light.
🌿 Step 5: Thin and Harden Off Seedlings
When seedlings have 2-3 true leaves (the second set after cotyledons), thin to the strongest one per cell. Use scissors to snip weak seedlings at soil level—don't pull them, or you'll disturb the roots of the ones you're keeping. Water gently after thinning to settle the soil.
Two weeks before your last frost date, start hardening off seedlings. Place them outside in a sheltered spot for 1-2 hours the first day, gradually increasing time over 10-14 days. This toughens them up so they survive transplant shock. Watch for wilting—if it happens, they're not ready yet. Once they're thriving outdoors, they're ready for the garden.
Tips & tricks for perfect seed starting
These simple strategies will help you avoid common pitfalls and get your seedlings off to a flying start.
Soil Mix Matters: Never skimp on the quality of your seed-starting mix. I've learned the hard way—cheap mixes compact easily and can harbor diseases. Look for a blend labeled specifically for seedlings, which typically contains perlite or vermiculite for drainage. If yours feels dense, add a handful of perlite to improve aeration. This small step makes all the difference in preventing seed rot and giving roots room to grow.
Lighting Secrets: That 14-hour light requirement isn't just about duration—it's about intensity. If your seedlings start looking pale and stretching toward the light, they're not getting enough. I place my grow light just 2-3 inches above the seedlings at first, then raise it as they grow. Watch for leaves touching the light—this is your cue to move it up immediately. A simple LED grow light on a timer solves this problem perfectly without breaking the bank.
Germination Timing: Those 5-14 days can feel like an eternity, but patience pays off. The key is consistency—keep the soil evenly moist (not soggy) and maintain that 75-85°F warmth. I've found that checking for condensation daily prevents fungal issues. If you notice heavy condensation after the 10-minute ventilation window, it's time to remove the cover completely. This simple check can save your entire tray from damping-off disease.
Hardening Off Hack: The gradual increase from 1-2 hours to full outdoor exposure might seem tedious, but it's worth it. I start by placing my seedlings in a sheltered spot like under a patio cover, which gives them protection from wind and direct sun. This mimics natural conditions and prevents shock. If you notice wilting during this process, simply bring them back inside and try again the next day with slightly less time.
Pro Tips for Seed Starting For Beginners
- These simple strategies will help you avoid common pitfalls and get your seedlings off to a flying start.
- Soil Mix Matters: Never skimp on the quality of your seed-starting mix.
- Lighting Secrets: That 14-hour light requirement isn't just about duration—it's about intensity.
Frequently asked questions
Got questions about seed starting? You’re not alone! Here are answers to the most common concerns to help you grow with confidence.
How do I know if my seeds are still viable?
Test old seeds by placing a few in a damp paper towel, sealing them in a bag, and checking for sprouts in 5–7 days. If most sprout, they’re good to plant! For extra peace of mind, buy fresh seeds (packaged within the last year) or check the expiration date on the packet.
What’s the best time to start seeds indoors?
Timing depends on your climate and plant type. As a rule, start cool-season crops (like lettuce or peas) 6–8 weeks before your last frost. Warm-season plants (tomatoes, peppers) need 8–12 weeks. Use a frost date calculator for your ZIP code to nail it!
Can I use regular potting soil for seed starting?
Nope! Regular potting soil is too dense and can suffocate tiny seeds. Use a lightweight seed-starting mix (often labeled "seedling mix" or "organic") with perlite or vermiculite for drainage. Pro tip: Mix in a bit of sand (coarse, not fine) if your mix feels too compact.
What should I do if my seedlings look leggy or weak?
Leggy seedlings mean they’re stretching for light! Move them closer to a bright window (south-facing is best) or use a grow light 12–16 hours daily. If they’re already tall, bury them deeper (up to the first true leaves) to encourage stable growth. Avoid overcrowding—thin or transplant if needed!
Do seeds need warmth to germinate?
Most seeds germinate best in warmth (70–85°F), but some (like lettuce) prefer cooler temps (60–70°F). Use a seedling heat mat ($10–$20) for stubborn seeds or place trays on top of your fridge. Test soil temp with a thermometer—consistency is key!
What’s the best way to harden off seedlings before transplanting?
Acclimate seedlings gradually by placing them outdoors in partial shade for 1–2 hours daily, increasing time over 7–10 days. Start with a sheltered spot (like under a porch) and avoid direct sun or wind. This toughens them up so they’re ready for the garden!
Wrapping up and next steps
Starting seeds from scratch might feel intimidating at first, but with the right tools and a little patience, you’ll be well on your way to a thriving garden! 🌱 The key is consistency—keep those seedlings cozy, well-lit, and hydrated, and soon you’ll be harvesting homegrown goodness.
Ready to take the next step? Try transplanting your strongest seedlings outdoors (or under grow lights) once they’ve sprouted their first true leaves—your green thumb is just beginning to bloom!