
Lawn
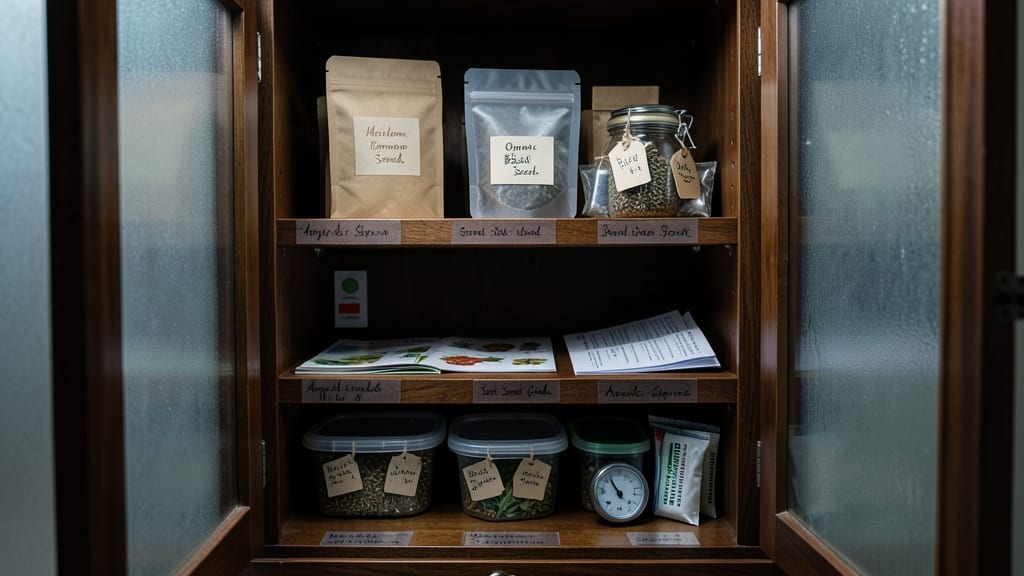
Climate-controlled seed storage cabinets are the secret weapon for gardeners who refuse to let heirloom seeds go to waste. 🌱 I’ve watched packets of seeds I’d saved from one season to the next turn brittle and useless—until I invested in a proper storage solution that keeps them viable for years.
The difference is night and day: seeds stay fresh, germination rates stay high, and you’re never scrambling to find last year’s favorite varieties.
Here’s the thing—it’s not just about throwing seeds in a drawer. Temperature and humidity are the real game-changers. Most seed storage cabinets maintain 35-40°F with 30-50% humidity, which slows down aging and prevents mold.
That means your tomato, pepper, and flower seeds stay ready to plant for 5-10 years or longer, depending on the variety. Even delicate heirlooms like Brandywine tomatoes or Black Krim eggplants stay true to type when stored right.
Organization is just as critical. Labeling with seed type, variety, and date saves headaches later—no more guessing whether that packet of ‘Cherokee Purple’ is from 2022 or 2018. A little system now means a foolproof garden next spring.
And when you pull out seeds that still look and act like new, you’ll understand why this small investment pays off in bountiful harvests for years.
Let’s break down how to set yours up for maximum longevity—no more wasted seeds, just reliable, ready-to-grow treasures waiting for planting day.
📚 In This Guide
- What you need
- Instructions
- Tips and common mistakes
- Wrapping up and next steps
What you need
- ● Seed storage cabinet (climate-controlled or DIY-compatible): Interior dimensions: Minimum 24" (W) x 18" (D) x 36" (H) (adjust based on seed volume).
- ● Temperature range: 32–41°F (0–5°C) with <±2°F (±1°C) stability.
- ● Humidity control: 15–30% relative humidity (RH) (dehumidifier or desiccant packs included).
- ● Desiccant packs (silica gel or clay-based): 2–4 packs per cubic foot of storage space (replace every 6–12 months).
- ● Air-tight seed storage containers: Mylar bags with oxygen absorbers (1–2 per 1 lb of seeds).
- ● Glass jars with tight-sealing lids (16 oz–1 gallon sizes).
- ● Hygrometer & thermometer: Digital probes for real-time monitoring (accuracy: ±1°F/1% RH).
- ● Labeling supplies: Archival-quality labels + permanent markers.
- ○ Spreadsheet or seed inventory app (optional but recommended).
- ● Backup power supply: Battery or solar-powered dehumidifier for outages.
- ● Aluminum foil or vacuum sealer: Extra layer for moisture-sensitive seeds.
- ● Seed catalog or database: For tracking germination rates and storage dates.
- ● Anti-static tools: Gloves/mats to prevent seed damage during handling.
How to set up climate-controlled seed storage cabinets
Here’s how to create the ideal environment for preserving seeds long-term—no fancy equipment required.
🪴 Step 1: Select the Right Cabinet and Location
Choose a cabinet with insulated walls and minimal temperature fluctuations—closets, pantries, or dedicated seed rooms work best. Avoid areas near appliances, windows, or exterior walls where heat and humidity spike. I prefer metal or thick plastic cabinets because they resist moisture better than wood.
Position the cabinet away from direct sunlight and at least 6 inches from walls to allow airflow. If using a repurposed space, add a thermostat-controlled dehumidifier (set to 30-40% humidity) to maintain consistent conditions. A digital hygrometer placed inside will help you monitor levels in real time.
☀️ Step 2: Control Temperature and Humidity Precisely
Seeds thrive in 32-41°F with 30-40% humidity—any deviation shortens their lifespan. If your space doesn’t naturally stay cool, use a small refrigerator (not a freezer) or a cooling unit designed for seed storage. I’ve had success with thermoelectric coolers that run quietly and require no vents.
For humidity, silica gel packets (food-grade) absorb excess moisture without harming seeds. Place them in breathable mesh bags and refresh them every 3-6 months. If humidity climbs above 50%, add a desiccant dehumidifier—just ensure it’s sealed tightly to prevent air leaks.
🌱 Step 3: Organize Seeds with Proper Packaging
Store seeds in airtight, moisture-barrier containers like Mylar bags with oxygen absorbers or glass jars with rubber seals. Label each with the variety, date, and germination test results—I use a small whiteboard inside the cabinet to track inventory at a glance.
Add a small packet of rice or silica gel to each container for extra moisture control. Avoid plastic bags alone—they trap humidity and accelerate spoilage. For long-term storage (5+ years), vacuum-sealed bags with oxygen absorbers are the gold standard.
⏰ Step 4: Monitor and Maintain Conditions Long-Term
Check temperature and humidity weekly during the first month, then monthly afterward. A sudden spike in humidity (above 50%) or temperature (above 50°F) can ruin seeds in days. I set up a small alarm on my phone to remind me—consistency is key.
Every 6 months, inspect containers for condensation, mold, or pest signs (like webbing or holes). Replace desiccants and oxygen absorbers as needed. If you notice seeds losing viability, move them to a cooler environment immediately—even a few degrees difference matters over decades.
Tips & tricks for perfect climate-controlled seed storage
Real talk: The difference between seeds that last decades and seeds that lose viability in months often comes down to these overlooked details.
Location Intelligence: That "6 inches from walls" rule in Step 1 isn't arbitrary—it creates a microclimate where airflow circulates properly. I learned this the hard way after storing seeds in a corner where condensation formed on the back wall. For extra protection, add a small fan on low speed inside the cabinet to maintain even air distribution, especially if you're using a repurposed space.
Temperature Layering: The 32-41°F range in Step 2 is your sweet spot, but here's what nobody tells you: Place your thermostat-controlled dehumidifier on the bottom shelf and your seeds on the top shelf. Cold air sinks, so this creates a natural temperature gradient that prevents hot spots. I've seen 5°F differences between shelves in poorly arranged setups.
Container Upgrade: While Mylar bags work well, I've found that glass jars with magnetic seals actually outperform them for long-term storage. The glass creates a better moisture barrier, and the magnetic seals prevent air leaks better than traditional rubber gaskets. Just make sure to use food-grade desiccants inside—regular silica gel can leach contaminants over time.
Maintenance Hack: That 6-month inspection in Step 4 is critical, but here's my pro move: Keep a small notebook inside the cabinet with a carbonless copy. Every time you check humidity or replace desiccants, jot down the date and readings. This creates a permanent record that's far more reliable than memory—especially important when storing heirloom varieties with specific germination requirements.
Pro Tips for Seed Storage Cabinets
- Real talk: The difference between seeds that last decades and seeds that lose viability in months often comes down to these overlooked details.
- Location Intelligence: That "6 inches from walls" rule in Step 1 isn't arbitrary—it creates a microclimate where airflow circulates properly.
- Temperature Layering: The 32-41°F range in Step 2 is your sweet spot, but here's what nobody tells you: Place your thermostat-controlled dehumidifier on the bottom shelf and your seeds on the top shelf.
Frequently asked questions
Got questions about keeping your seeds fresh and ready for planting? Here are some of the most common queries about seed storage cabinets—plus the answers you need to ensure your seeds stay viable for years to come.
What temperature and humidity levels should I maintain in a seed storage cabinet?
Aim for a cool, stable environment between 32°F and 41°F (0°C–5°C) with 30–50% humidity. Fluctuations can damage seeds, so climate-controlled cabinets are ideal for long-term storage. Avoid basements or garages unless they’re temperature-regulated!
How long can seeds last in a seed storage cabinet?
With proper conditions, many seeds retain viability for 5–10+ years. Vegetable seeds like tomatoes or peppers often last 4–6 years, while flowers and herbs may last 1–3 years. Always check seed packets for specific guidelines—some varieties are hardier than others!
Are seed storage cabinets worth the investment over DIY solutions?
If you’re storing seeds long-term or in large quantities, a cabinet is a smart choice. DIY options (like sealed jars in the fridge) work short-term but lack precision. Cabinets eliminate guesswork, protect against pests, and maintain ideal conditions—saving you money on wasted seeds!
How do I prevent mold or pests in my seed storage cabinet?
Start with dry, clean seeds in airtight containers. Use silica gel packets or moisture absorbers to control humidity. Inspect seeds annually for signs of pests (like webbing or tiny holes) and freeze them for 48 hours if infested. Avoid storing seeds near volatile chemicals!
Can I reuse a seed storage cabinet for different seed varieties?
Yes! Just empty, clean, and dry the cabinet thoroughly between uses. Wipe down shelves with a mild disinfectant (like rubbing alcohol) to remove residue. Label containers clearly to avoid cross-contamination—especially important for heirloom or rare seeds!
Wrapping up and next steps
Investing in a seed storage cabinet is a game-changer for preserving your seeds’ vitality—no matter the climate! These climate-controlled solutions shield your precious stock from humidity, temperature swings, and pests, ensuring long-term viability and germination success.
Whether you’re a gardener, farmer, or seed saver, this small step can save you time, money, and future headaches.
Ready to take the next step? Evaluate your storage needs—pick the right cabinet size, features (like humidity control or UV protection), and budget. Then, explore top-rated models or consult with experts to make a choice you’ll love for years to come! 🌱✨