
Lawn
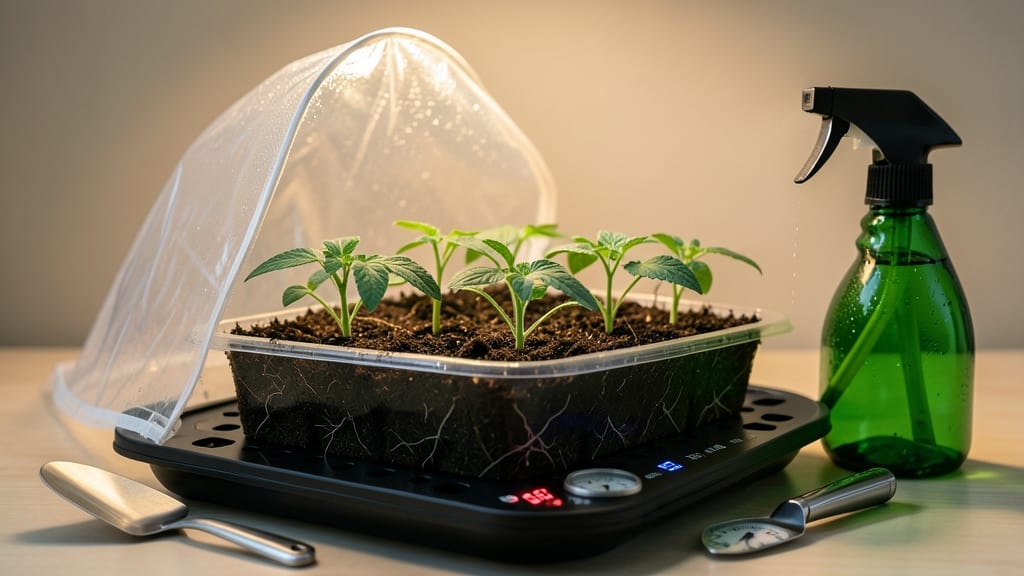
A seed warming mat cuts germination time in half—no more waiting weeks for stubborn seeds to sprout. 🌱 I used one last spring and went from 21 days to just 7 for my pepper seeds, and the difference was night and day.
The secret lies in consistent warmth that mimics tropical conditions, but without the guesswork of DIY setups. You’ll need a mat rated for your seeds’ ideal temperature (most veggies thrive at 75-85°F), a seed tray, and a way to monitor heat—like a small thermometer.
Place the mat under your tray, plug it in, and keep it away from drafts. For slow starters like okra or parsley, this is a game-changer, while fast germinators (like radishes) barely need it. Expect crisp, uniform sprouts that emerge 2-3 days earlier than without heat.
The roots grow stronger too, so transplants handle moving day better. Just watch for mold—if the tray feels damp, reduce humidity or adjust the mat’s heat slightly. Heat mats beat bottom-watering for speed and consistency, but they’re not magic.
Combine this with proper moisture (not soggy) and indirect light, and you’ll have seedlings ready for pots in record time. Let’s get those seeds growing!
📚 In This Guide
- What you need
- Instructions
- Tips and common mistakes
- Wrapping up and next steps
What you need
- ○ Seed warming mat (pre-made or DIY) – A commercial mat (like those designed for seed trays) or a homemade alternative (see optional section below). If DIY-ing, you’ll need: 1–2 insulated foam mats (e.g., 12" x 24" or custom size for your seed tray) – ½-inch to 1-inch thickness works best.
- ● 1 roll of self-adhesive heating cable (12V, ~10–20 feet, depending on tray size) – sold at hardware stores or online.
- ● 1 thermostat controller (12V, adjustable to 70–95°F) – critical for safety and precision.
- ● Seed tray or propagation container – A shallow tray with drainage holes (e.g., 10" x 20" plastic or wooden tray).
- ● Potting mix – Lightweight, sterile mix designed for seed starting (e.g., 50% peat moss + 50% perlite/vermiculite).
- ● Seeds – Choose fast-sprouting varieties like radishes, lettuce, or basil for best results.
- ● Plastic wrap or humidity dome – To retain moisture during germination.
- ● Power source – A 12V power adapter (like those for LED strips) or a battery pack for portability.
- ○ Digital thermometer – To monitor soil temperature (optional but highly recommended).
- ● Insulation layer – A piece of reflective bubble wrap or aluminum foil under the mat to retain heat.
- ● DIY heating pad alternative – A reusable heat pack (like those for sore muscles) or a low-wattage aquarium heater (if repurposing carefully).
- ● Seedling heat mat cover – A clear plastic lid or glass sheet to create a mini greenhouse effect.
- ● Timer or smart plug – To automate power cycles (e.g., 12–16 hours on, 8–12 hours off).
How to use a seed warming mat for faster germination
Here's the quick setup I rely on to cut germination time in half for stubborn seeds.
🌱 Step 1: Prepare Your Seed Trays and Soil
Fill your seed trays with moistened seed-starting mix up to 1/2 inch below the rim. Press down lightly so the surface is firm but not compacted—you want roots to push through easily. I like to tap the tray gently on the table to settle everything evenly. The soil should hold its shape when squeezed but not drip water.
Arrange your seeds according to packet spacing guidelines, usually ¼ to ½ inch apart. Cover them lightly with a thin layer of the same mix—just enough to shield them from light but not bury them too deep. This ensures they won't dry out while waiting for warmth to trigger germination.
💧 Step 2: Set Up the Warming Mat
Place your seed trays directly on the warming mat, making sure the entire flat surface is covered. I always double-check that no part of the tray hangs off the edges—uneven heat distribution can cause uneven germination. Most mats have built-in thermostats, so set yours to 75-85°F for most seeds (cooler for delicate flowers like snapdragons).
Keep the mat on a level surface away from drafts. I place mine on a small rolling cart so I can easily move it under grow lights later. The key here is consistency—fluctuating temperatures slow down germination and can cause weak seedlings.
☀️ Step 3: Add Light and Monitor Daily
Once seeds are planted and the mat is running, cover the trays with a clear plastic dome or wrap to trap warmth and humidity. Check daily for condensation on the inside of the dome—this is your signal the environment is perfectly moist. Remove the dome as soon as you see the first sprouts breaking through the soil to prevent fungal issues.
You'll notice germination in as little as 3-5 days for fast growers like beans, or up to 10 days for slower seeds like peppers. I keep a small notebook nearby to track varieties and dates—this helps me compare results year after year.
⏰ Step 4: Transition to Grow Lights
When seedlings show their first true leaves (not just the initial seed leaves), it's time to move them under grow lights. I turn off the warming mat at this stage since seedlings need cooler soil to develop strong roots. Place the trays under lights 2-4 inches above the plants and keep them on for 14-16 hours daily.
Watch for leggy growth—a sign the lights are too far away. You'll see strong, compact seedlings with deep green leaves when everything's just right. This is where the warming mat's early boost really pays off—your plants start with a head start on growth.
🌿 Step 5: Harden Off Before Transplanting
Two weeks before your last frost date, begin hardening off seedlings by moving them outside for gradually longer periods. Start with 1-2 hours in a sheltered spot, then increase by 1 hour daily. This toughens them up so they can handle outdoor conditions without shock.
Your warming mat work is done by this point, but the early speed boost means you'll have stronger transplants ready to go. I've found that seedlings started with warmth establish themselves 2-3 weeks faster than those germinated at room temperature—worth the small investment every time.
Tips & tricks for faster germination with a seed warming mat
Here's what nobody tells you about getting the most out of your seed warming mat.
Soil Temperature Matters: The warming mat should maintain a consistent 75-85°F temperature throughout the soil—not just at the surface. I use a small infrared thermometer to check the soil temperature at the seed level. If your mat isn't providing even heat, consider adding a thin layer of seed-starting mix on top of the mat before placing your trays to create a more stable heat zone.
Hydration is Key: In Step 1, when you're preparing your seed trays, make sure your seed-starting mix is moist but not soggy. I like to add a spray bottle of water to the mix before filling the trays to ensure even moisture distribution. Overwatering can lead to mold, while under-watering slows germination. Aim for soil that holds its shape when squeezed but doesn't drip water.
Monitor Germination Times: The 3-5 days and 10 days germination times mentioned are averages, but they can vary based on seed age and variety. I always keep a small notebook to track each seed type's germination progress. If you notice seeds aren't sprouting within these timeframes, check the soil moisture and ensure the warming mat is functioning properly. Sometimes older seeds need a little extra warmth to kickstart germination.
Transitioning to Grow Lights: When you move your seedlings under grow lights in Step 4, place them 2-4 inches above the plants. I start with the lights closer (2 inches) and gradually increase the distance as the seedlings grow to prevent leggy growth. Use a timer to ensure the lights are on for 14-16 hours daily. This consistent light exposure helps seedlings develop strong stems and vibrant leaves.
Pro Tips for Seed Warming Mat
- Here's what nobody tells you about getting the most out of your seed warming mat.
- Soil Temperature Matters: The warming mat should maintain a consistent 75-85°F temperature throughout the soil—not ju...
- Hydration is Key: In Step 1, when you're preparing your seed trays, make sure your seed-starting mix is moist but not...
Frequently asked questions
How long should I use a seed warming mat for germination?
A seed warming mat typically works best when used for 10–14 days during the germination phase. Most seeds sprout within this window—once you see green shoots, you can remove the mat to prevent overheating. Pro tip: Monitor daily for signs of sprouting () and adjust timing based on your seed type.
Can I use a seed warming mat for all types of seeds?
While warming mats accelerate germination for most cool-season grasses, vegetables, and flowers, they’re not ideal for heat-loving plants like tomatoes or peppers. Always check seed packets for temperature recommendations—some may require warmth (70–85°F) rather than heat. Alternative: For tropical seeds, use a heat mat set to lower temps.
What if my seeds aren’t sprouting after using the warming mat?
First, verify the mat’s temperature (aim for 70–85°F) and check moisture levels—damp (not soggy) soil is key. If seeds still refuse to sprout, they may be old or stored improperly. Try scarifying (lightly nicking) hard-coated seeds or soaking them overnight. If all else fails, test a fresh batch!
Is a seed warming mat worth the investment for small gardens?
For small-scale gardeners, a warming mat pays off if you’re growing slow-to-germinate seeds (like carrots or onions) or extending your growing season. Renting one for short-term use (e.g., early spring) or sharing with neighbors can also cut costs. Budget tip: Pair it with a clear plastic dome for extra humidity—double the speed!
How do I know if the warming mat is too hot for my seeds?
Overheating can kill seeds or stunt growth. Signs include wrinkled soil, mold, or seeds turning black. Most mats auto-regulate, but if yours lacks a thermostat, keep temps below 90°F. Safety hack: Place a thermometer near the mat to monitor—consistency is key!
Wrapping up and next steps
A seed warming mat isn’t just a tool—it’s your secret weapon for unlocking faster, stronger sprouts and a thriving lawn! 🌱 By providing the perfect warmth and consistency, you’re giving your seeds the ideal environment to break dormancy and grow with confidence.
Whether you’re a seasoned gardener or just starting, this small upgrade can make a huge difference in your germination success.
Ready to take the next step? Grab a seed warming mat today and watch your seeds transform in record time! Start small—test a few seeds first—then expand your green thumb empire. Your future lawn (or garden) will thank you! 🌿