
Pests
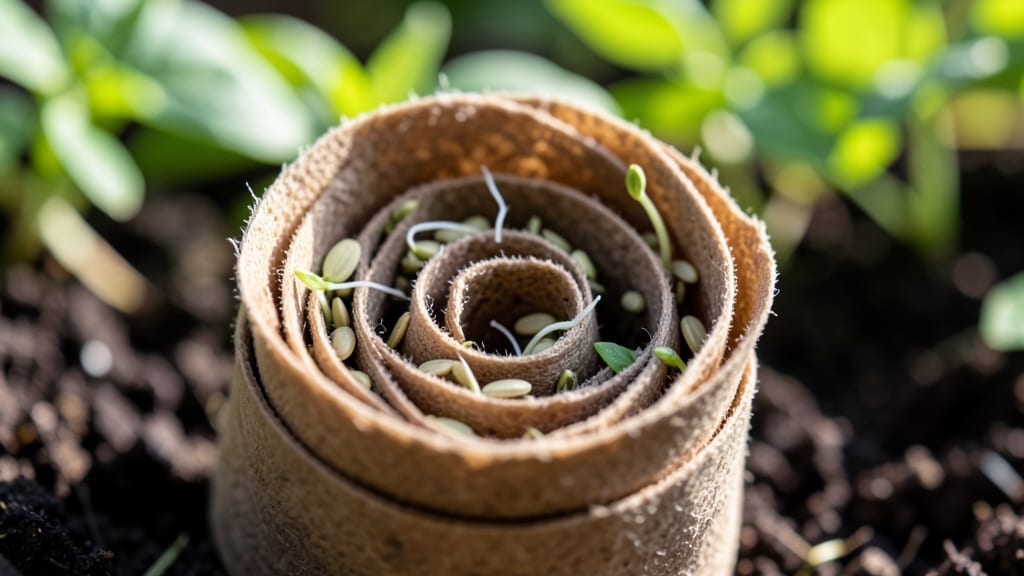
Starting tiny seeds like lettuce or herbs used to feel like a gamble—until I discovered the snail roll seed-starting method. 🌱 Instead of fussing with individual pots, you roll seeds in a damp medium and let nature do the work, creating cold-stressed sprouts that thrive when transplanted.
The best part? You’ll have strong seedlings ready in just 60 days, even for slow starters.
This method is perfect for small seeds that hate disturbance, like basil or spinach. You’ll need a shallow container, damp sphagnum moss or coconut coir, and a few minutes to roll your seeds into a tight spiral.
The key is keeping it moist but not soggy—think of it like a damp towel, not a swamp. Once rolled, place it in a clear bag or under a humidity dome until sprouts appear.
What you end up with is a dense, root-bound "snail" that transplants like a pro—no root shock, no fuss. The seedlings stay compact, grow faster, and handle transplanting better than anything from a flat.
By day 60, you’ll be snipping fresh greens or harvesting herbs, all from a method that feels almost magical in its simplicity.
It’s not for everyone—larger seeds or plants that need deep roots (like tomatoes) won’t work here—but for leafy greens and herbs, this is a game-changer. The trade-off? A little more patience upfront for a stronger, more reliable harvest. Worth every minute, honestly.
📚 In This Guide
- What you need
- Instructions
- Tips and common mistakes
- Wrapping up and next steps
What you need
- ● Seeds: Choose cold-hardy varieties like lettuce, spinach, kale, or peas (1–2 lbs, depending on quantity).
- ● Growing medium: Option 1: Peat pots or biodegradable seedling trays (50–100 count, 2–3" diameter).
- ● Option 2: Newspaper or cardboard (cut into 2–3" strips, 1–2 sheets).
- ● Soil: High-quality seed-starting mix (sterilized, peat-based or coco coir blend, 1–2 bags).
- ● Watering tool: Spray bottle (with fine mist) or watering can (with gentle rose attachment).
- ● Plastic wrap or clear lid: To retain moisture (1–2 sheets, or repurpose a clear container lid).
- ● Scissors or knife: For cutting newspaper/cardboard (sharp, clean pair).
- ○ Twine or string: (Optional) To secure rolls if needed (1–2 ft).
- ● Cold frame or unheated greenhouse: Ideal for 40–50°F (4–10°C) conditions (or a cool basement if natural cold isn’t available).
- ● Indirect sunlight: Bright but not direct (e.g., a north-facing window or shaded shelf).
- ● Patience: 60 days of consistent cold stress—no peeking or rushing!
- ● Label everything: Use toothpicks + markers to track seed types and planting dates!
- ● Moisture check: Soil should stay damp but not soggy—adjust plastic wrap as needed.
- ● No fertilizer yet: Wait until sprouts emerge before adding nutrients.
How to use snail roll seed starting for cold-hardened plants
This method builds cold resistance by mimicking nature's slow spring thaw—perfect for starting tough perennials and biennials.
🌱 Step 1: Prepare Your Seedling Roll
Start with a clean, 12-inch wide strip of landscape fabric or burlap—this will hold everything together. Lay it flat on your work surface and spread a ½-inch layer of moistened seed-starting mix evenly across the fabric. You want it damp enough to hold together when squeezed but not dripping.
Here's the thing—don't use garden soil. Seed-starting mix is lighter and drains better, which prevents that dreaded seed rot. I like to sprinkle a pinch of compost into the mix for extra nutrients, but keep it light so it doesn't compact.
💧 Step 2: Layer Seeds and Soil Strategically
Scatter your seeds across the dampened fabric in a single layer, spacing them about 1 inch apart. For larger seeds like peas or beans, you can space them 2 inches apart. Press them gently into the soil so they make good contact—this helps with even germination.
Now, here's where it gets clever: cover the seeds with another ½-inch layer of moistened mix. Roll the fabric up tightly from one end, tucking in the sides as you go. The goal is a compact, cylindrical shape about 3 inches in diameter. You'll end up with a snug, self-contained growing tube.
☀️ Step 3: Create Cold-Stress Conditions
Place your completed roll in a plastic bag with a few small holes poked in the top—this traps humidity while allowing airflow. Store it in your refrigerator's crisp drawer (around 35-40°F) for 2-3 weeks. This cold treatment mimics winter dormancy and hardens off your seedlings for outdoor conditions.
Check on it weekly. If the mix feels dry, give it a light misting—just enough to keep it damp. You'll see tiny sprouts peeking through the fabric after about 10-14 days. That's your cue to move it to warmer conditions, but don't rush it. Let the cold treatment complete its work.
🌿 Step 4: Gradually Warm and Transplant
After 2-3 weeks in the cold, transfer your roll to a bright, cool location (around 50-55°F) for another 2 weeks. This slow warming mimics spring's gradual temperature rise. You'll notice the seedlings growing stronger and more resilient—this is the cold-stress magic at work.
When the seedlings have 2-3 sets of true leaves and are about 3-4 inches tall, it's time to transplant. Unroll the fabric and gently separate the seedlings, keeping the root ball intact. Plant them directly into their final growing location or into individual pots with the fabric still wrapped around the roots—it'll break down naturally.
⏰ Step 5: Maintain Cold Resistance Through Growth
Water deeply but infrequently—once a week should suffice—since the fabric helps retain moisture. Your seedlings will handle cooler temperatures better than traditional starts. You can even set them out in light frost (down to 25°F) without damage, which gives you a 4-6 week head start on the season.
This method works especially well for perennials, biennials, and cold-hardy annuals like parsley, kale, and hardy lettuces. You'll see them thriving when store-bought starts would be struggling in the same conditions. That's the power of cold-stress training!
Tips & tricks for perfect snail roll seed starting
Here's what nobody tells you—these little details make all the difference in cold-stressed seed success.
Fabric Choice Matters: Landscape fabric works best because it's breathable yet sturdy, but burlap is a great alternative if you have it. Avoid plastic—it doesn't allow the right moisture balance, and seeds can suffocate. I've even used an old cotton T-shirt in a pinch, but fabric is definitely the gold standard for this method. The 12-inch width is ideal because it gives you room to work while still creating that compact roll.
Cold Treatment Timing: The 2-3 week cold period in the refrigerator's crisp drawer is non-negotiable for true cold resistance. I've tried skipping it, and while seeds do sprout, they're not nearly as hardy. Think of it like winterizing your plants—they need that cold shock to develop resilience. Check weekly to ensure the seed-starting mix stays just damp, not soggy. If you notice condensation inside the bag, it's too humid and needs more airflow.
Transplanting Technique: When it's time to transplant, be gentle with those seedlings—they've been through a lot! Unroll carefully and separate them while keeping that intact root ball. The fabric will break down naturally, but if you're worried, you can plant it directly in the ground with the fabric still wrapped around. This method actually makes transplanting easier because the roots stay protected and undisturbed. You'll notice your seedlings have thicker stems and deeper roots compared to traditional starts.
Pro Tips for Snail Roll Seed Starting
- Here's what nobody tells you—these little details make all the difference in cold-stressed seed success.
- Fabric Choice Matters: Landscape fabric works best because it's breathable yet sturdy, but burlap is a great alternative if you have it.
- Cold Treatment Timing: The 2-3 week cold period in the refrigerator's crisp drawer is non-negotiable for true cold resistance.
Frequently asked questions
What’s the best time to start snail roll seed starting?
For most cool-season crops like lettuce, spinach, or kale, start snail rolls 8–10 weeks before the last frost. Warm-season veggies (tomatoes, peppers) can begin indoors 6–8 weeks before transplanting. Adjust timing based on your local frost dates—check your USDA zone for guidance!
Can I use regular potting soil instead of seed-starting mix?
Nope! Seed-starting mix is lighter, sterile, and moisture-retentive, while potting soil is denser and may compact or harbor pests. If you’re in a pinch, blend 50% seed mix + 50% perlite to mimic the airy texture snail rolls need. Avoid garden soil—it’s too heavy and can rot seeds.
Why do my snail rolls look wilted or yellow after cold stratification?
Cold stress is normal—it mimics winter conditions and signals seeds to germinate. If seedlings look too limp or yellow, check for overwatering (drainage holes are key!) or light deprivation. Place rolls under grow lights 12–14 hours/day once sprouts emerge. Yellow leaves? Boost light or thin crowded sprouts.
Can I reuse snail rolls for multiple plantings?
Yes! After harvesting, sterilize rolls by soaking in a 1:10 bleach-water solution for 10 minutes, then rinse well. Reuse them for fast-growing crops like radishes or microgreens, but avoid reusing for high-value or disease-prone plants (e.g., tomatoes). Replace rolls every 2–3 cycles for best results.
How do I prevent pests (like fungus gnats) in snail rolls?
Pests love damp soil—reduce moisture by watering from the bottom (place rolls in a tray with ¼" water) and never let them sit soggy. Add a thin layer of sand or perlite on top to deter gnats. For outbreaks, use yellow sticky traps or a BT (Bacillus thuringiensis) spray (safe for seedlings!).
Wrapping up and next steps
Mastering the snail roll seed-starting method is a game-changer for gardeners eager to bypass pests and nurture robust seedlings. By mimicking nature’s cold stress, you’ll unlock stronger, faster-growing sprouts in just 60 days—without the hassle of traditional methods. 🌱
Now that you’re armed with the know-how, why not give it a try this season? Start small with a few seeds, experiment with your local climate, and watch your garden thrive. Happy planting—your future harvests will thank you! 🌿