
Lawn
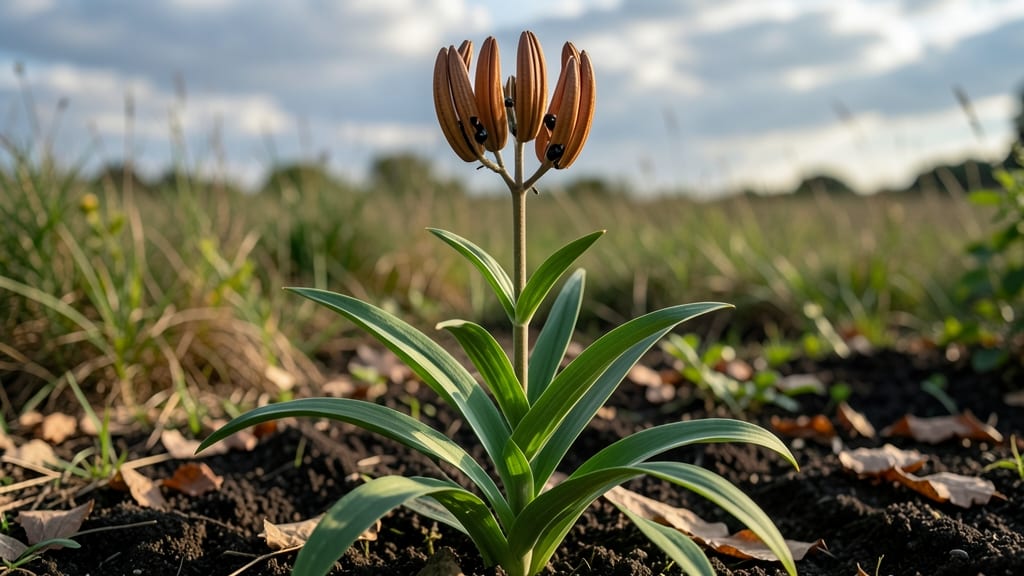
Your tiger lily seed pods hold the secret to next year’s bold, golden blooms—if you handle them right. 🌱 I’ve learned the hard way that skipping cold stratification means months of waiting for seeds that might never sprout.
The key is timing: harvest those papery pods when they turn brown and dry in late fall, then store them properly until spring planting. You’ll need just three things: a sharp pair of pruners, a breathable paper bag for storage, and patience for the cold stratification process.
The real magic happens when you mimic winter’s chill by refrigerating the pods for 8-12 weeks before planting. This breaks dormancy and gives you a head start on growth. By late winter, you’ll watch tiny green shoots push through the soil, ready to become next year’s showstopper lilies.
The payoff? A garden filled with those iconic tiger-striped blooms—without spending a dime on bulbs. Just don’t rush the process; these seeds need their cold spell to wake up properly.
Here’s the trick I wish I’d known sooner: don’t clean the seeds too early. Leave them inside the dried pods until you’re ready to plant—this protects them from drying out.
Once you do plant, keep the soil consistently moist (not soggy) and expect germination in 4-8 weeks, depending on your climate. The biggest challenge? Seed viability drops after just a year, so collect and plant these pods as soon as they mature.
With the right approach, you’ll go from seed to stunning blooms in no time—no black thumbs required.
📚 In This Guide
- What you need
- Instructions
- Tips and common mistakes
- Wrapping up and next steps
What you need
- ● Fresh tiger lily seed pods: Harvest them when they’re fully ripe but still slightly soft (usually late summer to early fall). Aim for 5-10 pods per batch.
- ● Potting soil: Use a well-draining, sterile mix (e.g., 50% peat moss, 30% perlite, 20% vermiculite). A 1-gallon container or small pots (3-4 inches deep) will work.
- ● Plastic storage bag: A ziplock or breathable mesh bag (quart-sized or larger) for stratification.
- ● Water spray bottle: For lightly moistening the soil and seeds.
- ● Label & marker: To track seed varieties and planting dates.
- ● Seedling heat mat: Speeds up germination after stratification (set to 65-75°F).
- ● Grow lights: Provides 12-14 hours of light/day if natural light is limited.
- ● Fungicide (e.g., neem oil or hydrogen peroxide): Prevents mold during stratification (mix 1 tsp hydrogen peroxide per cup of water).
- ● Notebook or app: To log moisture levels, temperature, and germination progress.
How to cold-stratify tiger lily seed pods for stronger plants
Cold-stratification mimics nature's winter cycle and gives you a head start on growing tiger lilies from seed.
🌱 Step 1: Harvest and Prepare the Seed Pods
Collect mature seed pods when they turn brown and papery in late fall or early winter. Cut them from the plant with a clean pair of scissors, leaving a short stem. You'll want 4-6 pods for a good start—each pod contains dozens of tiny seeds.
Open the pods carefully to expose the seeds inside. You'll see small, flat, dark brown seeds that look like tiny beans. Remove any seeds that appear shriveled or damaged. Place the viable seeds in a paper towel and label them with the variety and harvest date.
💧 Step 2: Moisten and Stratify the Seeds
Mix the seeds with a damp paper towel or vermiculite in a sealed plastic bag. The moisture level should feel like a wrung-out sponge—not dripping, just damp. This mimics the moisture seeds experience during winter's thaw cycles.
Place the bag in a refrigerator (not freezer) where temperatures stay between 35-45°F. Store it in a crisper drawer to maintain consistent humidity. Check the bag every 2-3 weeks to ensure it hasn't dried out. If it feels dry, lightly mist the contents and reseal.
☀️ Step 3: Plant Stratified Seeds in Spring
After 8-12 weeks of cold stratification (when you see tiny root hairs forming), it's time to plant. Fill small pots with well-draining potting mix—tiger lilies hate soggy roots. Plant seeds ½ inch deep, spacing them 1 inch apart in the pot.
Water gently until the soil is moist but not soggy. Place the pots in a bright, indirect light spot (like a north-facing window) where temperatures stay between 65-75°F. You'll see sprouts in 2-4 weeks—this is your signal that stratification worked.
⏰ Step 4: Transplant Seedlings When Strong Enough
Once seedlings develop 2-3 true leaves (not just the first tiny seed leaves), they're ready to move. Choose a sunny outdoor spot with full sun exposure and well-draining soil. Transplant in early spring after the last frost date when soil temperatures reach 55°F.
Dig holes twice as wide as the root ball but only as deep as the pot. Space plants 12-18 inches apart to give them room to grow. Water deeply after transplanting to help roots establish. You'll see blooms in 2-3 years—patience pays off with these striking flowers.
Tips & tricks for perfect tiger lily seed stratification
Here's what nobody tells you about getting those tiger lily seeds to sprout reliably—these little details make all the difference.
Harvest Timing: Wait until the seed pods are completely brown and papery before harvesting, usually in late fall. If you pick them too early (when they're still green), the seeds inside won't be fully mature and may not germinate properly. I've learned this the hard way after trying to rush the process—patience here pays off with stronger plants.
Moisture Balance: That damp paper towel or vermiculite should feel like a wrung-out sponge—not dripping, just damp. Too much moisture can cause mold, while too little means the seeds won't get the hydration signal they need to break dormancy. I keep mine in a sealed bag with a tiny air pocket to maintain that perfect balance at 35-45°F.
Stratification Check: After 8-12 weeks in the fridge, peek inside the bag before planting. If you see tiny white root hairs forming, your seeds are ready! If not, give them another 2-3 weeks. This visual cue tells you exactly when to move to planting instead of guessing based on time alone.
Light Transition: When moving your stratified seeds from the fridge to the growing setup, place them in bright but indirect light first. Direct sunlight can shock the delicate seedlings. I start them in a north-facing window for a few days before gradually increasing light exposure—this helps prevent leaf burn while they adjust.
Pro Tips for Tiger Lily Seed Pods
- Here's what nobody tells you about getting those tiger lily seeds to sprout reliably—these little details make all th...
- Harvest Timing: Wait until the seed pods are completely brown and papery before harvesting, usually in late fall. If ...
- Moisture Balance: That damp paper towel or vermiculite should feel like a wrung-out sponge—not dripping, just damp. T...
Frequently asked questions
Got questions about growing tiger lilies from seed pods? You’re not alone! Here are some of the most common queries—and their straightforward answers—to help you get those vibrant blooms off to a great start.
How do I know when tiger lily seed pods are ready for harvesting?
Seed pods are ready when they turn brown and papery, usually 6–8 weeks after flowering. Gently squeeze the pod—if seeds rattle inside, they’re ripe! Avoid harvesting if the pods are still green or soft, as seeds may not germinate properly. Pro tip: Collect pods on a dry day to prevent mold.
Why do tiger lily seeds need cold stratification, and how long should I wait?
Cold stratification mimics winter, breaking seed dormancy for better germination. For tiger lilies, 6–8 weeks in the fridge (moistened paper towel or peat moss) works best. Plant them outdoors in early spring after stratification—no need to rush! Patience pays off with stronger, hardier plants.
Can I grow tiger lilies from seed pods without cold stratification?
Yes, but germination rates drop significantly—expect 20–30% success vs. 70–90% with stratification. If you skip it, soak seeds in warm water for 24 hours first, then plant them twice as deep (½ inch) in well-draining soil. Direct sow in fall for a natural cold treatment, or plant in spring and hope for rain to help.
My tiger lily seeds sprouted indoors but died after transplanting. What went wrong?
This usually happens due to shock from temperature/light changes or overwatering. Harden off seedlings by gradually exposing them to outdoor conditions (1–2 weeks) before transplanting. Use lightweight potting mix and water only when the top inch of soil is dry. Bonus tip: Transplant on a cloudy day to reduce stress.
How long until tiger lily seed pods produce flowers?
From seed to bloom takes 2–3 years—don’t expect instant color! First-year plants focus on roots, so they’ll likely just grow foliage. Year two, you might see small blooms, but full, showy flowers usually arrive in year three. Patience is key—these lilies reward consistency with stunning displays!
Wrapping up and next steps
Growing tiger lily seed pods through cold stratification is a rewarding way to ensure vibrant blooms next season! With patience and the right techniques—like collecting mature pods, chilling them, and planting at the perfect time—you’ll unlock a garden full of striking orange and black flowers. 🌸
Ready to take the next step? Start by marking your calendar for fall planting or gather your supplies now if you’re eager to begin. Whether you’re a seasoned gardener or a curious beginner, these tips will help you cultivate stunning tiger lilies with confidence!