
Lawn
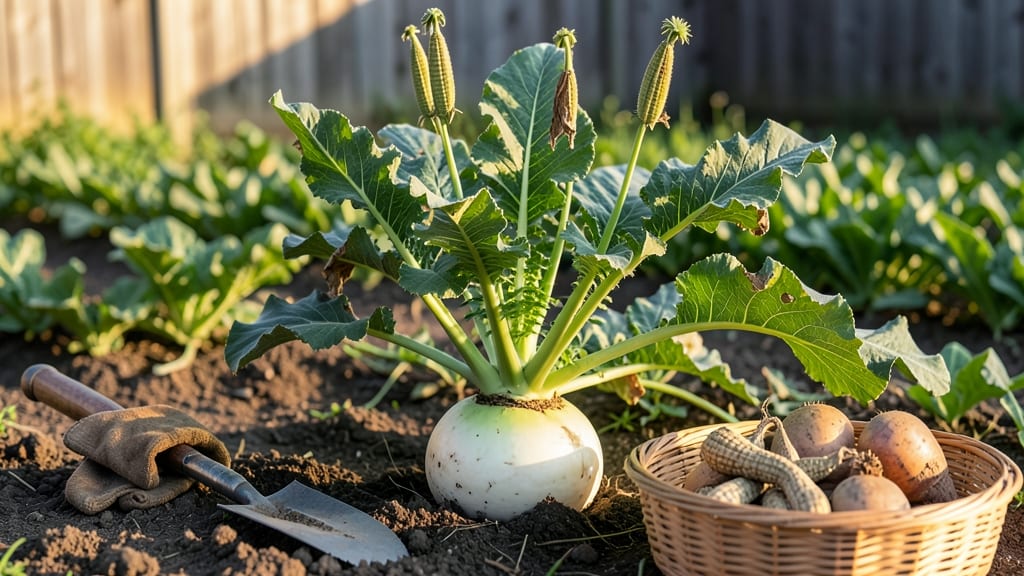
Turnip seed pods hold the secret to next year’s harvest—if you know how to test them right. 🌱 I’ve saved seeds from my garden for years, but the twist test for turnip viability saved me from planting dozens of duds last spring.
That simple squeeze tells you exactly which seeds will sprout strong and which won’t. Mature turnip pods turn from green to brown and start cracking open on their own—that’s your cue to harvest.
Once you’ve collected them, drying is key: spread them in a single layer on a screen or paper towel, out of direct sunlight, for about 2 weeks. Properly dried seeds stay viable for 3-5 years when stored in a cool, dark place.
The twist test works like this: gently squeeze a pod between your thumb and forefinger. If it gives slightly and feels dry inside, those seeds are good to go. If it’s still firm or crumbly, toss it—the seeds inside won’t germinate.
This method works for other brassicas too, like radishes and arugula. Most gardeners grow turnips from seed, though you can also transplant young seedlings. The real payoff? Homegrown seeds adapt to your local climate better than store-bought ones. Now let’s get those pods ready for planting season!
📚 In This Guide
- What you need
- Instructions
- Tips and common mistakes
- Wrapping up and next steps
What you need
- ● Turnip seed pods: 10–20 fresh, unopened pods (preferably from the same batch for consistency). Look for plump, firm pods with no visible damage.
- ● Paper towels or coffee filters: 2–3 sheets (cut into 4-inch squares if needed). Opt for thick, absorbent varieties to retain moisture.
- ● Spray bottle (with water): 1 (8–16 oz). A fine-mist setting works best to avoid over-saturating the seeds.
- ● Plastic zip-top bags: 2–3 (quart-sized). Choose clear bags to monitor progress easily.
- ● Permanent marker: 1 (for labeling bags with dates).
- ● Small plate or shallow tray: 1 (to hold the paper towels/seeds while spraying).
- ○ Ruler or measuring tape: 1 (optional but helpful for tracking seed size post-test).
- ● Notebook or app: For recording observations (e.g., sprouting dates, seed conditions). Try Gardenate or a simple spreadsheet!
- ● Magnifying glass: To inspect tiny seeds or early sprouts up close.
- ● Humidity dome or clear lid: If you’re testing seeds in a container without a bag, this keeps moisture trapped.
- ● Timer/alarm: To remind you to check on your seeds every 1–2 days.
How to test turnip seed viability without the twist method
Skip the guesswork—this simple test tells you exactly which seeds will sprout.
🌱 Step 1: Collect and Prepare the Seed Pods
Gather 4-5 dry turnip seed pods from a mature plant or store-bought package. If the pods are still attached to the plant, gently twist them off at the stem—don’t pull, or you’ll damage the pod. For dried pods, let them sit in a paper bag for 24 hours to soften slightly; this makes cracking them open easier.
Place the pods on a clean, flat surface like a cutting board. Hold one pod firmly between your thumb and forefinger, then tap it gently with a butter knife or your knuckles until it splits open. You’ll hear a faint pop when it’s ready. Avoid crushing the seeds inside—just enough pressure to release them.
💧 Step 2: Perform the Water Float Test
Fill a clear glass or bowl with room-temperature water (about 2 inches deep). Drop the turnip seeds into the water—you should have around 20-30 seeds for an accurate test. Let them sit undisturbed for 15-20 minutes. This gives sinking seeds time to absorb moisture and reveal their true condition.
Watch for two outcomes: viable seeds will sink to the bottom, while hollow or non-viable seeds will float. Don’t stir the water—this can cause false results. If you’re unsure, wait an extra 5 minutes before counting. The longer you wait, the clearer the separation becomes.
✂️ Step 3: Separate and Store Viable Seeds
Use a slotted spoon or fine mesh strainer to carefully lift the sinking seeds from the water. Place them on a paper towel to dry for 1-2 hours in a warm, shaded spot. This prevents mold from forming while keeping them ready for planting. Discard the floating seeds—they won’t germinate, no matter how hard you try.
Once dry, store the viable seeds in a small envelope or airtight container with a label noting the date. Keep them in a cool, dark place (like a pantry) until planting. If stored properly, turnip seeds stay viable for 3-4 years, though germination rates drop after the first year.
🌿 Step 4: Plant the Tested Seeds
Sow the viable seeds ½ inch deep in well-draining soil, either in a seed tray or directly in the garden. Space them 1 inch apart to avoid overcrowding. Water gently but thoroughly—soil should feel moist but not soggy. Place the container in a warm spot (around 65-75°F) with indirect light until germination begins.
Germination should appear in 5-10 days, though cooler temperatures may extend this. You’ll know it’s working when you see tiny green sprouts pushing through the soil. If no sprouts appear after 2 weeks, the seeds may have lost viability despite passing the test—start fresh with new seeds.
⏰ Step 5: Monitor and Transplant Seedlings
Once seedlings have 2-3 true leaves (not just the initial cotyledons), they’re ready to thin or transplant. If growing in a tray, gently separate seedlings and transplant them 4 inches apart in the garden. Thin weaker seedlings at the base with scissors to avoid disturbing roots.
Keep the soil consistently moist but not waterlogged—turnips hate soggy conditions. You’ll see rapid growth once they’re established, with edible greens and roots ready in 4-6 weeks. This test isn’t just about saving seeds; it’s about ensuring every seed you plant has the best chance to thrive.
Tips & tricks for perfect turnip seed viability testing
Real talk: This test is foolproof when you nail these small details that make all the difference.
Pod Prep Matters: The 24-hour softening trick in Step 1 isn't just about convenience—it prevents those stubborn pods from cracking unevenly. If you're impatient and skip this, you'll end up with crushed seeds mixed in with good ones. Pro tip: Place the paper bag in a warm spot (like near your oven while it's cooling) to speed up the process without over-softening.
Water Temperature Secret: Room temperature water is key—cold water can shock the seeds and give false results. If your kitchen feels chilly, let the water sit out for 10 minutes before using. The 15-20 minute wait time is non-negotiable for accuracy, but don't be tempted to rush it. I've seen people stir the water at 10 minutes and get confused results—let nature do its thing!
Seed Separation Technique: When lifting sinking seeds with a slotted spoon, go slow. A quick scoop can accidentally grab floating seeds too. I like to angle the spoon at 45 degrees and gently slide it under the sinking seeds. This careful approach saves you from having to re-test seeds later.
Storage Wisdom: The 1-2 hour drying time is crucial for preventing mold. If you're in a hurry, you can speed this up by placing the seeds on a screen or wire rack over a warm (not hot) radiator. Just don't leave them in direct sunlight—they'll dry too fast and become brittle. Labeling with the date is non-negotiable if you want to track germination rates over time.
Pro Tips for Turnip Seed Pods
- Real talk: This test is foolproof when you nail these small details that make all the difference.
- Pod Prep Matters: The 24-hour softening trick in Step 1 isn't just about convenience—it prevents those stubborn pods ...
- Water Temperature Secret: Room temperature water is key—cold water can shock the seeds and give false results. If you...
Frequently asked questions
Got questions about turnip seed pods and germination testing?
Here are some of the most common queries—and their straightforward answers—to help you get started with confidence!
What exactly is a turnip seed pod viability test, and why should I bother?
A turnip seed pod viability test is a simple, twist-free way to check if your seeds are still alive and ready to sprout. Instead of guessing, you’ll see real results in just a few days! This method saves time and money by ensuring you only plant healthy seeds—no surprises in the garden. Pro tip: It’s especially useful for seeds you’ve stored for a while or bought from questionable sources.
How long does the test take, and how do I know if the seeds are viable?
The test typically takes 3–7 days to show results. Place the seeds in a warm, moist environment (like a sealed bag with damp paper towels), then check daily. Viable seeds will sprout tiny roots or a green shoot—if 80% or more sprout, they’re good to plant! If fewer than half sprout, consider fresher seeds or a different batch.
Can I reuse the turnip seed pods after the test, or do I need to discard them?
You can plant the seeds directly after the test if they sprout successfully! Just transfer them to soil once roots are about ¼-inch long. If they didn’t sprout, compost the pods—they’re organic and won’t harm your garden. No waste, just smart gardening!
What if my turnip seeds don’t sprout during the test? Are there alternatives?
If your seeds fail the test, try these fixes:
- Check storage conditions: Seeds need a cool, dry spot (like a sealed container in the fridge). Heat or moisture can kill viability.
- Test a new batch: Sometimes seeds lose potency over time. Buy fresh seeds from a reputable supplier.
- Try scarification: Lightly sandpaper the seed coat to help water penetrate (works best for older seeds).
How should I store turnip seed pods to keep them viable for next year?
Store seeds in an airtight container with a desiccant packet (like silica gel) in a cool (32–40°F), dark place. Label the container with the date—most turnip seeds stay viable for 3–5 years if stored properly. Avoid the fridge or freezer unless using a sealed, moisture-free container.
Can I use this test for other vegetables or flowers, or is it turnip-specific?
This method works for most small seeds, including:
- Radishes
- Lettuce
- Spinach
- Carrots
- Marigolds or other tiny flower seeds
Wrapping up and next steps
Turnip seed pods offer a simple, twist-free way to test germination success—no fancy tools required!
By following the steps above, you’ll gain confidence in your seeds’ viability and set your lawn or garden up for a thriving start. Ready to grow? Grab those pods, test your seeds, and take the first step toward a lush, green space. 🌱
Next up: Plant your viable seeds with the same care and watch your garden flourish! 💚