
Propagation
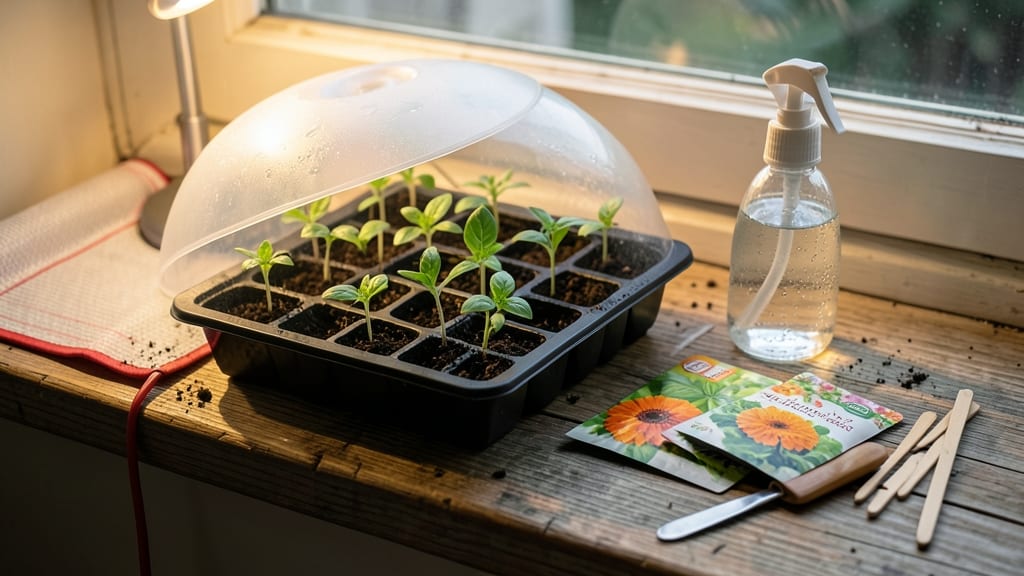
What soil to use for seed starting makes all the difference between weeks of waiting and watching tiny sprouts pop through the surface. ✨ The secret to fast germination isn't expensive equipment—it's the right lightweight mix that balances moisture and air. I've tested everything from garden soil to commercial blends, and the perfect combination keeps seeds happy without smothering them.
You need three key ingredients: a base like peat moss or coconut coir for moisture retention, perlite or vermiculite for drainage, and a bit of compost for nutrients. Most garden soils are too dense, compacting as they dry and cutting off oxygen to delicate roots.
A good seed-starting mix should feel like a damp sponge—not heavy clay or gritty sand.
With the right mix, your seeds will sprout in half the time, and seedlings grow strong enough to handle transplanting. The texture is fluffy yet holds moisture just enough to keep roots from drying out, while preventing the dreaded damping-off disease that kills young plants before they start.
Whether you're mixing your own or buying pre-made, sterilizing the soil first is non-negotiable. A quick bake in the oven or microwave kills fungal spores that cause seed rot. This one step saves more seedlings than any other trick I've tried—trust me, I've learned the hard way.
📚 In This Guide
- What you need
- Instructions
- Tips and common mistakes
- Wrapping up and next steps
What you need
- ● Seed-starting mix: 1 part sterilized seed-starting soil (look for labels like "peat-based" or "cocopeat" for lightweight, moisture-retentive blends). Avoid garden soil—it’s too dense and can harbor pests!
- ● Perlite or vermiculite: 1 part (for aeration and moisture control). Perlite is best for lightweight mixes, while vermiculite holds more water.
- ○ Sand (optional): ½ part coarse horticultural sand (improves drainage but use sparingly—too much can dry out seeds).
- ● Compost or worm castings: ¼ part (boosts nutrients without compacting the mix).
- ● Containers: Seed trays, peat pots, or small pots with drainage holes (4–6 inches deep).
- ● Mixing container: A clean bucket or large bowl (sterilized with a 10% bleach solution if reused).
- ● Measuring tools: A kitchen scale or measuring cups for precise ratios.
- ● Sterilization supplies: Hydrogen peroxide (3%) or a microwave (to sterilize containers/tools if reusing).
- ● Spray bottle: For gentle watering (avoid over-saturating the mix!).
- ○ Heat mat (optional): Speeds up germination for slow-starting seeds (like peppers or tomatoes).
- ○ Grow lights (optional): LED or fluorescent lights (12–16 hours/day) to prevent leggy seedlings.
Step-by-step guide to selecting and mixing seed starting soil
Fast germination starts with the right soil—here's how to create the perfect lightweight mix.
🌱 Step 1: Start With a Quality Base Soil
Begin with a sterile seed-starting mix (never garden soil or compost alone). These mixes are formulated to be lightweight, sterile, and free of weed seeds—critical for preventing damping-off and fungal diseases that can wipe out seedlings overnight. I like to use a blend that contains peat moss or coconut coir as the base, as these materials retain moisture while still allowing air to circulate around delicate roots.
Check the label for terms like "seed starting mix" or "seedling mix"—these are specifically designed to break down slowly and provide nutrients without compacting. Avoid mixes labeled for general potting or garden use, as they tend to be too dense and can suffocate young roots. For 4 seed trays, you'll need about 2-3 gallons of this base mix to work with.
🌿 Step 2: Add Perlite or Vermiculite for Aeration
Amend your base mix with 20-30% perlite or vermiculite by volume. This is the secret to fast germination—these materials create air pockets that prevent soil compaction, which is especially important when seedlings are just breaking through the soil. Perlite is great for moisture control, while vermiculite holds water slightly better. I usually split the difference and use a 50/50 blend of both for my seed-starting mix.
Sift the perlite or vermiculite through your hands and sprinkle it evenly over the base mix. Use about 1 part perlite/vermiculite to 4 parts base soil. Mix thoroughly with a clean hand or small trowel until the texture feels fluffy and light—like crumbled cake crumbs rather than packed dirt. This ensures roots can spread easily without resistance.
💧 Step 3: Incorporate a Slow-Release Fertilizer
Seedlings need nutrients to grow strong, but too much fertilizer too soon can burn tender roots. That's why I always add a gentle, slow-release fertilizer to my mix. Look for a balanced formula (like 5-5-5 or 10-10-10) labeled for seed starting. Measure about 1 tablespoon per gallon of soil mix—this is enough to provide steady nutrition without overwhelming the seedlings.
Work the fertilizer into the soil using your hands or a small trowel, ensuring it's evenly distributed. You'll notice the mix darkens slightly and smells earthy but not chemical. This is your signal that the nutrients are properly incorporated. Avoid liquid fertilizers at this stage—they can cause salt buildup that stunts germination.
☀️ Step 4: Test and Adjust Moisture Retention
Grab a handful of your mixed soil and squeeze it gently. If it holds together but doesn't drip water, you've got the right texture. If it crumbles too easily, add a bit more perlite or vermiculite. If it stays clumped and wet, mix in a little extra base soil to improve drainage. The goal is a mix that feels like a damp sponge—firm enough to support seedlings but loose enough to allow roots to push through easily.
Fill your seed trays or pots with the mix, leaving about ½ inch of space at the top. Tap the trays gently on the table to settle the soil without compacting it. This prepped mix is now ready for sowing—just water lightly before planting to ensure even moisture without creating puddles.
⏰ Step 5: Maintain Proper Moisture for Germination
After sowing seeds, keep the soil consistently moist but never soggy. The key to fast germination is maintaining a warm, humid environment while preventing fungal growth. Water the soil gently from below by placing the trays in a shallow tray of water for 10-15 minutes, then allowing excess water to drain completely. This method ensures the soil stays evenly moist without disturbing the seeds.
Cover the trays with a clear plastic dome or plastic wrap to trap warmth and humidity. Check daily for condensation on the inside of the cover—this is your signal that moisture levels are perfect. Once seedlings emerge, remove the cover immediately to prevent damping-off. You'll see the first signs of germination in 5-10 days, depending on the plant type, but your prepped soil will give them the best possible start.
Tips & tricks for perfect seed starting soil mix
Here's what nobody tells you about creating a mix that actually works for fast germination.
Base Soil Selection: When choosing your sterile seed-starting mix, prioritize brands that specifically mention "peat moss or coconut coir" as primary ingredients. These materials create the perfect balance of moisture retention and air circulation that delicate seedlings need. I've found that mixes containing sphagnum peat moss work particularly well for heat-loving plants like peppers and tomatoes, while coconut coir blends perform better for moisture-sensitive seedlings like lettuce. The key is to avoid any mix containing compost or garden soil—these introduce pathogens that can cause damping-off disease.
Perlite vs. Vermiculite: The 1 part perlite/vermiculite to 4 parts base soil ratio is your golden ticket for aeration, but here's the secret: use a 50/50 blend of both for optimal results. Perlite's porous structure prevents compaction and improves drainage, while vermiculite's ability to hold water creates a perfect microclimate for root development. I always sift these through a fine mesh screen before mixing to eliminate any large particles that could create air pockets around seeds. This step might seem tedious, but it makes all the difference in preventing seedling rot.
Fertilizer Timing: That 1 tablespoon per gallon of slow-release fertilizer is crucial, but don't stop there. For particularly nutrient-hungry plants like brassicas (broccoli, cabbage), I double the fertilizer amount to 2 tablespoons per gallon—just be sure to mix it thoroughly so you don't create hot spots where fertilizer concentrations could burn tender roots. The key visual cue is that the finished mix should have an even, earthy color without any streaks of darker fertilizer granules.
Moisture Testing: The damp sponge test in Step 4 is your best friend for determining proper moisture levels, but here's what to watch for: when you squeeze the mix, it should hold together briefly but not form a tight ball. If it crumbles completely, you need more perlite or vermiculite; if it stays clumped, add a bit more base soil. For extra precision, I use a moisture meter designed for seed starting—these typically read between 40-60% moisture for optimal germination conditions. This small investment pays off when your seedlings emerge strong and healthy instead of struggling with inconsistent moisture.
Pro Tips for What Soil To Use For Seed Starting
- Here's what nobody tells you about creating a mix that actually works for fast germination.
- Base Soil Selection: When choosing your sterile seed-starting mix, prioritize brands that specifically mention "peat ...
- Perlite vs. Vermiculite: The 1 part perlite/vermiculite to 4 parts base soil ratio is your golden ticket for aeration...
Frequently asked questions
about seed-starting soil can help clear up confusion and set you up for success! Here are some of the most common queries:What’s the best ratio of soil to perlite/vermiculite for seed starting?
A lightweight mix for seed starting typically uses 50% peat moss or coco coir, 30% perlite or vermiculite, and 20% compost or worm castings. This balance ensures good drainage while retaining enough moisture for delicate seedlings. Avoid heavy garden soil—it compacts and suffocates roots!
Can I reuse last year’s seed-starting soil?
Reusing soil isn’t recommended unless it’s been sterilized (baked at 200°F for 30+ minutes or treated with hydrogen peroxide). Old soil may harbor fungal diseases, pests, or weed seeds, which can stunt or kill new seedlings. Fresh, sterile mix is always best!
What’s a budget-friendly alternative to pre-mixed seed-starting soil?
Mix equal parts peat moss and perlite (or coconut coir if available) and add a handful of compost per gallon. Avoid garden soil—it’s too dense. For extra nutrients, sprinkle a pinch of fish emulsion or worm castings into the mix before planting.
Why are my seeds rotting even though the soil seems moist?
Overwatering or poor drainage are the top culprits! Ensure your containers have drainage holes and use a lightweight, airy mix (like the one above). Water gently from the bottom (by placing trays under pots) to avoid soggy soil. If seeds rot, try a 50/50 peat/perlite mix for better airflow.
Do I need to fertilize seed-starting soil right away?
No—hold off on heavy fertilizers until seedlings develop their first true leaves (about 2–3 weeks in). Instead, use a low-dose starter fertilizer (like 1/4-strength fish emulsion) or a worm-casting tea to avoid burning tender roots. Over-fertilizing can harm germination!
Wrapping up and next steps
Choosing the right soil for seed starting is your first step toward a thriving garden! A lightweight, well-draining loam mix—rich in organic matter and free of pests—sets the stage for fast germination and strong seedlings.
Don’t overcomplicate it: focus on quality, sterilization, and moisture control to give your seeds the best possible start.
Now that you’re armed with the knowledge, it’s time to roll up your sleeves and get planting! 🌱 Whether you’re a seasoned gardener or a curious beginner, every seed you sow today could grow into something amazing. Happy growing!