
Lawn
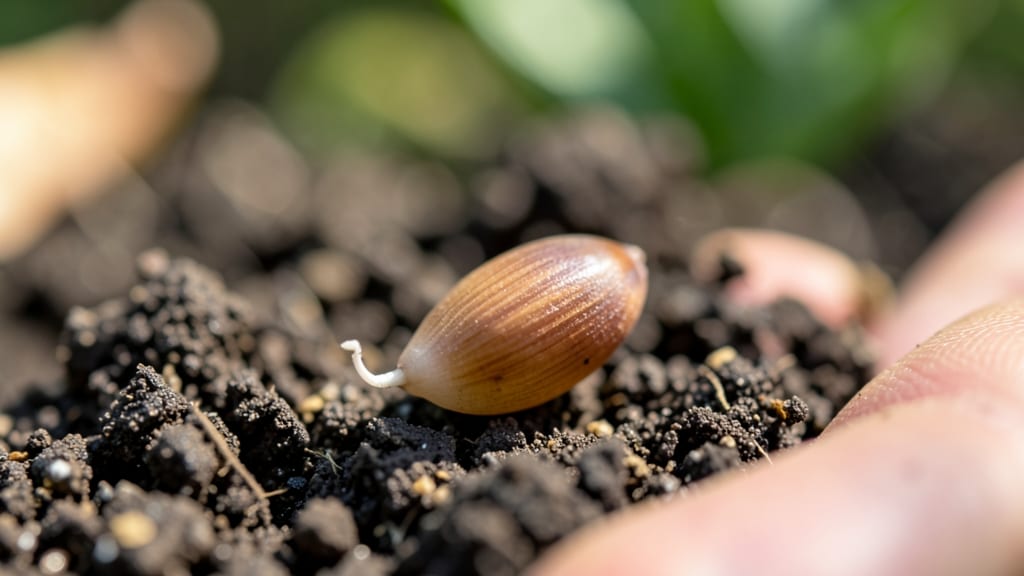
An apple seed in hand holds the promise of a future tree—if you know how to coax it to life. 🌱 The journey from seed to sapling is slower than grafting, but the satisfaction of nurturing a tree from scratch is unmatched, especially when you're preserving fruit waste instead of tossing it.
Start with seeds from a variety you love, since store-bought apples often won't grow true to type. After removing the seed from the core, let it dry for a few days, then store it in a cool, dark place until planting.
The key is patience: germination can take 3-6 months, but with the right conditions, you'll see that first green shoot emerge. Once sprouted, transplant the seedling into soil and give it sunlight, water, and time.
Your tree will grow slowly at first, but with proper care, it may produce fruit in 5-10 years—though it won’t be identical to the parent apple. The real reward is the story in its roots.
This method works year-round if you save seeds properly, making it a sustainable way to grow. Just be prepared for the long game—nature’s timeline isn’t ours.
📚 In This Guide
- What you need
- Instructions
- Tips and common mistakes
- Wrapping up and next steps
What you need
- ● Fresh apple seeds: Collect seeds from organic, non-hybrid apples (avoid store-bought varieties like Gala or Fuji—opt for heirloom or local apples instead). Aim for 10-20 seeds for a small experiment or 50+ seeds for a more robust project.
- ● Paper towels or coffee filters: 2-3 sheets per batch of seeds (enough to line a shallow container).
- ● Spray bottle with water: A fine-mist sprayer works best to keep seeds moist without drowning them.
- ● Small plastic bag or airtight container: A ziplock bag or tupperware with a lid (large enough to hold seeds and towels).
- ● Permanent marker: For labeling your seeds (e.g., date or apple variety).
- ● Potting soil: A lightweight, well-draining mix (e.g., 50% peat moss or coco coir + 50% perlite or vermiculite). You’ll need about 1-2 cups per 10 seeds.
- ● Small pots or seed trays: 2-3 inch pots or a seed-starting tray with drainage holes. 1 pot per 3-5 seeds is ideal.
- ○ Plastic wrap or humidity dome: To create a mini greenhouse effect (optional but helpful for germination).
- ● Grow lights or sunny windowsill: A LED grow light (12-16 hours/day) ensures consistent light if natural sunlight is limited.
- ● Seedling heat mat: Keeps soil warm (70-75°F) to speed up germination—great for cooler climates.
- ● Fertilizer (balanced, water-soluble): Diluted to half-strength once seedlings sprout (e.g., 10-10-10 NPK).
- ● Notebook or app: To track germination dates, soil conditions, and growth milestones (e.g., Gardenate or Seed to Kitchen).
- ● Compost or worm castings: Boosts soil nutrients once seedlings are 2-3 inches tall.
Instructions: how to save apple seeds for viable year-round planting
Here's my foolproof method for turning apple cores into strong, viable seedlings—no fancy tools needed.
🌱 Step 1: Extract and Clean the Seeds
Cut open the apple and scoop out the seeds, being careful not to crush them. Rinse them under cool water to remove any fruit pulp clinging to the surface—this prevents mold during storage. Lay them out on a paper towel to dry completely for about 24 hours. You'll know they're ready when they feel slightly rough to the touch and no moisture remains.
I store mine in a small paper envelope labeled with the apple variety and date. This keeps them organized and prevents mix-ups later. The drying step is critical—wet seeds will rot in storage, and you'll lose your chance to grow them.
🌿 Step 2: Stratify Seeds for Spring Germination
Apple seeds need a cold period to break dormancy, a process called stratification. Place the dried seeds in a sealed plastic bag with a damp paper towel—just enough moisture to keep it slightly damp, not soggy. Put the bag in the refrigerator for 6-8 weeks. Check them weekly to ensure the towel stays moist but not dripping.
This mimics winter conditions, tricking the seeds into thinking it's time to grow. You'll see the seeds start to plump up slightly during this period—that's your signal the stratification is working. If you forget to refrigerate, germination will be slow or nonexistent.
💧 Step 3: Plant Stratified Seeds in Potting Mix
Fill small pots with well-draining potting mix and plant the seeds about ½ inch deep. I use 2-3 inch pots for each seed to give roots room to develop. Water gently until the soil is moist but not waterlogged. Place the pots in a warm, sunny spot—65-75°F is ideal for germination.
Cover the pots loosely with plastic wrap to retain moisture, but remove it daily for 10 minutes to prevent mold. Germination can take 3-6 weeks, so be patient. You'll notice tiny sprouts pushing through the soil first, followed by the first true leaves in another week or two.
☀️ Step 4: Care for Seedlings Until Transplanting
Once seedlings emerge, move them to a bright window or under grow lights for 12-14 hours of light daily. Keep the soil consistently moist but never soggy—apple seedlings are sensitive to root rot. Thin weaker seedlings to leave the strongest one per pot, snipping at soil level with clean scissors.
When seedlings reach 4-6 inches tall and have developed 3-4 true leaves, they're ready for transplanting outdoors after the last frost. Harden them off by gradually exposing them to outdoor conditions over 1-2 weeks to prevent shock.
⏰ Step 5: Prepare for Long-Term Growth
Apple trees grown from seed take 5-10 years to bear fruit, but the journey is rewarding. Prune young trees to encourage strong branching, and monitor for pests like aphids. Mulch around the base to retain moisture and protect roots in winter.
Here's the thing—even if the fruit isn't identical to the parent apple, you'll often get a unique, flavorful variety. Keep track of which seeds came from which apples, and you might discover a new favorite. The real magic? You're creating a zero-waste cycle that connects you directly to the tree's life story.
Tips & tricks for perfect apple seed preservation
These simple tricks will help you maximize your apple seeds' potential and avoid common pitfalls along the way.
The Drying Secret: After rinsing your seeds in Step 1, spread them out in a single layer on the paper towel. I like to place them on a wire rack for better airflow, which speeds up the drying process. The goal is to reach that slightly rough texture within the 24 hours—this ensures they won't mold in storage. If your kitchen is humid, consider using a fan on low to circulate air around them.
Stratification Hack: When you're preparing your seeds for the 6-8 week cold treatment in Step 2, I recommend adding a small piece of paper with the apple variety and date directly inside the plastic bag. This way, you won't have to open the bag to check on them weekly—just peek through the clear plastic. Also, if you're short on fridge space, you can use a seed stratification kit or even a DIY setup with a bucket of water and a thermostat to maintain consistent cold temperatures.
Planting Precision: In Step 3, when planting your seeds ½ inch deep, make sure to use a pencil or your finger to create individual holes—this prevents multiple seeds from crowding together in one spot. I've found that using 2-3 inch pots gives the roots enough room to establish before transplanting, but you can also use seedling trays if you're working with many seeds. The key is to keep the soil consistently moist but never soggy, which is why I recommend checking the moisture level daily by sticking your finger about an inch into the soil.
Lighting Strategy: For the 12-14 hours of daily light in Step 4, if you don't have a sunny window, grow lights are a game-changer. I use a simple LED grow light on a timer to automate the process. If you're using natural light, rotate your pots every few days to ensure even growth. Watch for the first true leaves—they'll appear after the initial sprouts and indicate your seedlings are ready for more robust care. This is also a good time to start fertilizing lightly with a balanced, water-soluble fertilizer to encourage strong growth.
Pro Tips for Apple Seed In Hand
- These simple tricks will help you maximize your apple seeds' potential and avoid common pitfalls along the way.
- The Drying Secret: After rinsing your seeds in Step 1, spread them out in a single layer on the paper towel.
- Stratification Hack: When you're preparing your seeds for the 6-8 week cold treatment in Step 2, I recommend adding a small piece of paper with the apple variety and date directly inside the plastic bag.
Frequently asked questions
Got questions about saving apple seeds the right way? Here are answers to the most common ones—so you can turn those scraps into future trees (or compost!) with confidence.
Can I save seeds from any apple variety?
Most store-bought apples (like Gala or Fuji) are hybrids and may not grow true to type—but heirloom or organic apples from local orchards are your best bet! If you’re unsure, try saving seeds from multiple varieties and experiment. Pro tip: Label seeds by variety if possible to track growth patterns.
How long can I store apple seeds before planting?
Freshly dried seeds (in a cool, dark place) stay viable for 3–5 years. After that, germination drops sharply. For best results, plant within 1–2 years. Troubleshooting: If seeds sprout slowly, soak them in water for 24 hours before planting to speed up germination.
What’s the fastest way to germinate apple seeds?
Skip the wait! Stratify seeds by refrigerating them in a damp paper towel for 4–6 weeks before planting. Alternatively, nick the seed coat with sandpaper () to break dormancy. Plant ½-inch deep in well-draining soil, and keep moist—sprouts may appear in 2–4 weeks.
Can I use apple seeds for compost instead?
If you’re not growing trees, toss seeds into your compost pile—they’ll break down like any other organic matter. Just avoid composting apple cores if they’re diseased (like fire blight), as pathogens can survive. Eco tip: Crush seeds slightly to speed up decomposition.
Why did my apple seeds rot or mold?
Overwatering or poor drainage are the top culprits. Use a mix of 50% potting soil + 50% perlite to prevent soggy conditions. If mold appears, discard the batch and start fresh. Prevention: Sterilize containers with hydrogen peroxide (3%) before planting.
Wrapping up and next steps
Holding an apple seed in your hand isn’t just a quirky gardening trick—it’s a sustainable superpower! 🌱 By saving seeds year-round, you’re reducing waste, nurturing self-sufficiency, and connecting with nature’s cycle.
Whether you’re a seasoned green thumb or a curious beginner, this zero-waste method proves that small actions grow big rewards.
Ready to plant your future? Start by saving a single seed today—your garden (and the planet) will thank you. Grab your apple, follow the steps, and watch your zero-waste journey bloom! 🍏✨