
Lawn
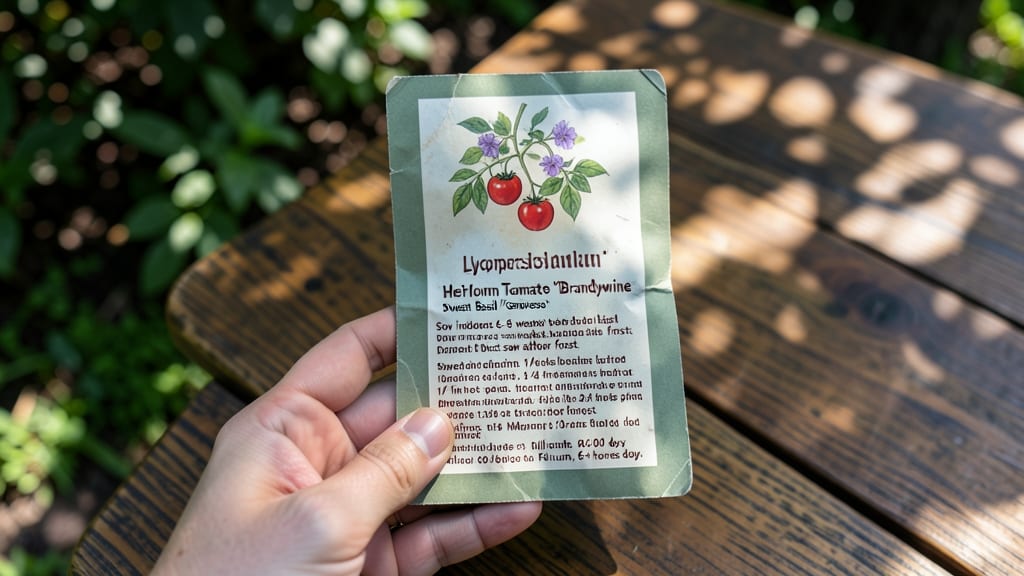
The back of a seed packet holds the secret to growing anything—even without a yard. 🌱 I’ve used these tiny guides to grow tomatoes in pots, herbs on my balcony, and flowers in old boots, and they’re the difference between thriving plants and wasted seeds.
Every packet lists planting depth (how deep to drop seeds), spacing (how far apart to plant), and sunlight needs (full sun vs. shade). My first basil plants flopped because I ignored the "partial shade" note—now I check these details first.
Soil type and watering needs are usually there too, though some packets leave room for guesswork.
You’ll end up with strong seedlings that grow exactly where you want them, whether that’s a 5-gallon bucket or a hanging basket. The right spacing prevents competition, the correct depth ensures germination, and sunlight notes save you from leggy, sad plants.
If a packet skips details, check the plant family (tomatoes, peppers, and eggplants all have similar needs) or look up your variety online. For climate tweaks, adjust watering—hotter areas need more frequent checks, while cooler zones might require extra warmth. Start with these basics, and you’ll grow anything, anywhere.
📚 In This Guide
- What you need
- Instructions
- Tips and common mistakes
- Wrapping up and next steps
What you need
- ● Seed packet – Choose one with clear planting instructions (e.g., basil, lettuce, or marigolds for beginners).
- ● Small container – A 4–6" pot, egg carton, or even a recycled plastic cup (with drainage holes!).
- ● Potting soil – A lightweight, seed-starting mix (avoid garden soil—it’s too dense!). Quantity: Enough to fill your container 2–3" deep.
- ● Watering can or spray bottle – Gentle moisture is key! A spray bottle keeps seeds from washing away.
- ○ Drainage tray or saucer – Prevents waterlogging (optional but helpful for containers).
- ● Plant labels – Toilette paper rolls or popsicle sticks + a marker (track your greens!).
- ● Grow lights or sunny windowsill – 6+ hours of light daily (south-facing windows work for many seeds).
- ● Humidity dome or plastic wrap – Keeps seeds cozy while germinating (remove once sprouts appear!).
- ● Fertilizer (diluted) – A balanced liquid fertilizer (e.g., 10-10-10) after seedlings sprout.
Step-by-step instructions for reading the back of a seed packet
Here's how to decode those tiny details and grow anything—even in small spaces.
📜 Step 1: Locate the 5 Key Sections on the Packet
The back of every seed packet follows a standard format—find these five areas first. Start with the plant name and variety at the top (this tells you what you're growing). Next, look for the days to maturity (how long until harvest) and plant spacing (how far apart to place them). These numbers prevent overcrowding and ensure strong growth.
Below those, you'll see light requirements (full sun, partial shade, or indoor light) and soil preferences (sandy, loamy, or well-draining). These details dictate where your plant thrives—ignore them, and you'll end up with weak, struggling seedlings. I always jot these down on a sticky note before starting.
☀️ Step 2: Interpret Light and Temperature Codes
Light needs are usually listed as sun exposure ranges (e.g., "6+ hours of sun" or "partial shade"). If your space only gets morning light, choose shade-tolerant varieties like parsley or ferns. For sun-lovers like tomatoes or peppers, a grow light becomes essential—position it 2-4 inches above seedlings for strong stems.
Temperature ranges (like 60-75°F) tell you when to start seeds indoors. If your home runs cooler, use a seedling heat mat to maintain warmth. Watch for hardening off notes—this means gradually acclimating seedlings to outdoor conditions before transplanting. Skipping this step shocks plants and stunts growth.
💧 Step 3: Decode Watering and Soil Instructions
Watering needs are often phrased as "keep soil moist" or "drought-tolerant." For moisture-loving plants like lettuce, water when the top inch of soil feels dry. For succulents or herbs, let the soil dry slightly between waterings. Overwatering is the #1 killer—always check for drainage holes in containers.
Soil type clues (like "well-draining" or "sandy") help you choose the right mix. If it says "organic matter," blend in compost. For containers, use lightweight potting mix—heavy garden soil compacts and suffocates roots. I keep a small notebook of each plant's soil preferences to avoid mix-ups.
⏰ Step 4: Plan Your Planting Timeline
Days to maturity (e.g., 50-60 days) tell you when to start seeds indoors for a fall harvest. Count backward from your first frost date—most seeds need 6-8 weeks before transplanting. For warm-season crops like peppers, wait until soil is at least 60°F before moving them outside.
Succession planting notes (like "sow every 2 weeks") maximize harvests. Radishes, for example, grow quickly—plant a new batch every 10-14 days for continuous yields. Mark your calendar with sowing dates and harvest windows to stay organized. I use a whiteboard in my kitchen to track progress.
🌱 Step 5: Troubleshoot Common Packet Pitfalls
Watch for warning labels like "susceptible to damping-off" (a fungal disease). To prevent it, avoid overwatering and use sterile seed-starting mix. If the packet says "direct sow," skip indoor starting—these plants hate transplanting (think carrots or beans).
Some packets list pH preferences (like "acidic soil" for blueberries). Test your soil with a kit if needed—amend with sulfur to lower pH or lime to raise it. For containers, use pre-mixed soil labeled for the plant type. I always double-check these details before planting to avoid wasted effort.
Tips & tricks for decoding seed packet secrets
These simple strategies will help you turn those tiny print details into a thriving garden—no green thumb required.
Light Requirements: Pay special attention to the sun exposure ranges like "6+ hours of sun" or "partial shade." If your space only gets morning light, choose shade-tolerant varieties like parsley or ferns. For sun-lovers like tomatoes, position your grow light 2-4 inches above seedlings—closer than you think! This prevents leggy, weak stems that flop over when transplanted.
Temperature Matters: The 60-75°F temperature ranges on packets tell you exactly when to start seeds indoors. If your home runs cooler, a seedling heat mat becomes your best friend—it keeps roots warm and speeds up germination. Pro tip: Place your seed trays directly on the heat mat for even warmth distribution.
Soil Selection: Never use garden soil straight from the yard—it compacts and suffocates roots. Instead, opt for lightweight potting mix labeled for seed starting. For containers, always check for drainage holes first. If you're unsure about soil preferences, start with a basic seed-starting mix and amend only if needed (like adding compost for "organic matter" requirements).
Planting Timeline: The days to maturity numbers (like 50-60 days) are your planting calendar. Count backward from your first frost date—most seeds need 6-8 weeks indoors before transplanting. For warm-season crops, wait until soil reaches at least 60°F before moving them outside. Mark your calendar with both sowing dates and harvest windows to stay organized.
Pro Tips for Back Of A Seed Packet
- These simple strategies will help you turn those tiny print details into a thriving garden—no green thumb required.
- Light Requirements: Pay special attention to the sun exposure ranges like "6+ hours of sun" or "partial shade." If yo...
- Temperature Matters: The 60-75°F temperature ranges on packets tell you exactly when to start seeds indoors. If your ...
Frequently asked questions
Got questions about growing from the back of a seed packet? You’re not alone! Here are some of the most common queries—and straightforward answers—to help you get started with confidence.
What if my seeds don’t germinate within the timeframe listed on the packet?
The germination window on the back of a seed packet is a general estimate, not a strict deadline. Factors like temperature, moisture, and light can speed up or slow down sprouting. If conditions are ideal but nothing happens, try lightly scratching the seed coat (for hard-coated seeds) or soaking them overnight. Some seeds, like heirloom varieties, may take longer—patience is key!
Can I use any container or just the ones suggested?
The packet often recommends specific containers (like peat pots or biodegradable pots), but you can get creative! Almost any clean, drainage-friendly container works—think yogurt cups, egg cartons, or even repurposed takeout boxes. Just ensure it has holes for excess water to escape. Pro tip: Label your containers with the plant type and date to avoid mix-ups!
How do I know if my seeds need light or darkness to germinate?
The back of the packet usually specifies light requirements, but here’s a quick rule: tiny seeds or those with low food reserves (like lettuce or basil) often need light to sprout, while larger seeds (like beans or peas) can germinate in darkness. If unsure, start with darkness—you can always move them to light once they’ve sprouted their first leaves.
What’s the best way to water seeds without drowning them?
Overwatering is a common rookie mistake! Use a spray bottle or a watering can with a gentle stream to keep the soil consistently moist (not soggy). A good trick: Water until it runs out the drainage holes, then let excess drain away. Avoid letting seeds sit in standing water, which can cause rot. Once sprouted, reduce watering slightly—healthy seedlings need air around their roots too!
Can I grow seeds from the back of a packet if I live in a cold climate?
Many seeds are cold-hardy and can be started indoors 6–8 weeks before your last frost date. Use a sunny windowsill or a grow light, and keep the soil warm (a heating mat helps). For outdoor planting, opt for cold-tolerant varieties like spinach, kale, or peas. If you’re unsure, check the packet’s “days to maturity” and your local frost dates to plan accordingly.
Wrapping up and next steps
The back of a seed packet is your secret weapon—packed with all the know-how to grow thriving plants, even in small spaces or containers!
Whether you’re a beginner or a seasoned gardener, these tiny guides hold the key to turning seeds into lush greenery, herbs, or vibrant flowers with minimal effort.
Ready to green your space? Start small—pick one packet, grab your supplies, and let nature do the rest. Plant a seed today, and watch your confidence (and garden!) grow! 🌱✨