
Lawn
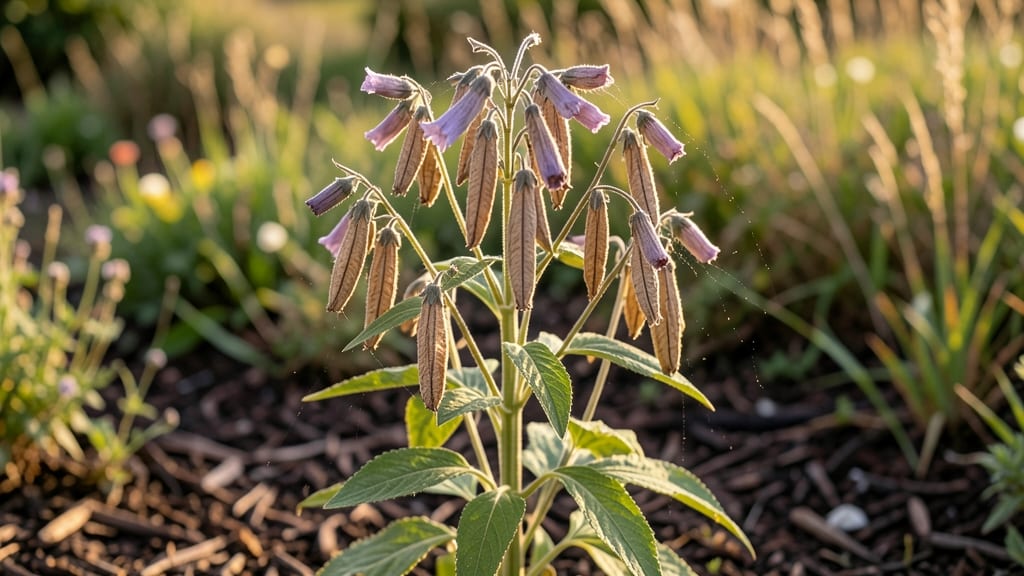
Harvesting bee balm seed pods without twisting them preserves viability and saves your back. 🌿 I’ve collected seeds the hard way—crushing pods and losing half the harvest—until I discovered this gentle method that keeps seeds plump and ready for planting.
The key is timing: pods turn from green to tan when ripe, and that’s your cue to act.
You’ll need just three things: sharp scissors, a paper bag, and patience. Snip the pods cleanly when they’re fully dry, then let them finish drying indoors for a week.
Store them in an envelope until spring, and you’ll have seeds that sprout reliably—no more sketchy germination rates from old, brittle pods.
What you’ll end up with are sturdy seedlings that thrive in partial shade, their purple blooms attracting pollinators all summer. The no-twist method cuts down on seed loss, and the process takes less than 10 minutes once you get the hang of it.
Works for both wild and cultivated bee balm varieties, and you can adapt the timing slightly for your climate. Here’s how to do it right the first time.
📚 In This Guide
- What you need
- Instructions
- Tips and common mistakes
- Wrapping up and next steps
What you need
- ● Mature bee balm plants – Choose healthy, flowering plants (preferably Monarda spp.) with fully developed seed pods (brown and papery). Aim for at least 3-5 plants for a good seed yield.
- ● Sharp pruning shears or scissors – A pair with clean, sterilized blades (rubbing alcohol works!) to avoid spreading disease.
- ● Paper bags or breathable seed-saving envelopes – 5-10 bags, sized to fit harvested pods loosely (avoid plastic—it traps moisture!).
- ● Labeling tags or masking tape + marker – To note the variety and harvest date (critical for future planting!).
- ● Drying tray or screen – A wire mesh screen (1/4" mesh) or a clean, flat tray for spreading pods to dry.
- ○ Glove (optional but recommended) – Protects hands from Monarda’s mild hairiness and potential skin sensitivities.
- ● Seed catalog or notebook – For tracking germination rates or cross-pollination notes.
- ● Fine-mesh sieve – Helps separate seeds from chaff after drying.
- ● Desiccant packets – Place a few in your seed storage to prevent mold (especially in humid climates).
- ● Camera or phone – Snap photos of your plants for reference next season!
Step-by-Step guide to harvesting bee balm seed pods
Here’s how to collect healthy seeds without damaging the plant—no twisting required.
🌿 Step 1: Identify Mature Seed Pods
Wait until the bee balm flowers fade to brown and the seed pods turn a deep, papery tan color. These pods should feel dry and brittle when gently squeezed between your fingers. If they’re still green or soft, they’re not ready—harvesting too early means seeds won’t germinate properly.
Look for pods that have split open slightly at the top. This natural opening is your cue that the seeds inside are mature and ready for collection. I like to harvest on a dry morning after the dew has evaporated—this keeps the pods from sticking to my hands or tools.
✂️ Step 2: Gently Remove Seed Pods
Use clean, sharp scissors or pruning shears to snip the entire seed pod from the stem. Cut just above the first set of leaves where the pod meets the stalk. This prevents damage to the plant’s growth points and encourages more blooms next season.
Be careful not to crush the pods while handling them. Place them in a paper bag or envelope to collect—this allows any loose seeds to fall naturally into the bag while keeping the pods intact. If you’re working with multiple plants, label each bag with the bee balm variety to avoid confusion later.
🪴 Step 3: Dry and Store Seed Pods Properly
Spread the harvested pods on a clean, dry surface in a single layer. Place them in a warm, dry spot with good airflow—like a sunny windowsill or a well-ventilated shelf—for about 1-2 weeks. This allows any remaining moisture to evaporate completely, preventing mold or rot.
Once the pods are fully dry, they’ll crumble easily when rubbed between your fingers. Store them in a sealed envelope or airtight container in a cool, dark place. Bee balm seeds stay viable for 2-3 years when stored this way, so don’t rush to plant them right away unless you’re eager to start a new batch.
🌱 Step 4: Extract Seeds for Planting
When you’re ready to plant, gently crush the dried seed pods between your fingers or roll them on a clean surface. The seeds will spill out naturally—no need to force them. Sift through the debris to separate the seeds from the chaff, which looks like tiny brown specks.
Plant the seeds immediately in well-draining soil or store them in a sealed container in the refrigerator until spring. Bee balm seeds germinate best when sown fresh, so if you’re not planting right away, keep them cool and dry to maintain viability.
💧 Step 5: Test Germination (Optional)
If you’re unsure about seed viability, conduct a simple germination test. Place 10 seeds on a damp paper towel, fold it over, and seal it in a plastic bag. Keep the bag in a warm spot (70-75°F) and check daily for sprouts. If 50% or more sprout within 10-14 days, your seeds are good to plant.
This test also helps you gauge how quickly your seeds will germinate, so you can plan your planting schedule accordingly. If fewer than half sprout, try storing the remaining seeds in the fridge for another month before testing again—sometimes they just need a little extra time.
Tips & tricks for perfect bee balm seed pod harvesting
Here’s what I’ve learned from years of harvesting bee balm seeds—avoiding these common mistakes will save you time and frustration.
Timing is Everything: The 1-2 week drying period in Step 3 is non-negotiable for seed viability. I’ve learned the hard way that rushing this step leads to moldy pods and wasted seeds. Place your drying pods in a spot with consistent airflow—like a mesh screen over a baking rack—and check daily for any signs of moisture. If you notice condensation on the surface or an earthy smell, extend the drying time by another week.
The Right Tools Make All the Difference: While scissors work, a small pruning shears with a sharp blade makes Step 2 effortless. I recommend sterilizing your tools with rubbing alcohol before use—this prevents introducing plant diseases to your bee balm. For large harvests, consider using a small bucket with a handle to collect pods without bending over constantly. The goal is to minimize handling while maximizing efficiency.
Germination Test Insights: When conducting the optional germination test in Step 5, I’ve found that placing the damp paper towel inside a clear plastic bag creates a mini greenhouse effect. This helps maintain consistent moisture levels at the ideal 70-75°F. If your kitchen runs cooler, place the bag on top of your refrigerator (not inside) for more stable warmth. Watch for the first sprouts around day 7—this gives you a realistic expectation for outdoor planting times.
Pro Tips for Bee Balm Seed Pods
- Here’s what I’ve learned from years of harvesting bee balm seeds—avoiding these common mistakes will save you time and frustration.
- Timing is Everything: The 1-2 week drying period in Step 3 is non-negotiable for seed viability.
- The Right Tools Make All the Difference: While scissors work, a small pruning shears with a sharp blade makes Step 2 effortless.
Frequently asked questions
Got questions about harvesting bee balm seed pods? You’re not alone! Here are some of the most common inquiries—plus quick, practical answers to help you master the process.
When is the best time to harvest bee balm seed pods?
Harvest seed pods when they turn tan or light brown and begin splitting open naturally—usually late summer to early fall. Avoid harvesting too early (green pods) or too late (scattered seeds on the ground). Morning harvests prevent seeds from popping out due to humidity.
What if my seed pods are already open and seeds are scattered?
No stress! If seeds have already fallen, gently rake the area under the plant (use a fine-mesh screen) to collect them. Spread the seeds on a dry surface to dry further before storing. For future harvests, try paper bags over stems to contain seeds before they release.
Can I harvest bee balm seeds without cutting the whole stem?
Use sharp scissors or pruners to snip only the seed pod clusters (about 4–6 inches below the pods). Leave the rest of the plant intact to encourage regrowth and attract pollinators. This method also reduces stress on your bee balm.
How do I store harvested bee balm seeds for planting next year?
Store seeds in a cool, dry place (like a paper envelope or breathable bag) for up to 2 years. Label them with the harvest date! For best germination, stratify seeds (mix with damp sand, refrigerate 4–6 weeks) before sowing in spring.
Why aren’t my bee balm plants producing seed pods?
Check these common culprits:
- Lack of pollinators: Bee balm relies on bees! Plant near flowers like coneflowers or lavender to attract them.
- Over-fertilizing: Too much nitrogen = lush foliage, zero flowers/seeds. Use a low-nitrogen fertilizer.
- Deadheading: If you pruned back old blooms in summer, you may have missed seed formation. Leave some spent flowers for pods.
Wrapping up and next steps
Harvesting bee balm seed pods with the no-twist method is simple, eco-friendly, and ensures strong, viable seeds for next season’s blooms! 🌱 By following the right timing, tools, and techniques, you’ll protect your plants and boost your garden’s biodiversity.
Whether you’re a seasoned gardener or just starting, this approach makes seed-saving effortless and rewarding.
Ready to try it? Grab your pruners, mark your calendar for late summer, and give it a go—your future bee balm patch will thank you! 🐝✨ Happy harvesting!