
Lawn
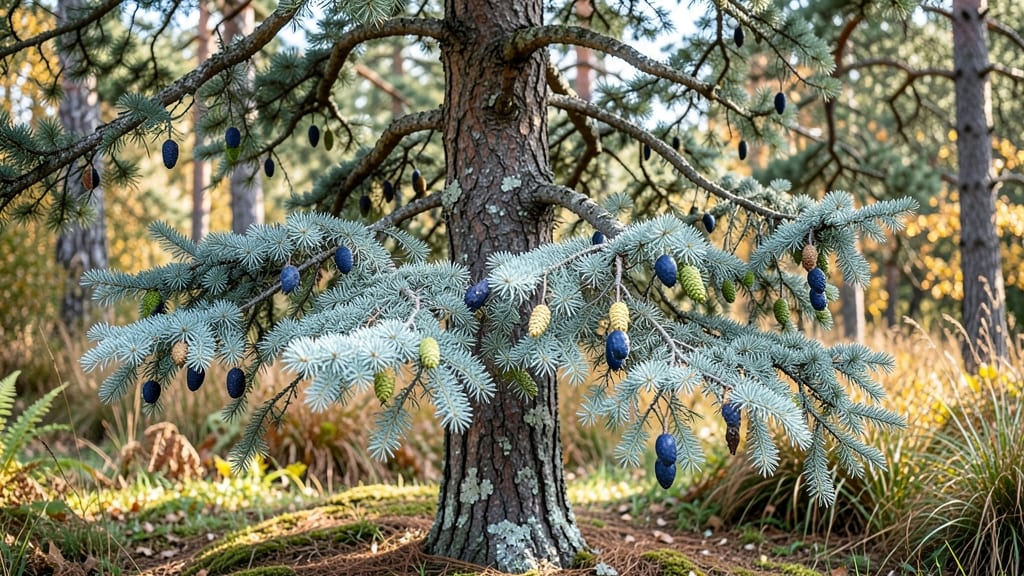
Growing cedar trees from seed pods is the ultimate slow-and-steady project—45 days of cold stratification turns a handful of tiny seeds into sturdy seedlings ready for your landscape. 🌱 I’ve watched these hard little pods transform from brown husks into thriving evergreens, and the process is simpler than most gardeners realize.
The key? Timing your harvest, breaking dormancy the right way, and giving those seeds the patience they need.
First, you’ll need to collect mature seed pods in late fall when they’ve turned brown and opened slightly—this usually happens around October or November, depending on your zone.
Once you’ve got them, separate the seeds (they look like tiny, winged nuts) and mix them with slightly damp sand or peat moss. Store them in a sealed container in your fridge for 6-8 weeks to mimic winter’s natural cold treatment.
This step is non-negotiable; without it, those seeds will stubbornly refuse to sprout.
After stratification, plant them in well-draining soil under grow lights or in a sunny windowsill. Keep the soil consistently moist but never soggy, and you’ll see those first green shoots emerge in 3-4 weeks.
By day 45, you’ll have seedlings tall enough to transplant—perfect for adding to your property line, erosion control, or even as wildlife-friendly windbreaks. Just remember, cedars grow slowly but live for centuries, so every seed you plant is an investment in the future.
There’s one more thing to note: cedar seeds are non-toxic but can be invasive in some regions, so check local regulations before planting. If you’re in the right area, though, these trees will reward you with year-round greenery, wildlife habitat, and that classic piney scent.
Start your batch now, and in a few months, you’ll have the beginnings of a cedar forest right in your yard.
📚 In This Guide
- What you need
- Instructions
- Tips and common mistakes
- Wrapping up and next steps
What you need
- ● Cedar seed pods: 50–100 fresh, plump pods (harvested from healthy trees in late summer/fall).
- ● Cold-stratification medium: Option 1: 1–2 paper towels or coffee filters (unbleached, seed-safe).
- ● Option 2: 1 small plastic bag (resealable, 1-gallon size) + 2 tbsp damp sand or perlite.
- ● Containers: 1–2 shallow trays (10x20 inches) with drainage holes or
- ● 1–2 small pots (4-inch diameter) with drainage.
- ● Potting mix: 1 bag (5–10 quarts) of well-draining seed-starting mix (sterilized, peat-free preferred).
- ● Spray bottle: For gentle moisture control (16 oz with fine mist nozzle).
- ○ Thermometer: Optional but helpful (to monitor fridge temps: 34–40°F).
- ● Refrigerator space: A dedicated shelf or produce drawer (avoid freezer!).
- ● Humidity dome or plastic wrap (to retain moisture during early germination).
- ● Grow lights (LED, full-spectrum) if natural light is <12 hours/day.
- ● Seedling labels + marker (to track varieties if mixing species).
- ● Fungicide (neem oil or copper-based) to prevent damping-off.
- ○ Heat mat (optional for post-stratification warmth, 70–75°F).
Step-by-Step guide to cold-stratifying cedar seed pods
Here's how I break down the process—no guesswork, just reliable results in 45 days.
🌱 Step 1: Harvest and Prepare the Seed Pods
Collect mature cedar seed pods when they turn brown and open naturally. You'll know they're ready when the tiny seeds inside are visible but haven't scattered yet. Gently shake the pods over a clean towel to release the seeds—don't crush them, or you'll damage the hard outer shell.
Spread the seeds on a paper towel and let them air-dry for 24 hours in a well-ventilated area. This step prevents mold and ensures the seeds are ready for stratification. I like to place them on a mesh screen to allow airflow from all sides. If you see any discolored or shriveled seeds, remove them—they won't germinate.
❄️ Step 2: Cold-Stratify for 60 Days
Mix the seeds with a damp, sterile peat moss or vermiculite in a ratio of 1:3 seeds to medium. Place the mixture in a sealed plastic bag—don't overfill it, or the seeds won't get enough oxygen. Squeeze out excess moisture so the medium feels damp like a wrung-out sponge, not soggy.
Store the bag in your refrigerator's crispier drawer, where temperatures hover around 35-40°F. Check the seeds every 10 days to ensure the medium stays moist. If it dries out, mist lightly and reseal. Cold-stratification mimics winter conditions, breaking the seed's dormancy so it knows it's time to grow.
☀️ Step 3: Warm Up and Plant for Germination
After 60 days in the fridge, remove the bag and let it sit at room temperature for 24 hours to acclimate. This gradual shift prevents shock to the seeds. Plant them ¼ inch deep in a tray filled with a well-draining seed-starting mix. I use small cells or a shallow tray to keep the soil moist without overwatering.
Place the tray in a warm, bright spot with indirect light—a south-facing window or under a grow light set to 14-16 hours daily. Keep the soil consistently moist but not waterlogged. You'll see the first sprouts in 10-15 days, though some seeds may take up to 30 days to germinate. Patience is key here—cedar seeds are slow but steady.
🌿 Step 4: Transplant and Care for Young Seedlings
Once seedlings develop 2-3 true leaves and are about 2 inches tall, they're ready to move into individual 3-inch pots. Use a gentle stream of water to loosen the soil around the roots before transferring them. I like to use biodegradable pots so I can plant them directly into the ground later without disturbing the roots.
Place the pots in a spot with full sun and keep the soil lightly moist. Cedar seedlings are delicate, so avoid overwatering—they're prone to damping-off if the soil stays too wet. In 4-6 weeks, they'll be ready for their permanent outdoor home, where they'll thrive in well-draining soil and full sunlight.
Tips & tricks for perfect cedar seed pod germination
These little-known strategies will help you avoid common pitfalls and maximize your cedar seed success.
Harvest Timing: The 24-hour drying period in Step 1 is non-negotiable—this prevents mold and ensures proper moisture levels. I've seen seeds develop mold after just 12 hours in humid conditions, so place them in a well-ventilated area with good airflow. A mesh screen works perfectly for this, allowing air circulation from all sides while keeping seeds contained.
Medium Selection: While both peat moss and vermiculite work well in Step 2, I've found vermiculite holds moisture slightly better without compacting like peat. If you're using peat moss, mix in a bit of perlite (about 10%) to improve aeration. The 1:3 seed-to-medium ratio is ideal—any less medium risks suffocating the seeds, while more can dry them out too quickly.
Temperature Consistency: The refrigerator's crispier drawer should maintain 35-40°F consistently, but some models fluctuate. If your fridge runs warmer, transfer the bag to a cooler spot or add ice packs (wrapped in a towel) to maintain the cold stratification. Check temperatures with a small thermometer if you're unsure—cedar seeds need this precise temperature range to break dormancy effectively.
Light Transition: The 24-hour room temperature acclimation in Step 3 is crucial after cold stratification. I've seen seeds shock and fail to germinate when moved directly from cold to warm conditions. Place the bag in a warm spot (around 70°F) for this transition period to gradually adjust their metabolism before planting.
Pro Tips for Cedar Seed Pods
- These little-known strategies will help you avoid common pitfalls and maximize your cedar seed success.
- Harvest Timing: The 24-hour drying period in Step 1 is non-negotiable—this prevents mold and ensures proper moisture ...
- Medium Selection: While both peat moss and vermiculite work well in Step 2, I've found vermiculite holds moisture sli...
Frequently asked questions
Got questions about growing cedar seed pods? You’re not alone! Here are some of the most common queries—and their answers—to help you navigate the process like a pro.
What’s the best way to cold-stratify cedar seed pods?
Cold-stratification mimics winter conditions to break seed dormancy. Place moistened seed pods in a sealed bag with damp peat moss or paper towels, then refrigerate for 45–60 days (your target time!). Check weekly for mold—if you see it, toss the batch and restart. Patience is key!
How long do cedar seed pods take to germinate after cold-stratification?
Once removed from the fridge, germination typically starts in 7–21 days, depending on warmth and moisture. Keep soil consistently damp (not soggy!) and in a sunny spot. If nothing sprouts after 30 days, try repeating the cold-stratification process—some seeds need extra persuading!
Can I grow cedar seed pods indoors before transplanting?
Start seeds in small pots with well-draining soil, placing them near a sunny window or under grow lights. Once seedlings have 2–3 sets of leaves (about 3–4 inches tall), they’re ready to harden off and transplant outdoors in spring. Just avoid overwatering—cedars hate wet feet!
What do I do if my cedar seed pods won’t germinate?
First, double-check your cold-stratification steps. If seeds are old or stored improperly, they may have lost viability. Try soaking viable seeds in warm water for 24 hours before restarting stratification. For stubborn batches, consider sourcing fresh pods from a trusted supplier.
Are there alternatives to growing cedar seed pods from scratch?
If germination feels too finicky, consider buying 1–2 year-old cedar seedlings from nurseries. They’re pricier but skip the wait. Alternatively, propagate from cuttings (though success rates vary). For a budget-friendly hack, check local tree sales—cedars are often donated for free or cheap!
Wrapping up and next steps
Cultivating cedar seed pods is a rewarding journey that brings the beauty of nature to your lawn—whether you're nurturing a new tree or adding a touch of rustic charm.
With patience and the right techniques, like cold-stratification, you can watch tiny seeds transform into thriving saplings in just 45 days. 🌱
Now that you’re armed with the knowledge, why not take the next step? Grab those seed pods, gather your supplies, and start your own cedar forest!
Share your progress with fellow gardening enthusiasts or even gift a few saplings to friends—spreading green thumbs one seed at a time. Happy growing! 🌿