
Lawn
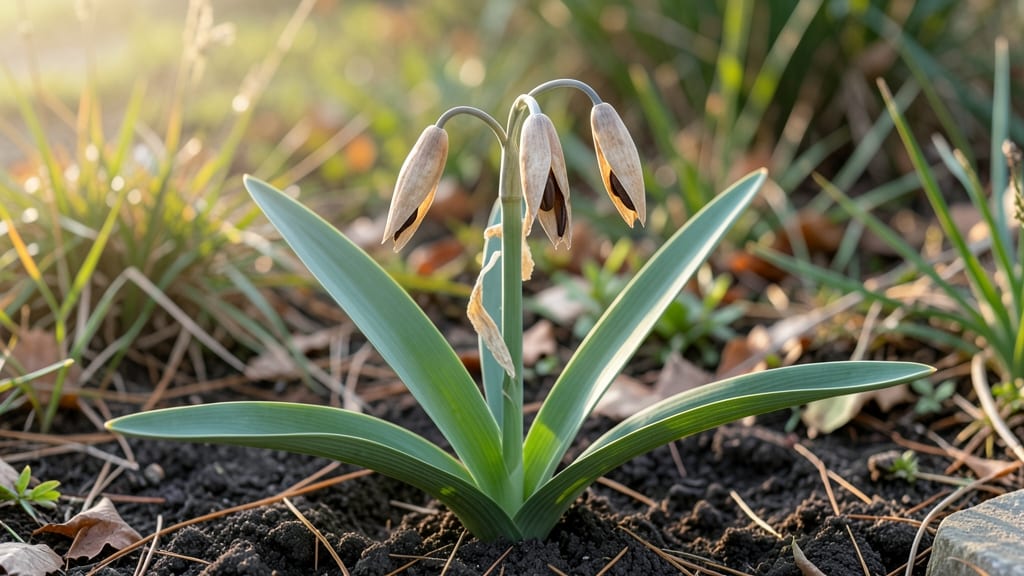
Harvesting daffodil seed pods turns your garden's spent blooms into next year's surprises—no bulbs needed. 🌱 I've collected these little treasure pods for years, and while most gardeners skip this step, there's something magical about growing daffodils from seed instead of buying bulbs.
The process is slower but rewarding, especially if you love rare varieties or want to experiment with color variations.
Timing is everything: wait until the pods turn brown and papery—usually 4-6 weeks after flowering—before harvesting. A gentle twist or sharp snip does the trick, and storing them in a cool, dry spot mimics winter dormancy.
Most seeds need 3-4 months of cold stratification before they'll sprout, so patience is key here. This is where many gardeners give up, but it's the secret to higher germination rates.
Once stratified, you'll see tiny green shoots within 4-8 weeks of planting. They grow slowly at first but eventually form bulbs underground—though it takes 3-5 years before they bloom.
The payoff? Unique daffodils that might not exist in nurseries, all from seeds you saved yourself. Just don't expect overnight miracles; this is a long-term experiment worth the wait.
For best results, plant seeds in well-draining soil and keep them moist but not soggy. If you're in a warmer climate, you might need to refrigerate pods longer or even sow them in fall.
The key is consistency—whether you're a patient gardener or just curious about propagation, these pods hold potential for next spring's surprises.
📚 In This Guide
- What you need
- Instructions
- Tips and common mistakes
- Wrapping up and next steps
What you need
- ● Mature daffodil seed pods: Harvest after they’ve turned brown and dried on the plant (usually late summer to early fall). Aim for at least 10-15 healthy pods for a good yield.
- ● Pruning shears or sharp scissors: One pair with clean, sharp blades (sterilize with rubbing alcohol if reusing).
- ● Paper bags or breathable mesh bags: 2-3 medium-sized bags (paper lunch bags or seed-starting mesh bags work great).
- ● Rubber bands or twine: To secure the bags and allow airflow.
- ● Labeling tags or masking tape + marker: To label pods with the harvest date and daffodil variety (if applicable).
- ● Drying location: A dry, well-ventilated spot (like a garage, shed, or even a sunny windowsill). Avoid direct sunlight to prevent overheating.
- ● Small paper envelopes or airtight containers: For long-term storage (e.g., 3x5-inch envelopes or small glass jars with tight lids).
- ● Desiccant packets: Place 1-2 in storage containers to absorb moisture and extend shelf life.
- ● Fine-mesh strainer: For sifting out debris if you plan to clean seeds before storage.
- ● Notebook or app: To track germination rates or experiment with different drying methods.
- ● Glove: A pair of lightweight gardening gloves to protect your hands from prickly pods.
How to harvest and save daffodil seed pods for next season
Here's the simple method I use to collect and store daffodil seed pods—no fancy tools, just patience and timing.
🌱 Step 1: Identify and Monitor Mature Seed Pods
After your daffodils bloom and the flowers fade, watch for the seed pods to form. These look like small, green, pea-sized bulbs on the stem. They’ll start as bright green but gradually turn brown and papery as they mature—this is your cue they’re ready. I like to mark the stems with a small flag or tie a piece of twine around them when they first appear, so I don’t miss the harvest window.
Harvesting too early means the seeds won’t be fully developed, while waiting too long risks them splitting open and scattering on their own. Aim for when the pods are fully brown but still intact—usually 4-6 weeks after flowering, depending on your climate. If you’re in a cooler region, they might take longer to mature.
✂️ Step 2: Gently Remove and Clean the Seed Pods
Use clean, sharp scissors or pruners to snip the seed pods from the stem, leaving a small portion of the stem attached. This helps prevent damage to the pod itself. Place them in a paper bag or a breathable mesh bag—this allows airflow while keeping them contained. Avoid plastic bags, as moisture buildup can encourage mold.
Once home, gently rub the pods between your fingers or tap them lightly on a hard surface to release the seeds. You’ll see small, flat, brown seeds inside—each one a potential future daffodil. Discard any pods that feel soft or squishy, as these likely contain spoiled seeds. Store the seeds in an envelope or small jar labeled with the variety and harvest date.
💧 Step 3: Stratify Seeds for Better Germination
Daffodil seeds need a cold stratification period to break dormancy and encourage strong germination. Place the seeds in a sealed container with a moist paper towel or a small amount of sphagnum moss (kept damp but not soggy). Store the container in your refrigerator’s crisper drawer for 8-12 weeks. This mimics the natural winter cycle and tricks the seeds into thinking they’ve experienced a cold season.
Check the seeds every few weeks to ensure the moss or towel stays moist but not dripping. If you notice any mold or unpleasant odors, discard those seeds immediately and start fresh. After the stratification period, you can plant the seeds outdoors in the fall or store them in a cool, dry place until planting time.
☀️ Step 4: Plant Stratified Seeds in Fall for Spring Blooms
Once the seeds have completed their cold treatment, plant them in a prepared garden bed or containers. Choose a spot with well-draining soil and partial shade—young daffodil seedlings don’t need full sun. Sow the seeds about ½ inch deep and 2 inches apart in rows or clusters. Lightly cover them with soil and water gently to settle everything in place.
Keep the soil consistently moist but not waterlogged until the seeds germinate, which can take 4-6 weeks or longer, depending on conditions. You’ll see tiny green shoots emerge in early spring, signaling that your patience has paid off. Be prepared to thin seedlings to 4-6 inches apart once they’re established to give them room to grow.
Tips & tricks for perfect daffodil seed pod preservation
Between us, saving daffodil seed pods is all about timing and patience—here's what I've learned after years of trial and error.
Timing is Everything: In Step 1, when you're watching for those pods to turn brown, here's the thing: the exact window is narrower than it seems. I've found that in my climate (Zone 6), pods are ready when they're uniformly brown but still firm to the touch—like a slightly wrinkled apple. If you live in a warmer zone, they might mature faster (as little as 3-4 weeks), while cooler zones could extend this to 7-8 weeks. Trust your fingers more than the calendar.
Harvesting Technique: When you're snipping those pods in Step 2, leave that little stem stub attached—it's not just for looks. That tiny stem connection helps protect the delicate seed pod from bruising during handling. I use small floral scissors for this because they give me better control than pruners. And for heaven's sake, don't crush them! Even a gentle squeeze can damage seeds inside.
Stratification Secrets: For Step 3, I've discovered the refrigerator's crisper drawer isn't just any cold spot—it's the perfect microclimate. The high humidity there keeps your sphagnum moss just right without needing constant monitoring. Pro tip: Place your container on a small plate to catch any condensation that might drip onto the seeds. Also, I like to write the harvest date directly on the container with a permanent marker so I don't forget when that 8-12 week period started.
Pro Tips for Daffodil Seed Pods
- Between us, saving daffodil seed pods is all about timing and patience—here's what I've learned after years of trial and error.
- Timing is Everything: In Step 1, when you're watching for those pods to turn brown, here's the thing: the exact window is narrower than it seems.
- Harvesting Technique: When you're snipping those pods in Step 2, leave that little stem stub attached—it's not just for looks.
Frequently asked questions
Got questions about harvesting, storing, or using daffodil seed pods? You’re not alone! Here are answers to the most common queries—so you can turn those spent blooms into zero-waste treasures with confidence.
When are daffodil seed pods ready to harvest?
Harvest seed pods when they turn brown and papery (about 6–8 weeks after blooming). If they’re still green, they’re not dry enough—wait a few more weeks! Avoid harvesting if pods are squishy or moldy.
How do I store daffodil seed pods long-term?
Store pods in a cool, dry place (like a paper bag or envelope) for up to 6 months. For longer storage, dry them further in a warm spot (like a sunny windowsill) before sealing in an airtight container with silica gel packets.
Can I plant daffodil seed pods right away?
No—seed pods need stratification (a cold period) to germinate. After harvesting, chill them in the fridge for 4–6 weeks before planting in fall. Alternatively, sow them directly in the garden in autumn for natural stratification.
What if my daffodil seed pods don’t open?
Some pods stay closed due to humidity or poor drying. To help them open, place them in a paper bag with a rubber band and store in a warm, dry spot for 1–2 weeks. If they still resist, gently squeeze the pod to release seeds (wear gloves!).
Are there alternatives to saving daffodil seed pods?
Yes! If you’re not into seed-saving, try these:
- Dried flower arrangements: Hang pods upside-down to dry, then use in crafts or potpourri.
- Composting: Chop pods into garden compost for nutrient-rich soil.
- Natural dyeing: Simmer pods for a soft yellow-brown hue for fabric or paper.
Wrapping up and next steps
Harvesting daffodil seed pods is a simple yet rewarding way to embrace zero-waste gardening while ensuring your garden blooms year after year. By following these stress-free steps, you’ll not only save money but also contribute to a sustainable cycle of growth.
Ready to put your new skills to the test? Start by identifying your ripest pods this season—your future garden will thank you! 🌱