
Propagation
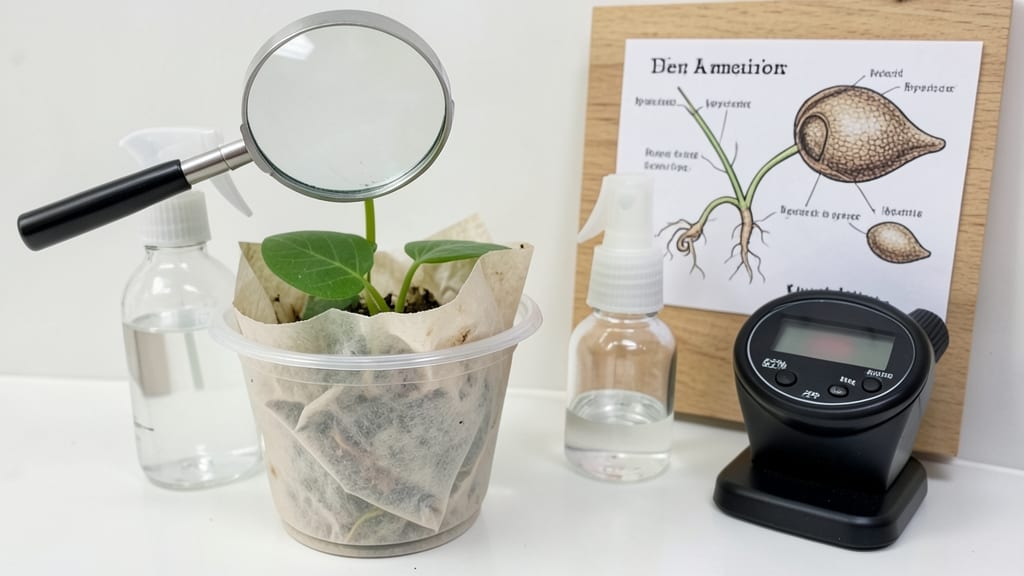
Explain seed germination—starting with a tiny seed and ending with your first green sprout—here’s how to make every seed count. 🌱 The process is surprisingly simple once you understand the science behind it: water activates the seed, warmth kickstarts growth, and light determines what kind of plant emerges. I’ve watched dozens of seeds fail before I cracked the code on consistent germination, and now I’m sharing the exact steps that work.
You’ll need just four things: seeds (obviously), a container with drainage, moistened seed-starting mix, and a warm spot with indirect light. The magic happens in three phases—soaking up water, cell division, and the radicle breaking through—each requiring the right conditions.
Most people overlook temperature or light, which is why their seeds either rot or never sprout.
Within 7-14 days, you’ll see tiny roots push through the soil, followed by the shoot reaching for light. That first green hook is your reward for getting the moisture, warmth, and patience right.
The key is keeping the mix damp (not soggy) and maintaining steady warmth—no guesswork, just science-backed consistency.
This method works for almost any seed, from tomatoes to marigolds, and troubleshooting is straightforward once you know what to watch for. Let’s get those seeds growing reliably—no more wasted flats or empty trays.
📚 In This Guide
- What you need
- Instructions
- Tips and common mistakes
- Wrapping up and next steps
What you need
- ● Seeds: Choose fresh, high-quality seeds (organic or non-GMO preferred). Start with 1–2 tbsp per container (adjust based on seed size). Popular beginner options: radish, lentil, or sunflower.
- ● Germination Container: Small plastic tray (10" x 20") with drainage holes, or
- ● A glass jar (16 oz) with a mesh lid (for sprouting in water).
- ● Growing Medium (pick one): Paper towels (2–3 sheets per tray, dampened but not soaked), or
- ● Coconut coir (1–2 inches deep in trays), or
- ● Vermiculite (sterilized, for moisture retention).
- ● Spray Bottle (16 oz with a fine mist nozzle) for gentle watering.
- ● Tweezers or Gloves (to handle seeds without crushing them).
- ● Light Source: Grow lights (LED, full-spectrum, 12–16 hrs/day), or
- ● A sunny windowsill (south-facing, 6+ hours of light).
- ● Seedling Heat Mat (for faster germination, especially in cool climates).
- ● Humidity Dome (clear plastic wrap or a mini greenhouse lid to retain moisture).
- ● pH Test Kit (to check water/medium acidity—ideal range: 6.0–7.0).
- ● Labeling Tags (to track seed types and planting dates).
- ● Fungicide (like hydrogen peroxide 3%, diluted to 1%, to prevent mold).
Science-backed steps for reliable seed germination
Here's how to coax seeds into sprouts—no guesswork, just proven techniques.
🌱 Step 1: Understand Seed Requirements
Every seed has three basic needs: moisture, warmth, and oxygen. Check the seed packet for specifics—some need light to germinate (like lettuce), while others (like beans) prefer darkness. I always start by reading the recommended soil temperature range—most seeds germinate best between 65-75°F, but cold-hardy crops like peas thrive at 50-60°F.
Seeds also need proper oxygen flow. If you plant too deep, the seedling exhausts its energy reserves before reaching light. As a rule, plant seeds at a depth of twice their diameter—that’s about ¼ inch for tiny seeds like carrots and 1 inch for large seeds like beans. Too shallow, and they dry out; too deep, and they rot.
💧 Step 2: Moisten and Maintain Ideal Conditions
Water is the first trigger for germination. I use a spray bottle to mist the soil evenly—this prevents displacing seeds or creating pockets of air that block moisture. The soil should feel damp like a wrung-out sponge, not soggy. Overwatering now leads to rot before sprouts even appear.
Cover the container with clear plastic wrap or a humidity dome to trap warmth and moisture. Place it in a warm, dark spot (like on top of the fridge) until sprouts emerge. Check daily—condensation on the plastic signals high humidity, but if you see mold, remove the cover immediately for 24 hours to air it out.
☀️ Step 3: Provide Light at the Right Time
Most seeds need darkness to germinate, but light triggers the first true leaves to unfold. Wait until you see cotyledons (the first leaves) breaking through the soil before moving seedlings to light. These look like small, rounded leaves—not the grass-like sprouts that appear first.
Once cotyledons appear, place seedlings under grow lights or in a south-facing window for 14-16 hours of light daily. Without enough light, seedlings stretch toward the source (a sign of etiolation), becoming weak and leggy. If you notice stems bending or leaves turning pale, your light source is too far away—move it within 2-4 inches of the plants.
⏰ Step 4: Monitor and Adjust for Success
Germination times vary wildly—some seeds (like radishes) sprout in 3-5 days, while others (like okra) take 10-14 days. Track your progress with a germination log (I jot down dates and varieties on a sticky note). If no sprouts appear after twice the expected time, the seeds may be old or stored improperly.
Once seedlings emerge, reduce humidity by removing the cover entirely. Water from the bottom by placing the tray in ½ inch of water for 10-15 minutes—this prevents fungal diseases that thrive in damp foliage. You’ll know moisture is right when the soil surface looks slightly damp but not glistening.
Tips & tricks for perfect seed germination
Here's what nobody tells you about turning seeds into thriving sprouts—these details make all the difference.
Temperature Precision: The 65-75°F range isn't just a suggestion—it's where most seeds activate their germination enzymes. I keep my seed trays on top of the fridge during winter months to maintain this range consistently. For cold-hardy varieties like peas, a slightly cooler 50-60°F works better, but most common garden seeds will languish below 55°F. Consider using a seedling heat mat if your home runs cooler than 65°F—it's a game-changer for consistent results.
Planting Depth Technique: The "twice the diameter" rule is your best friend, but here's the secret: press each seed gently into the soil rather than dropping it in. This ensures proper soil contact for moisture uptake while maintaining that crucial oxygen flow. For seeds smaller than ¼ inch (like lettuce), I use a toothpick to create tiny indentations before placing them—this prevents them from floating to the surface when watered.
Humidity Management: That condensation on your plastic cover? It's not just water vapor—it's a visual humidity indicator. If you see heavy condensation daily, your setup is too humid and risks mold. Remove the cover for 24 hours to air it out, then replace. For extra insurance, I poke a few small holes in the plastic wrap if I notice mold spores forming along the edges. The goal is 80-90% humidity during germination, not 100%.
Light Transition Strategy: The moment cotyledons appear is your cue—don't wait for true leaves. I use a small magnifying glass to examine seedlings closely, looking for those rounded first leaves rather than the grass-like radicle. Once they appear, I move trays to a south-facing windowsill where they'll get natural light during the day but stay protected from harsh afternoon sun. Artificial grow lights work beautifully too, but position them within 2-4 inches for optimal intensity.
Pro Tips for Explain Seed Germination
- Here's what nobody tells you about turning seeds into thriving sprouts—these details make all the difference.
- Temperature Precision: The 65-75°F range isn't just a suggestion—it's where most seeds activate their germination enzymes.
- Planting Depth Technique: The "twice the diameter" rule is your best friend, but here's the secret: press each seed gently into the soil rather than dropping it in.
Frequently asked questions
Got questions about seed germination? You’re not alone! Here are answers to the most common queries—from impatient gardeners to science-curious beginners.
How long does it take for seeds to germinate?
Germination time varies by seed type. Fast growers like radishes or beans sprout in 3–10 days, while slowpokes like peppers or trees can take 2–4 weeks. Check the seed packet for specifics—patience is key!
What if my seeds won’t germinate?
Try these fixes:
- Check moisture: Soil should stay consistently damp (not soggy). Mist lightly if dry.
- Test temperature: Most seeds need 65–85°F (18–29°C). Use a heat mat if your space is chilly.
- Verify viability: Old or stored seeds may fail. Do a float test (sink = good; float = toss).
- Scratch the shell: Some seeds (like tomatoes) need a light nick to break dormancy.
Do seeds need light to germinate?
Nope! Seeds germinate in the dark—they just need moisture, warmth, and oxygen. Once sprouts emerge (when the radicle breaks through), move them to bright, indirect light to prevent leggy seedlings.
Can I germinate seeds without soil?
Try these soil-free methods:
- Paper towels: Dampen a towel, sandwich seeds between two, and store in a sealed bag. Check daily for sprouts.
- Jars: Line a jar with damp paper towels, place seeds inside, and secure the lid. Rinse as needed.
- Hydroponics: Use a seed-starting mat or net pot with water and nutrients.
What’s the best way to store seeds for future planting?
Extend seed life with these tips:
- Keep seeds cool (32–41°F / 0–5°C) and dry in an airtight container.
- Avoid moisture or sunlight—humidity speeds up spoilage.
- Label containers with the seed type and date (most last 1–5 years, depending on the variety).
- For long-term storage, add a desiccant packet to absorb excess moisture.
Wrapping up and next steps
Understanding seed germination is your first step toward nurturing thriving plants! 🌱 From moisture and warmth to proper light and patience, each factor plays a crucial role in coaxing life from a tiny seed.
With the right knowledge and tools, you’re well on your way to growing healthy sprouts—whether for your garden, kitchen, or green thumb adventures.
Ready to put theory into action? Start small—pick a seed type, gather your supplies, and experiment! Whether you’re sprouting microgreens or planting a vegetable garden, every seed you germinate is a tiny victory. Happy growing! 🌿