
Lawn
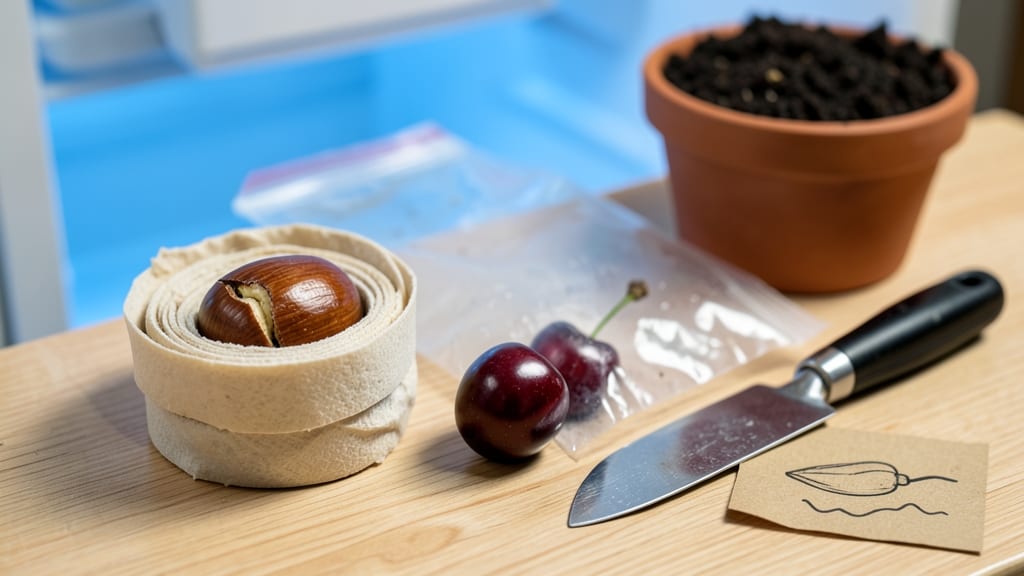
Preparing cherry seeds for planting starts with a twist-free extraction—because forcing them open ruins viability. 🌱 I learned the hard way that gently rolling seeds between two sheets of sandpaper works better than cracking them open, and it preserves that tiny embryo inside.
The process feels delicate, but once you master it, you’re ready for the next critical step: stratification, which mimics winter’s natural dormancy period.
You’ll need just three supplies: a bowl of water, damp paper towels, and a sealed plastic bag for the cold treatment. The key is patience—cherry seeds need 60-90 days of cold, moist stratification before they’ll germinate.
I keep mine in the fridge, checking weekly to ensure the towels stay damp but not soggy. This step is non-negotiable; skipping it means waiting months—or never seeing sprouts at all.
After stratification, plant the seeds ½ inch deep in well-draining soil and keep them warm (around 70°F) until germination, which can take 4-12 weeks. The first green shoots are the most exciting part—proof that your patience paid off.
Just remember: these seedlings won’t fruit like the parent tree, but the thrill of growing your own cherry from scratch makes it worth it.
For best results, start this process in late summer or early fall so seeds get their required cold period naturally. If you’re in a warm climate, replicate the cold with a fridge setup.
And if your seeds don’t sprout? Don’t give up—some cherry varieties are stubborn, but persistence pays off with strong, disease-resistant trees.
📚 In This Guide
- What you need
- Instructions
- Tips and common mistakes
- Wrapping up and next steps
What you need
- ● Fresh or dried cherries – At least 5–10 pits (more = better odds of germination). Use sweet cherries (Prunus avium) for the best results.
- ● Paper towels or coffee filters – 2–3 sheets per batch of seeds (for stratification). Opt for unbleached, seedling-safe options.
- ● Plastic zip-top bags – 1–2 quart-sized bags (or reusable silicone bags for eco-friendliness). Ensure they’re airtight but not crushing.
- ● Small bowl or container – For soaking pits (if needed). A glass or ceramic bowl works best.
- ● Water – Room-temperature, not distilled (tap water with minerals is ideal). ~½ cup per batch.
- ○ Rubbing alcohol (70% isopropyl) or hydrogen peroxide (3%) – 1–2 tbsp for sterilizing pits (optional but highly recommended to prevent mold).
- ● Fine-grit sandpaper or emery board – For gently scratching the pit’s hard shell (if stratification fails).
- ● Pencil or marker – To label your bags (e.g., "Cherry Seeds – Stratified 1/2024").
- ● Planting pots or seed trays – 2–4" deep with drainage holes. Peat-free organic soil mix is ideal.
- ● Heat mat or seedling heat pad – To maintain 65–75°F during germination (speeds up the process!).
- ● Spray bottle with water – For misting soil post-planting (keeps moisture consistent).
- ● Grow lights or sunny windowsill – Cherry seedlings need 12+ hours of light daily once sprouted.
- ● Patience and a notebook – Track stratification dates, germination timelines, and seedling growth (trust us, it’s rewarding!).
Step-by-step instructions for preparing cherry seeds for planting
Here's how to gently extract and prepare cherry seeds without damaging them.
🌱 Step 1: Select and Extract the Cherry Pit
Pick a fully ripe cherry—it should be deep red or purple and plump to the touch. Cut it in half and locate the single large pit inside. The pit is actually the seed encased in a hard stone shell. Use a sharp knife to carefully pry open the pit without cracking it.
Real talk: don't use force. A gentle sawing motion works best. Once open, you'll see the seed inside—it looks like a small, flat bean with a smooth, slightly glossy surface. Handle it with care; the outer shell is fragile and can split if pressed too hard.
💧 Step 2: Soak the Seed to Softening
Place the exposed seed in a small container and cover it with lukewarm water. Let it soak for 24-48 hours—this softens the outer shell and speeds up germination. You'll know it's ready when the seed feels slightly pliable when pressed gently between your fingers.
Don't skip this step. The seed's hard outer coating slows down water absorption, and without soaking, germination could take months instead of weeks. Check the water level daily and top it off if needed—it should always cover the seed completely.
☀️ Step 3: Stratify for Cold Treatment
After soaking, wrap the seed in a damp paper towel and place it inside a sealed plastic bag. Put the bag in the refrigerator for 4-6 weeks. This cold treatment, called stratification, mimics winter conditions and breaks the seed's dormancy.
I know it seems counterintuitive to put seeds in the fridge, but this step is crucial. Without stratification, cherry seeds often fail to germinate. Check the towel weekly—it should stay damp but not soggy. If it dries out, mist it lightly with water.
🌿 Step 4: Plant the Seed in Moist Soil
Fill a small pot with well-draining soil mix and plant the seed ½ inch deep. Gently press the soil around it to ensure good contact. Use a spray bottle to mist the soil until it's evenly moist but not waterlogged. Place the pot in a warm, bright spot with indirect light.
Here's the thing—cherry seeds are finicky. If the soil dries out, the seed may not germinate. Keep the soil consistently moist by checking it daily. You'll see the first signs of germination in 2-4 weeks as a tiny sprout pushes through the soil.
⏰ Step 5: Transplant and Provide Care
Once the seedling reaches 3-4 inches tall and has developed its first true leaves, it's ready to transplant. Choose a larger pot or outdoor garden bed with well-draining soil. Plant it 1 inch deeper than it was growing before to encourage strong root development.
Cherry seedlings need full sun (6+ hours daily) and regular watering. Keep the soil moist but not soggy, and avoid overwatering—this can cause root rot. You'll know your seedling is thriving when it grows steadily and develops vibrant green leaves.
Tips & tricks for perfect cherry seed preparation
Here's what nobody tells you about getting those stubborn cherry seeds ready to grow.
Pit Extraction: Use a sharp paring knife—not a serrated one—for Step 1. The smooth blade glides between the pit halves more easily, reducing the risk of cracking. Work on a cutting board with a damp paper towel underneath to catch any juice. This prevents slipping and keeps your workspace clean.
Soaking Strategy: The 24-48 hour soak in Step 2 is your germination shortcut—don't rush it! I like using a small glass jar with a tight lid for this step. The seed should float slightly when ready, and you'll notice tiny bubbles forming around it. Change the water every 24 hours to prevent bacterial growth, especially if you're extending to 48 hours.
Stratification Secrets: For Step 3, place your sealed bag in the crisper drawer of your fridge if possible—it maintains more consistent humidity than regular shelves. Label your bag with the date to track your 4-6 week timeline. Pro tip: If you forget to mist the towel, place the entire bag in a shallow tray of water for 10 minutes to rehydrate it without over-saturating.
Planting Precision: When planting in Step 4, make a small indentation with your finger rather than pressing the seed directly into dry soil. This creates better soil-to-seed contact. For the ½-inch depth, use a pencil to mark your planting line on the pot—it's more accurate than eyeballing. After planting, give the pot a gentle tap on the counter to settle the soil around the seed.
Pro Tips for How Do You Prepare A Cherry Seed For Planting
- Here's what nobody tells you about getting those stubborn cherry seeds ready to grow.
- Pit Extraction: Use a sharp paring knife—not a serrated one—for Step 1.
- Soaking Strategy: The 24-48 hour soak in Step 2 is your germination shortcut—don't rush it!
Frequently asked questions
Got questions about preparing cherry seeds for planting? Here are some common ones—and their answers—to help you grow your own cherry tree with confidence!
How long does it take for a cherry seed to germinate?
A cherry seed typically takes 4 to 8 weeks to germinate, depending on temperature and moisture. Cold stratification (chilling) speeds this up—place seeds in the fridge for 4–6 weeks before planting. Patience is key, but consistent warmth (around 70°F) and damp soil help!
Do I really need to cold-stratify cherry seeds?
Yes! Cold stratification mimics winter, breaking seed dormancy. Without it, seeds may never sprout. Simply wrap seeds in damp paper towels, place them in a sealed bag, and refrigerate for 4–6 weeks. Skip this step at your own risk—your seeds might just stay stubbornly dormant!
Can I plant cherry pits directly in the ground?
Technically yes, but success rates drop. Pits planted outdoors face unpredictable germination and may attract pests. For better odds, start seeds indoors in pots with well-draining soil, then transplant seedlings after they’ve sprouted. If planting outside, bury pits deep (2–3 inches) in a sheltered spot.
Why won’t my cherry seed sprout? Troubleshooting tips.
If your seed refuses to sprout, check these fixes:
- Moisture: Keep soil consistently damp (not soggy). Use a spray bottle for gentle watering.
- Temperature: Seeds need warmth (65–75°F). A heat mat helps if your home runs cool.
- Depth: Plant pits only 1–2 inches deep—too deep = no sprouts.
- Patience: Some seeds take months. If nothing happens in 3 months, the seed may be non-viable.
Will a cherry tree grown from seed taste like store-bought cherries?
Probably not! Seed-grown trees often produce wild, tart cherries—not the sweet, juicy varieties you’d find in a grocery store. For flavorful fruit, graft a cultivated variety onto your seedling. But hey, wild cherries are great for birds (and homemade jams!)
Wrapping up and next steps
Preparing a cherry seed for planting is simpler than you think—and it’s a rewarding way to grow your own fruit tree! 🌱 By following these 5 easy steps, you’ll ensure a smooth, twist-free extraction and set the stage for a thriving seedling.
Whether you’re a gardening newbie or a seasoned green thumb, patience and care will pay off with a beautiful cherry tree in your backyard.
Now that you’re ready, grab those seeds and get planting! Once your seedling sprouts, stay tuned for tips on nurturing it into a healthy, fruit-bearing tree. Happy growing! 🌿