
Lawn
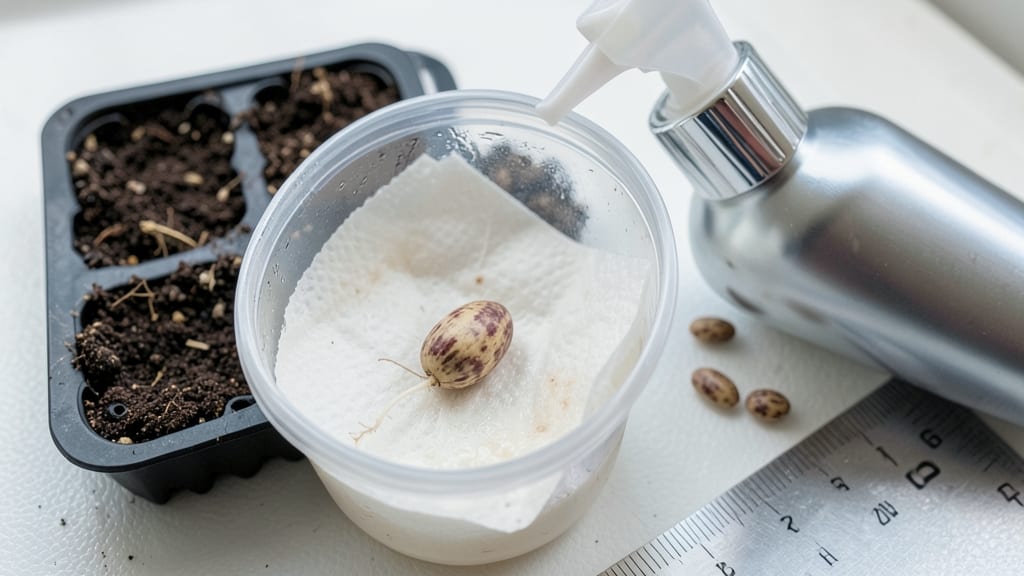
Getting a seed to sprout starts with understanding its tiny universe—moisture, warmth, and darkness are the magic trio that kickstarts life. 🌱 I’ve watched hundreds of seeds germinate (and fail), and the difference always comes down to these three factors working in harmony.
The right soil, consistent watering, and a cozy environment turn a hard seed into a green sprout in just days—not weeks. Most beginners overcomplicate it with fancy tools, but you only need three things: the right seed type, a container with drainage, and a way to maintain steady warmth.
Fast germinators like radishes pop up in 3-5 days, while stubborn ones like peppers take 2-3 weeks. The key is patience—seeds know when they’re ready, and rushing never helps.
By the end, you’ll have a tray of tiny seedlings reaching for the light, their first leaves unfurling like nature’s promise. The secret isn’t luck—it’s creating the perfect microclimate where seeds feel safe to wake up. Let’s break it down step by step.
First, match your seeds to their ideal conditions: some need light to germinate, others darkness. Plant them at the correct depth—usually twice the seed’s width—and keep the soil damp, not soggy. A spray bottle works better than pouring, because you want moisture without drowning the seeds.
Too much water causes rot; too little keeps them dormant. Temperature is the wild card. Most seeds thrive between 65-75°F, but cold-loving veggies like broccoli need 50-60°F. A heat mat or sunny windowsill can make all the difference.
If your kitchen gets chilly at night, move the tray closer to a warm spot—just avoid direct heat sources like radiators.
Troubleshooting is half the fun. Mold? Your soil’s too wet—let it dry slightly before covering again. No sprouts after two weeks? The seeds might need scarification (a gentle sandpaper rub) or stratification (a cold spell). And if they finally break through but flop over?
It’s time for a gentle light source to guide their growth. This method works for flowers, veggies, and herbs—just adjust the timing and conditions. Soon, you’ll be swapping store-bought plants for homegrown starts, and the satisfaction of watching life begin from a tiny seed is unmatched.
📚 In This Guide
- What you need
- Instructions
- Tips and common mistakes
- Wrapping up and next steps
What you need
- ● Seeds: Choose high-quality, fresh seeds (check the packet for viability dates). Quantity: 1–5 seeds per container (depending on size).
- ● Growing Containers: Seed trays or pots (4–6 inches deep) with drainage holes.
- ○ Optional: Biodegradable seed pods or peat pellets for easy transplanting.
- ● Growing Medium: Sterilized potting mix (lightweight and well-draining). Quantity: Enough to fill containers 2–3 inches deep.
- ○ Optional: Coconut coir or vermiculite for moisture retention.
- ● Water: Room-temperature, filtered, or rainwater (avoid tap water with high chlorine). Quantity: Small amounts for misting or bottom-watering.
- ● Spray Bottle or Watering Can: With a fine mist setting to avoid disturbing seeds.
- ○ Heat Mat (Optional but Helpful): For slow-germinating seeds (e.g., tomatoes, peppers). Specs: 70–85°F range.
- ● Clear Plastic Dome or Plastic Wrap: To create a humidity tent (remove once sprouts appear).
- ○ Grow Lights or Sunny Window: A south-facing window or LED grow lights (12–16 hours/day). Optional: Heat lamp for warmth.
- ○ Thermometer (Optional): To monitor soil temperature (ideal: 65–85°F for most seeds).
- ● ✅ Patience: Germination times vary (days to weeks—check seed packets!).
- ● ✅ Consistency: Keep soil moist but not soggy (overwatering = seed rot!).
- ● ✅ Warmth: Most seeds sprout faster in warm conditions (70–80°F is ideal).
- ● ✅ Light (After Sprouting): Wait until sprouts emerge before introducing light to prevent damping-off.
Step-by-step guide to germinating seeds reliably
Here's how I guarantee strong, consistent sprouts every time—no guesswork involved.
🌱 Step 1: Prepare Seeds for Faster Germination
Start by soaking seeds overnight in lukewarm water for 8-12 hours—this softens the outer coating and jumpstarts hydration. I use a shallow container with enough water to cover seeds by about 1 inch. For small seeds like lettuce, I place them on a damp paper towel instead.
After soaking, drain the water completely. You'll notice some seeds swell slightly—this means they're absorbing moisture and preparing to break dormancy. If you're working with large seeds like beans, you can skip soaking and move straight to planting, but smaller seeds benefit from this prep.
💧 Step 2: Use the Right Moisture and Warmth
Fill your seed-starting container with moistened seed-starting mix (not garden soil) and press it down gently until it's firm but still light. Plant seeds at a depth of twice their diameter—burying too deep slows germination because the seedling must use energy to reach light.
Cover the container with plastic wrap or a humidity dome to trap warmth and moisture. Place it in a warm spot—70-85°F is ideal. I keep mine on top of my fridge or near a sunny window (but not in direct light yet). Check daily for condensation on the plastic—this means moisture levels are perfect.
☀️ Step 3: Provide Light at the Right Time
Wait until you see tiny green tips breaking through the soil—this usually takes 3-10 days, depending on the seed type. The moment sprouts appear, remove the plastic wrap immediately to prevent mold growth. Place the container under grow lights or in a bright, indirect sunlight spot.
Leggy seedlings (long, weak stems) mean your light source is too far away. Keep lights 2-4 inches above the plants and adjust as they grow. You'll know light is right when seedlings grow sturdy and compact, with leaves close together.
✂️ Step 4: Maintain Consistent Care After Sprouting
Water gently from below using a tray of water—this prevents disturbing delicate roots. Keep the soil evenly moist but never soggy. You'll see the perfect moisture level when the top inch of soil feels damp but not wet to the touch.
Once seedlings have their first true leaves (not the initial seed leaves), thin to the strongest sprout per container. Use small scissors to snip weak seedlings at soil level—this prevents shock from pulling. Strong seedlings will have thick stems and vibrant color, ready for their next growth phase.
Tips & tricks for reliable seed germination
These science-backed strategies will help you avoid the most common germination pitfalls and get every seed sprouting like a pro.
Soaking Secrets: The 8-12 hour soak time is perfect for breaking seed dormancy, but don't let seeds sit in water longer than that—they can develop mold or rot. For extra insurance with tough seeds like chard, add a pinch of hydrogen peroxide (3%) to the soaking water to prevent bacterial growth. After draining, give seeds a quick rinse to remove any excess moisture that could encourage mold during germination.
Temperature Matters: While 70-85°F is ideal, most homes hover around 68°F—just cool enough to slow germination. If your space runs cold, place your seed trays on top of the fridge (not inside) or use a seedling heat mat set to 75°F. For warm climates where temps exceed 85°F, move trays to a cooler spot like a basement to prevent overheating.
Light Timing: Those 3-10 days until sprouting can feel like forever, but patience pays off. The moment you see green tips, remove plastic immediately—even 24 hours of trapped moisture can cause mold. For consistent light, place grow lights on a timer for 14-16 hours daily. If using natural light, rotate trays daily so seedlings grow straight rather than leaning toward the window.
Thinning Technique: When it's time to thin to the strongest sprout, use small scissors to cut at soil level rather than pulling. This prevents disturbing the roots of remaining seedlings. I like to water first so the soil is moist—it makes cutting cleaner and reduces stress on the plants. Save your cuttings for compost or, if they're healthy, replant them in a separate container.
Pro Tips for Get A Seed To Sprout
- These science-backed strategies will help you avoid the most common germination pitfalls and get every seed sprouting...
- Soaking Secrets: The 8-12 hour soak time is perfect for breaking seed dormancy, but don't let seeds sit in water long...
- Temperature Matters: While 70-85°F is ideal, most homes hover around 68°F—just cool enough to slow germination. If yo...
Frequently asked questions
Got questions about sprouting seeds? You’re not alone! Here are answers to the most common concerns—so you can turn seeds into thriving plants with confidence.
How long does it take for a seed to sprout?
Sprouting time varies by plant type. Fast growers like radishes or beans may sprout in 3–7 days, while slower seeds (e.g., tomatoes or trees) can take 2–4 weeks. Check the seed packet for specifics—patience is key! Keep soil consistently moist and warm (70–80°F) to speed things up.
What do I do if my seeds won’t sprout?
Don’t panic! First, check moisture—dry soil is a top culprit. Try gently pressing seeds into damp soil (not buried too deep). If they’re old, test viability by soaking in water (floating seeds are likely dead). For stubborn seeds, try scarification (lightly sanding the shell) or a warm, humid environment.
Can I sprout seeds without sunlight?
Use a grow light (LED or fluorescent) 12–16 hours daily, or place seeds near a sunny window. For indoor sprouting, a humidity dome or plastic wrap helps mimic natural conditions. Just avoid direct heat sources—seeds need warmth, not scorching!
Do I need special soil to sprout seeds?
Not necessarily! Start with a light, well-draining mix like potting soil blended with perlite or coconut coir. Avoid heavy garden soil—it compacts and suffocates seeds. For germinating, a damp paper towel works for small seeds (like herbs or flowers) until roots appear.
Is it better to plant seeds indoors or directly outside?
It depends! Delicate seedlings (e.g., peppers, basil) thrive indoors under grow lights, then transplant outdoors after hardening off. Hardy seeds (like carrots or beans) can go straight into the ground. Check your climate—cool seasons favor direct sowing, while frost-sensitive plants need indoor starts.
Still stumped? Drop your seed type below—we’re happy to help troubleshoot!
Wrapping up and next steps
Growing a seed into a thriving sprout is all about patience, preparation, and consistency—but with the right conditions, you’ll see those first green shoots in no time! 🌱 Whether you’re nurturing a delicate herb or a sturdy lawn seed, remember: warmth, moisture, and light are your best allies.
Now that you’re armed with science-backed techniques, it’s time to get your hands dirty and watch nature work its magic.
Ready for the next step? Once your sprouts emerge, focus on transplanting or nurturing them with care. Happy growing—your green thumb is closer than you think! 🌿